Book of the Dead: Character and hero assets


In this blog series, we will go over every aspect of the creation of our demo “Book of the Dead”. If you haven't already, make sure to check our previous posts on the Book of the Dead creation process: Introduction to Unity’s Demo team and Book of the Dead: Concept Art.
My name is Plamen ‘Paco’ Tamnev, and I've been working as a Character/Environment artist on the Unity Demo team for the last couple of years. Some of the previous projects I worked on were Adam, The Blacksmith, Viking Village and a few other smaller projects. In this blog I will go through some of the work I did for Book of the Dead, my process and the pipeline for the creation of the characters and hero assets in the demo.
After our concept art director Georgi Simeonov explored lots of quick ideas in 2d, we decided to try and blend different elements that we liked in those sketches. To do that, I started with some rough sculpts in ZBrush to flesh out some of those ideas. Since we worked in parallel from such an early stage, we didn’t intend for these sculpts to end up as the final art, we were rather looking for the opportunity to try things that we otherwise wouldn't. I also wanted to have the chance to play around with different types of surface treatment and some material explorations. Some of the design elements that can be found in those draft sculpts stayed persistent through the entire character creation process. The proportions, on the other hand, changed quite a bit, because it was an important part of the narrative that the Screwie characters had to be realistic, as opposed to the earlier more stylized designs.


I took the opportunity to do some material exploration as early as possible to hopefully give better context to the draft sculpts. Those tests helped to explore the dripping sap that made it into the final design.


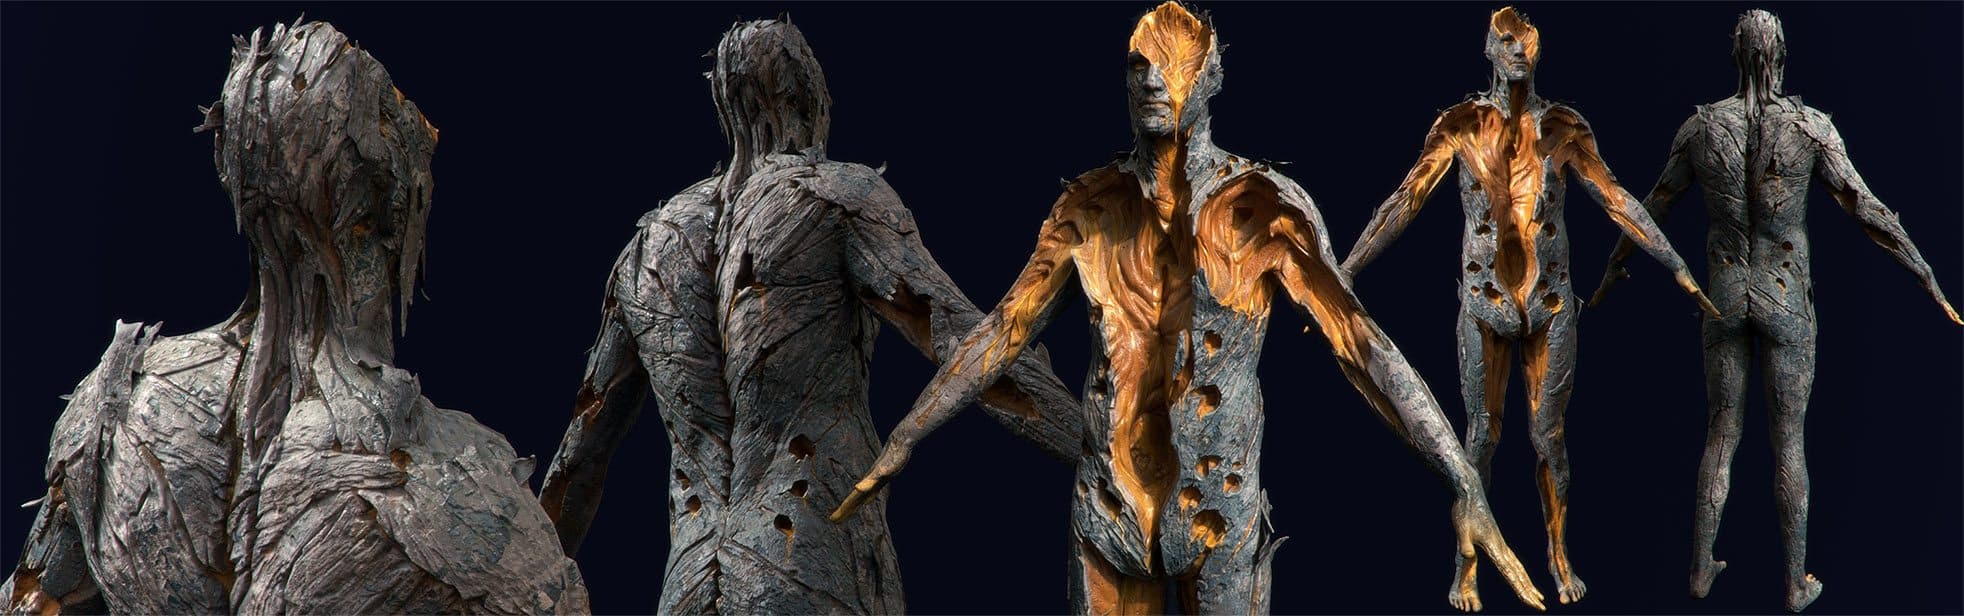
For the final design, I started from a male scan from an online scan library. starting with a scan gave me the base proportions and general features. After cleaning up the mesh in ZBrush, The final sculpt of the screwie was challenging in the sense that It had to be easily recognizable as a normal human at first glance, especially from the back. We had a slow approaching shot from the back and seeing all of the decay right away would have ruined the buildup. I started by blocking out the bigger cavities that were needed for the front of the character and for the back I stayed closer to the original silhouette and muscle flow. Then I've added some bits of bark to break up the silhouette just a bit in certain places, but still careful to not break the outline of the body too much. Most of the low to mid-level detail was hand sculpted and then I used some scanned alphas to add breakup. It was also a matter of balance to not go overboard in terms of detailing the sculpt in ZBrush, since I'm adding quite a bit of detail in Substance Painter later.
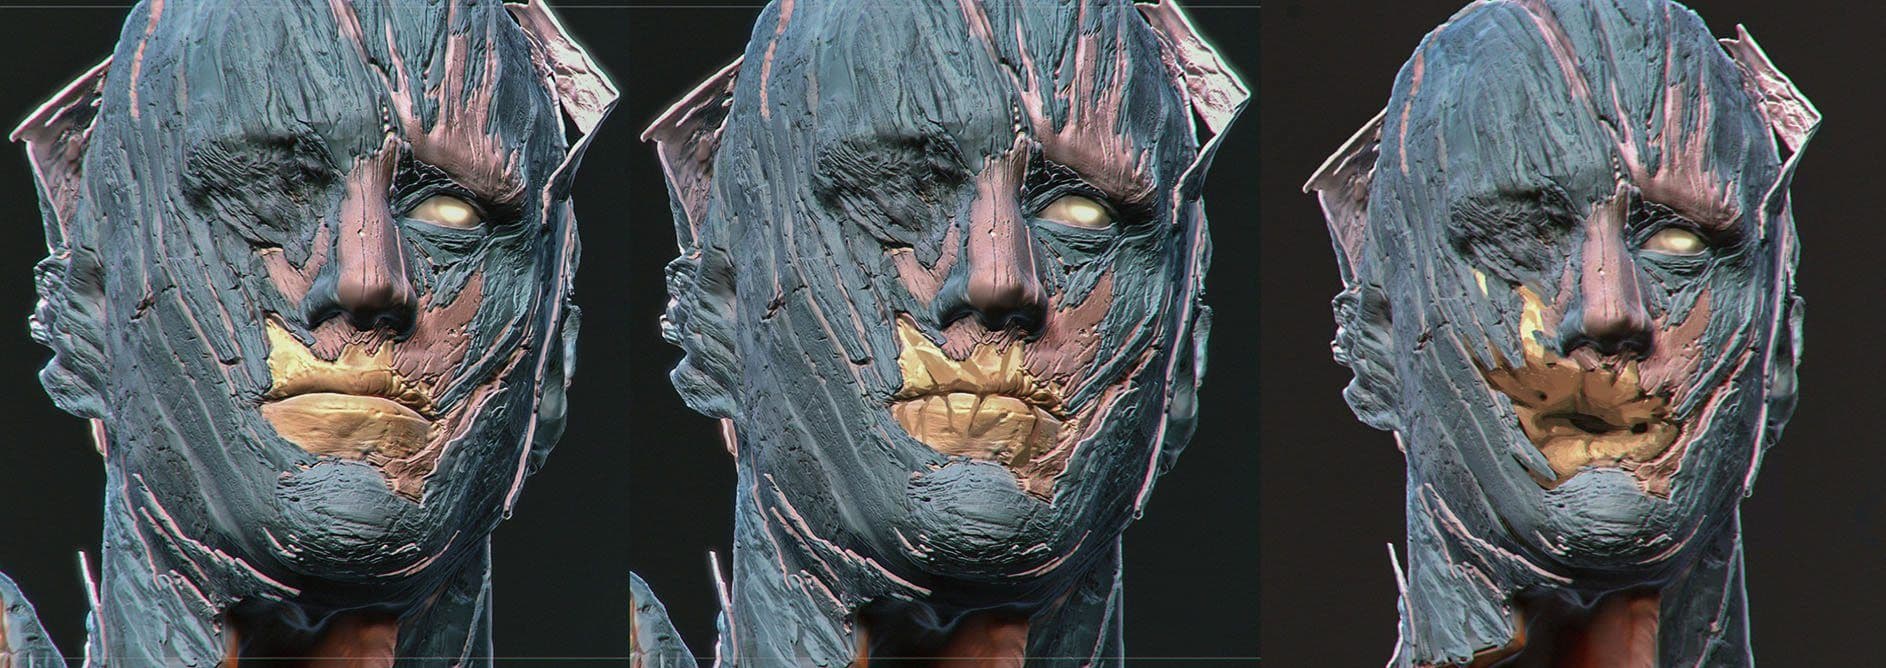


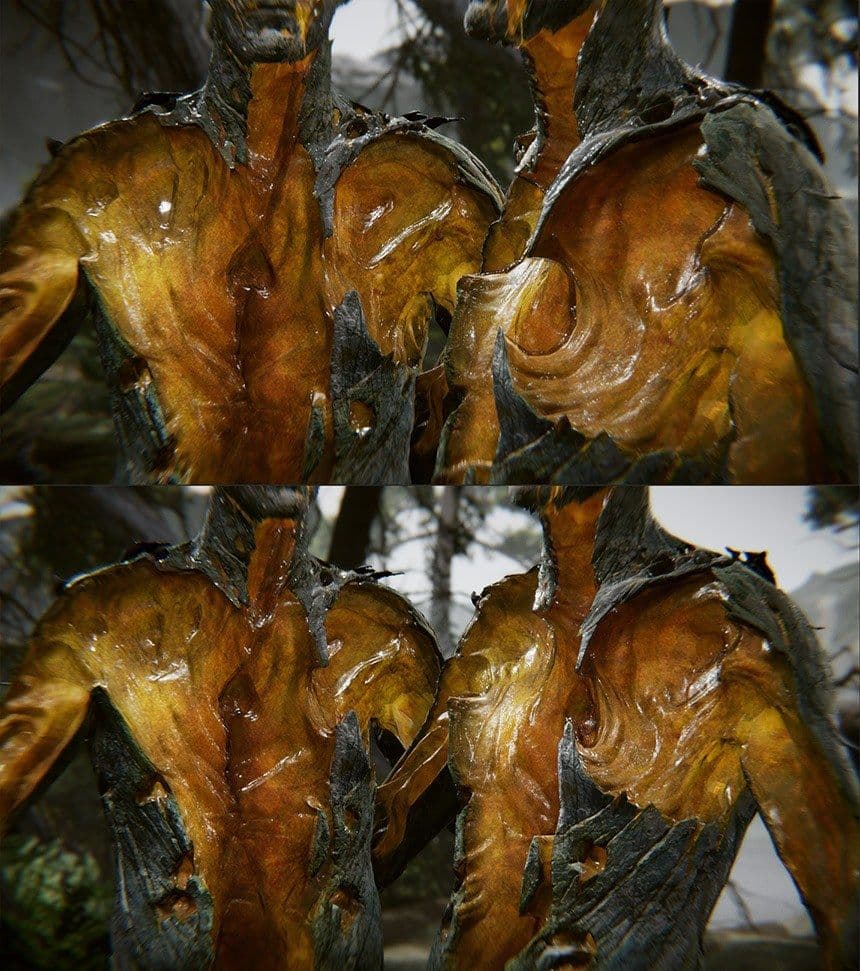
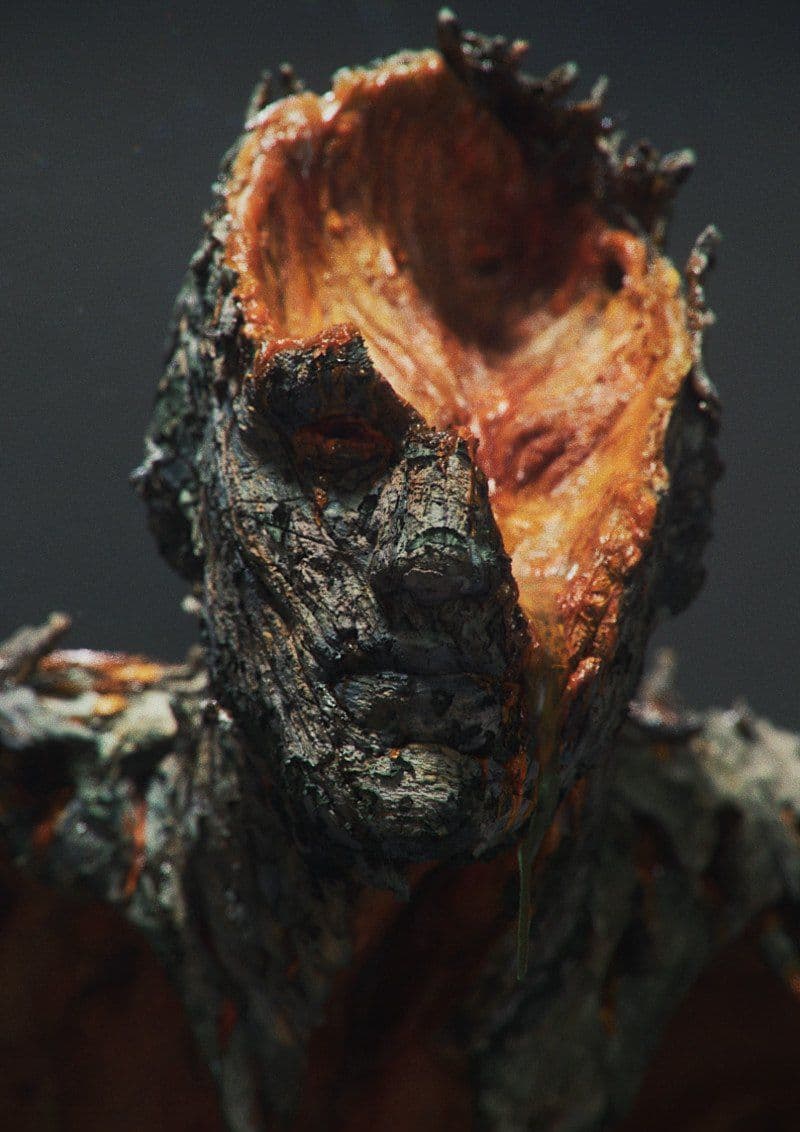
The backstory of the Screwies required that their look incorporates a combination of solid resin for the dried up bits, and a more liquid resin for the fresh leaks. This complex material was going to be a challenge. We had the very talented Yibing Jiang do some RnD testing for the shader setup of the amber. She came up with the approach of using two layers of geometry. The base layer of amber acted as the core, and we had a slightly offset version of the same geometry as the top layer. The top layer had a dithered alpha as well as a different set of detail maps, in order to give breakup and variety to the core layer. This, in combination with the Subsurface scattering (SSS) profile adjusted the core layer and gave us a nice looking material with some depth to it.
The animated sap dripping from the head was made by Zdravko Pavlov, he will talk more about it in his upcoming blog post.


We wanted a quick way to have a crowd of characters with some variety to them, without actually having to build a whole new set of characters. We knew the crowd would be mainly visible in the mid to far distance, so we pushed for them to be good enough without wasting too much time on them. I started by using the clone brush in Substance Painter to create a few fully bark covered versions. I repeated the same process to create the amber layer that was undneath the bark.


At this point, we still had no height maps placed. They helped to give a more organic feeling to the final material by adding parallax and breakup to the bark bits. After it was all set up and working, it was easy to make alterations to the decay of the crowd members through only editing the masks.

The picture above is one of the first tests of the two layers approach, with a few random masks to test the breakup and decay. Shader-wise, there is a height map with tesselation to help with the offset and overall material definition.
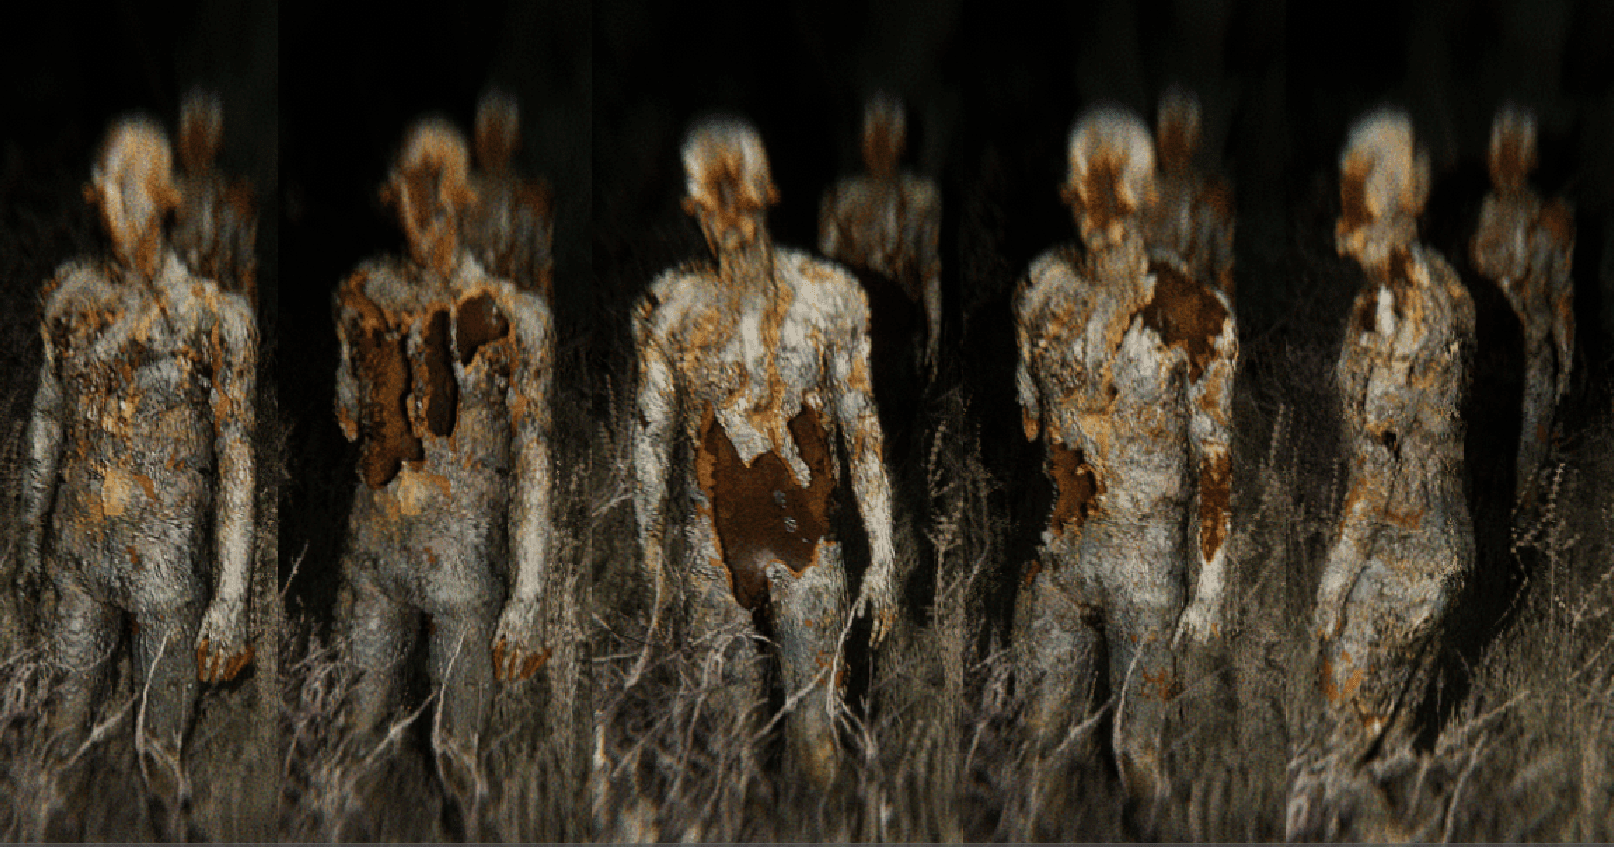
For the final look, we added the broken hollow bits by using both opacity and height maps. This workflow gave us the chance to add things like missing limbs easily.

A shot of the final crowd with all of the effects applied.
Karen’s hands and bracelet are seen for a very short time in the teaser, but they are important for the entire experience. As such, we had to treat them properly and give them enough care, even when compared to their short on-screen presence.


For the hands of the player character, I started with a scan from the online library Ten24 that I had retopologized and cleaned up. Then I separated the nails and brought the hands into Substance Painter for the texture pass. Some basic weathering was needed as well, but without being covered in mud or being too distracting when on screen.

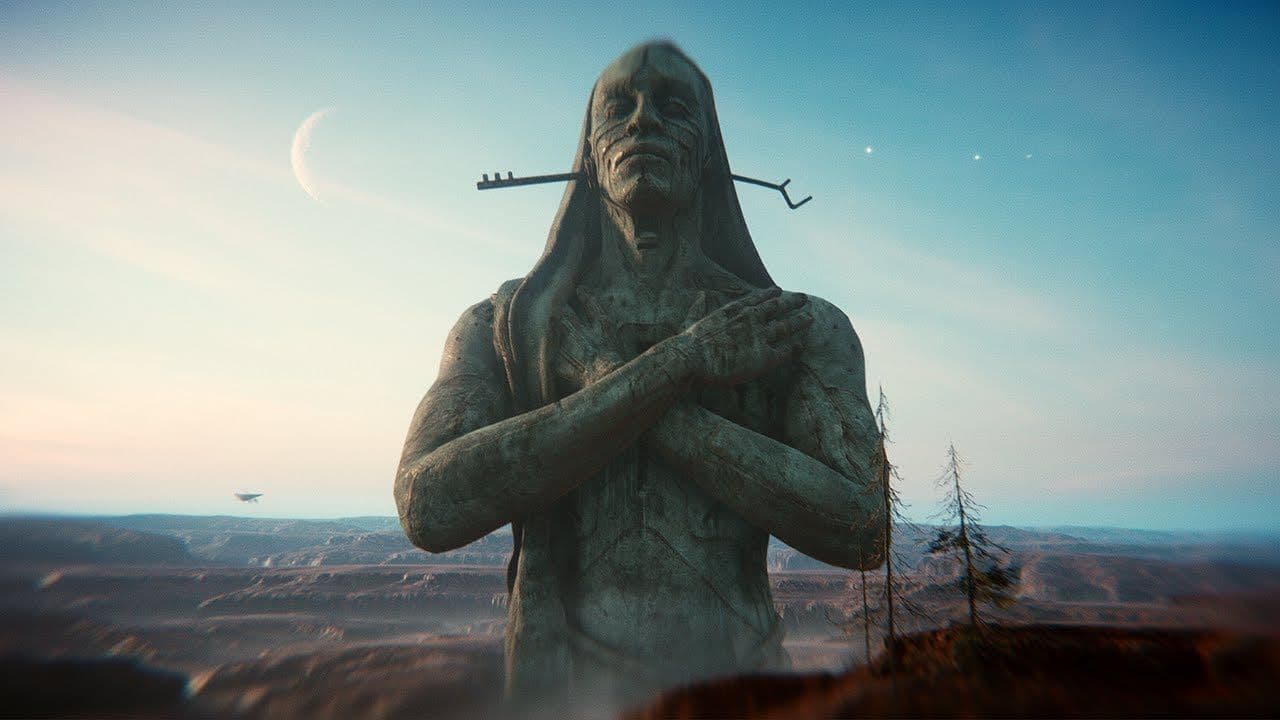
The Bishop went through quite a few blockouts in Unity. This gave us the chance of trying out interesting ideas such as playing with scale, pose, and how they affected what the character had to convey. Once the final design of the character was finished, and approved by the whole team, we started to build the actual asset.
We worked with freelance 3D artist Alex Ponomarev to create the high poly sculpt in ZBrush. Once the sculpt was finalized, I began building the game resolution mesh and used the rigging tools in ZBrush to help make the final pose. These tools are a great way to get a quick static pose and tweak the model, without having to build a complex rig and just gives more room for exploration. I then brought it into Substance Painter and made a few quick explorations for the materials and weathering. Given the size of the Bishop, we had to use several tiled detail maps to help with the resolution and sense of scale.
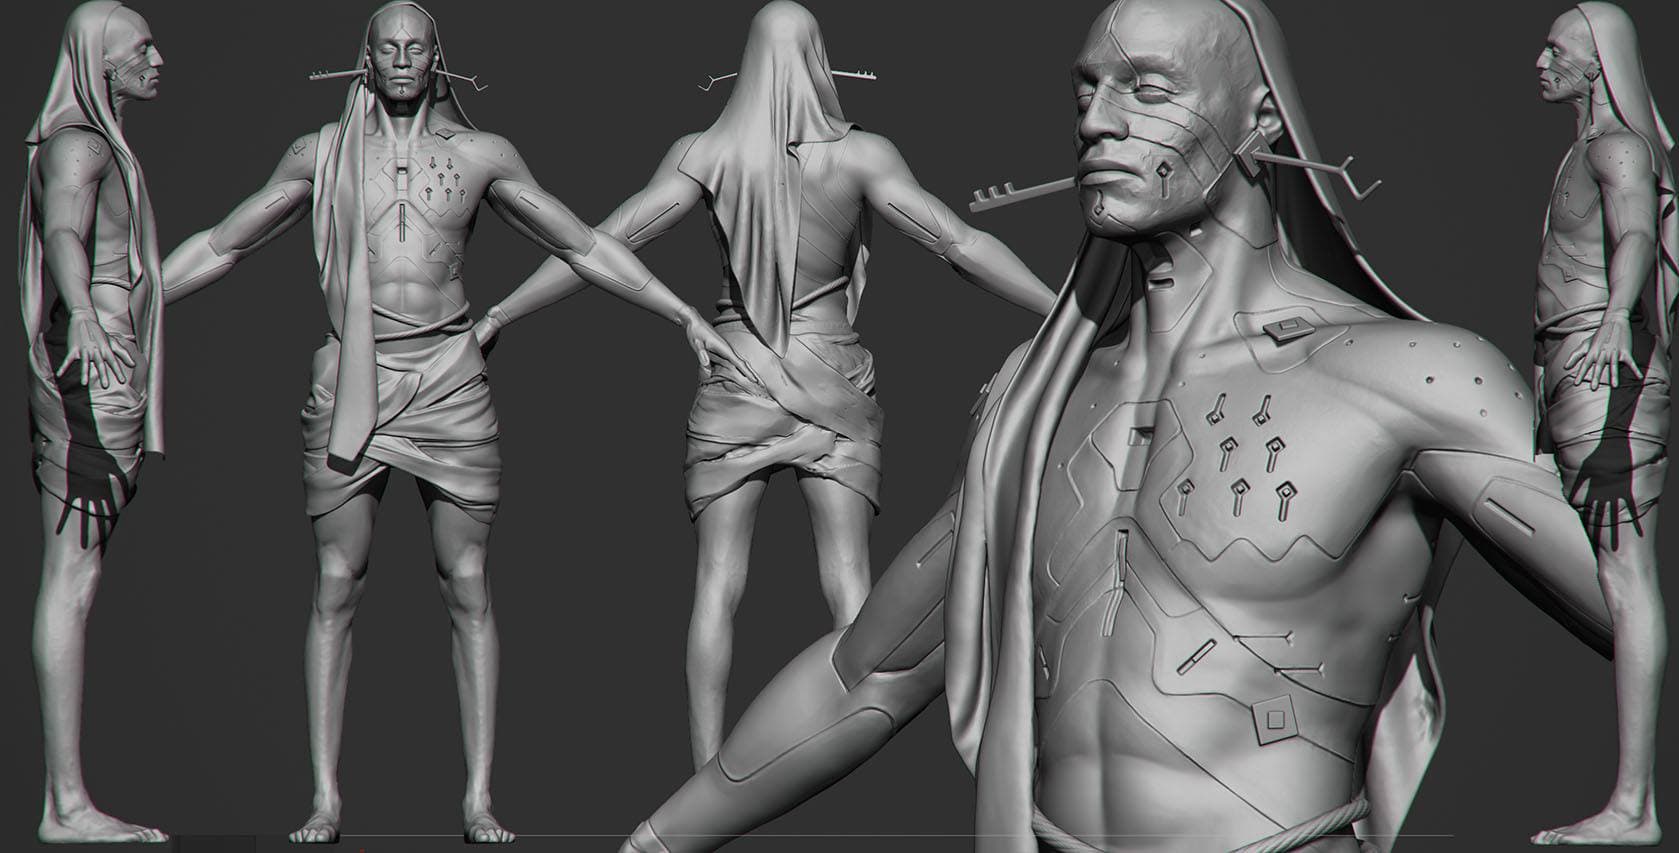

The first thing I did after I got the high poly sculpt from Alex, was to build a quick ZSphere rig and pose the character. We didn’t need him to do any gesturing other than turn his torso slightly, it didn’t make sense to make a complex rig for him. In this case, the ZBrush posing worked just fine.

As far as materials go, we decided to go with the more traditional type of look you would see for a large monument. I created several custom materials and for the final Bishop, we used detail maps to complement the sense of scale.
Before we settled on the final design for the Bishop, I tried a few of Georgi’s earlier designs and brought them into Unity. It was important to try them out and see how they feel when you approach them from the POV of the game character.


We approached Environment and Character artist Tinko Wiezorrek for the modeling and texturing of the shells, cars, and hive.
He started by making several different sculpts of the shells based on Georgi’s concepts and notes. His approach was to use the sculpt as a base, add a few texture sets of the different scanned bark that we already had, and combine them with the sculpted details.


In the teaser, you encounter cars and other mundane objects found in the world. Since those had to have a handcrafted look to them, we used custom baked geometry with opacity and sap added here and there.

When creating the hive entrance, Tinko used the same approach he had for the cars. To help add visual interest and scale, the hive was built with even more variety and custom objects.

There were a lot more assets and work done by the team, but I think for the purpose of this blog post, we covered most of our more interesting assets and how we approached their creation.
You can follow my work on Artstation & Instagram
---
Stay tuned for our next posts in the series. Next week Zdravko Pavlov explores the themes and process of asset creation in Book of the Dead with his approach to the trees. After that, Julien Heijmans brings you through the tools and tricks used to make the environment believable. More to come after that.
Meet us at Unite Berlin on June 19 to walk through the Book of the Dead environment on a console yourself, and attend Julien Heijmans’s presentation about Environment art in the demo. See the full schedule here.