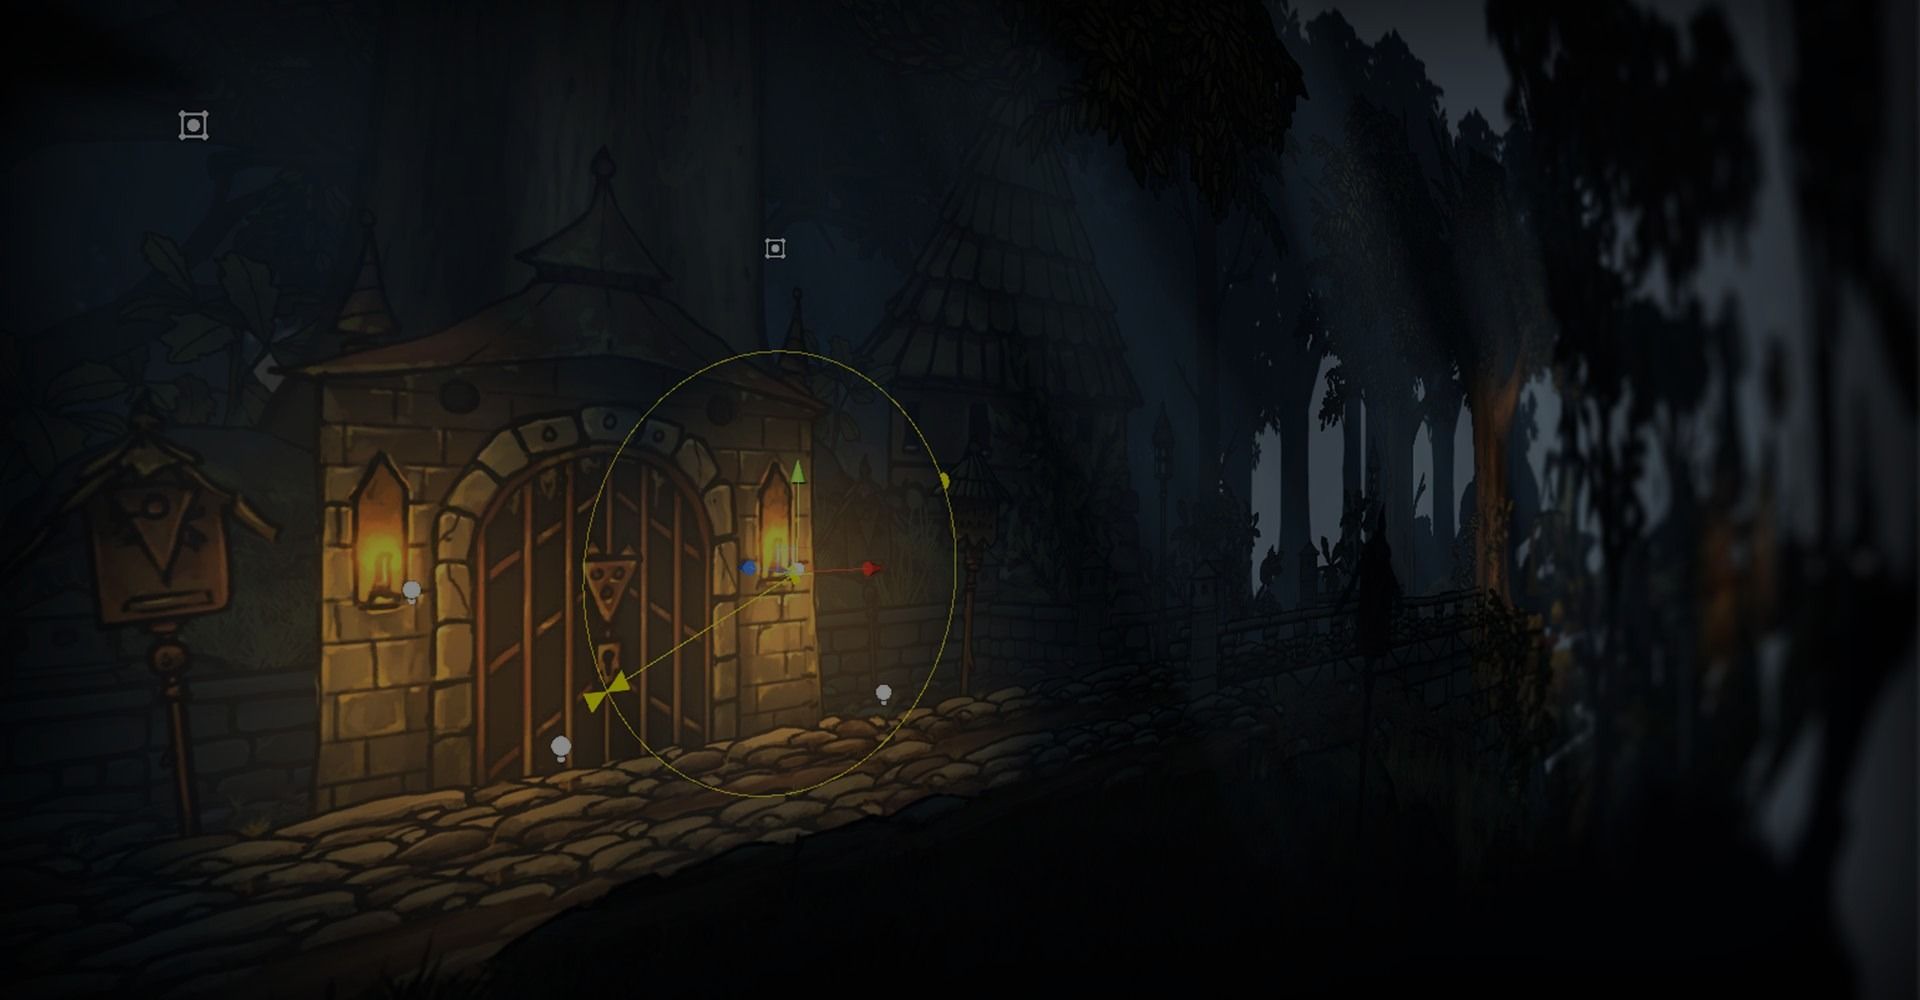
This article is based on Martin Reinmann’s talk called How Odd Bug used 2D lights to create mood. It covers the studio’s development process of crafting a scene and how they used Unity’s 2D lighting system combined with their custom tools to create the environment world of Tails of Iron.
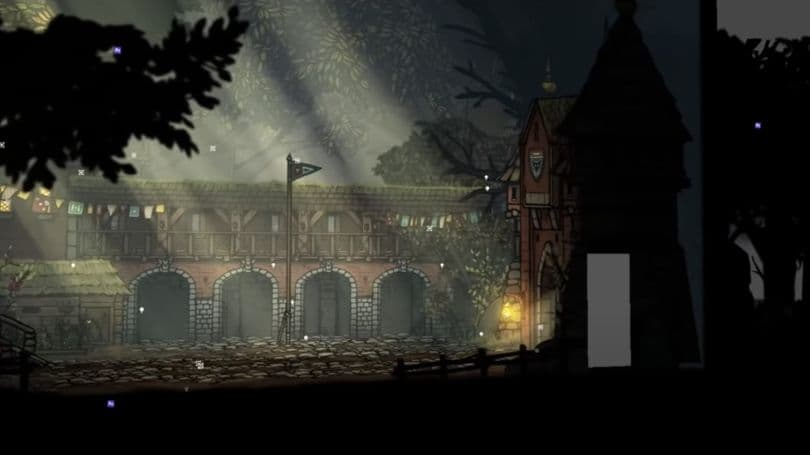
Tails of Iron was developed by Odd Bug Studio, a company of friends and artists based in Manchester U.K. The game consists of many different levels in which the player can navigate freely from one scene to the next through doors or tunnels.
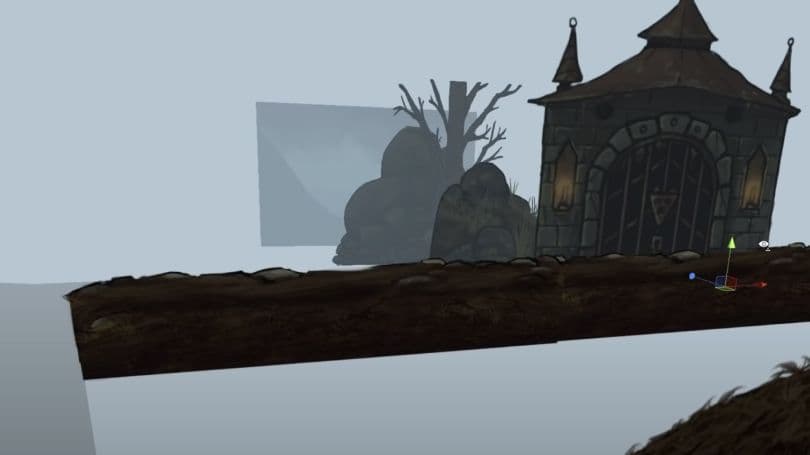
Every scene creation begins with the Collider Tool, which is a custom tool created by the studio’s level designer. This is placed as the foundation of the level and gives the scene its general shape. It’s also the surface that the player walks on. The collider line is used as a guide to sketch compositions and ideas for creating a batch of assets and placing them into the scene.
But before doing that, the scene needs to be set up with the Light and Layer Tool, a custom tool that the studio’s Lead Programmer, Matt Taylor, created. This tool enables the team to manage the lighting and the sprite asset sourcing and ordering, as they build detailed levels using a large quantity of separate sprite assets to create parallax levels.
Once the team defines the layers, such as background and midground, the Light and Layer Tool gathers all the Sprite Renderers in the scene section. Then, the assets can be sorted from closest to furthest based on the z depth of each asset in the level section. Once this list is generated, the tool assigns values linearly, making sure that the assets are rendered in the correct order.
Once this step is completed, the tool assigns a layer based on the previously defined subdivisions in the scene. This defines which Sprite Renderers are affected by a specific 2D light. With these two processes combined, the studio can create large, detailed parallax levels with specific lighting scenarios per layer.
The team also created a library of assets divided into multiple atlases for a specific level, so they can easily pick out assets for use in the scenes. Having assets tied to specific levels helps with optimization. Their atlases are divided into categories like rocks, trees, and small assets. The team usually starts with placing the midground assets to outline the colliders and reinforce the surfaces of a scene.
Placing a few assets in the foreground and background helps to set up the lighting. They continue with big assets such as trees, rocks, and hills to create a good composition, adding details later. As assets are positioned, the “Sort'' feature of the Light Tool ensures the assets are properly assigned and rendered at the correct depth.
Placing assets is sometimes like a big 3D puzzle. It can be challenging to find the right shapes to create an effective scene that is also readable by the player. Odd Bug wanted each scene to be unique. This helps the player navigate the world as each scene becomes memorable with its own landmarks or assets.
They place assets at different depths to create a parallax effect as the player runs through the scene and the perspective camera can follow it. This can be exaggerated by placing the assets further apart on the z axis or closer to the camera. You can keep the asset closest to the camera darker, or entirely black, as this creates a border near the edges of the screen and reinforces depth.
Another great feature of Odd Bug’s customized Light Tool is that it instantly creates an artificial depth by fading the color of each subdivision layer as it moves to the horizon. It allows the team to adjust the density and set the global light color and volume of that fade. This creates an optimized illusion with a fading horizon and atmospheric fog and, combined with added lights and particles, it can create dramatically different moods in the scenes.
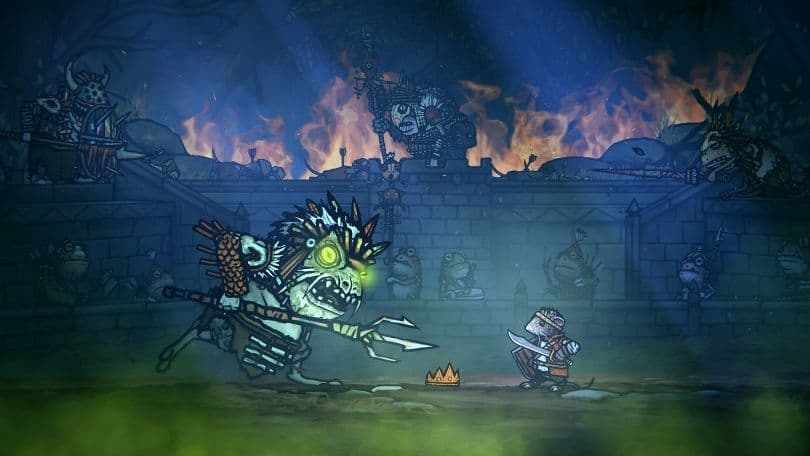
Once the scene has been filled with assets, it’s time to add lights to set the mood and highlight important parts of the scene. This is where Unity 2D Lights come into play with the custom Light Tool workflow.
Odd Bug adapted the 2D Unity lighting system for its multilayered parallax vision. Each 2D light determines its own layer based on its z depth in the scene using the manually defined subdivision layers. Alternatively, the team can manually set which layer the 2D light affects.
The 2D lights in each section automatically light sprites in each layer correctly. This gives the team a great deal of control over lighting according to where the lights are placed. For example, you can set up a stronger Point light to light up the midground and the characters there, with faded lights in the background, to put a focus on the midground.
The Layered Light System is useful for creating cool effects such as silhouette scenes, with a light placed in the background and assigned to affect only the background layers, resulting in very dim lights in the midground and foreground layer. Additionally, you can create a different atmosphere by adding a light behind a window or a doorway.
There are mainly three different light types used throughout the scenes: Point, Freeform, and Sprite.
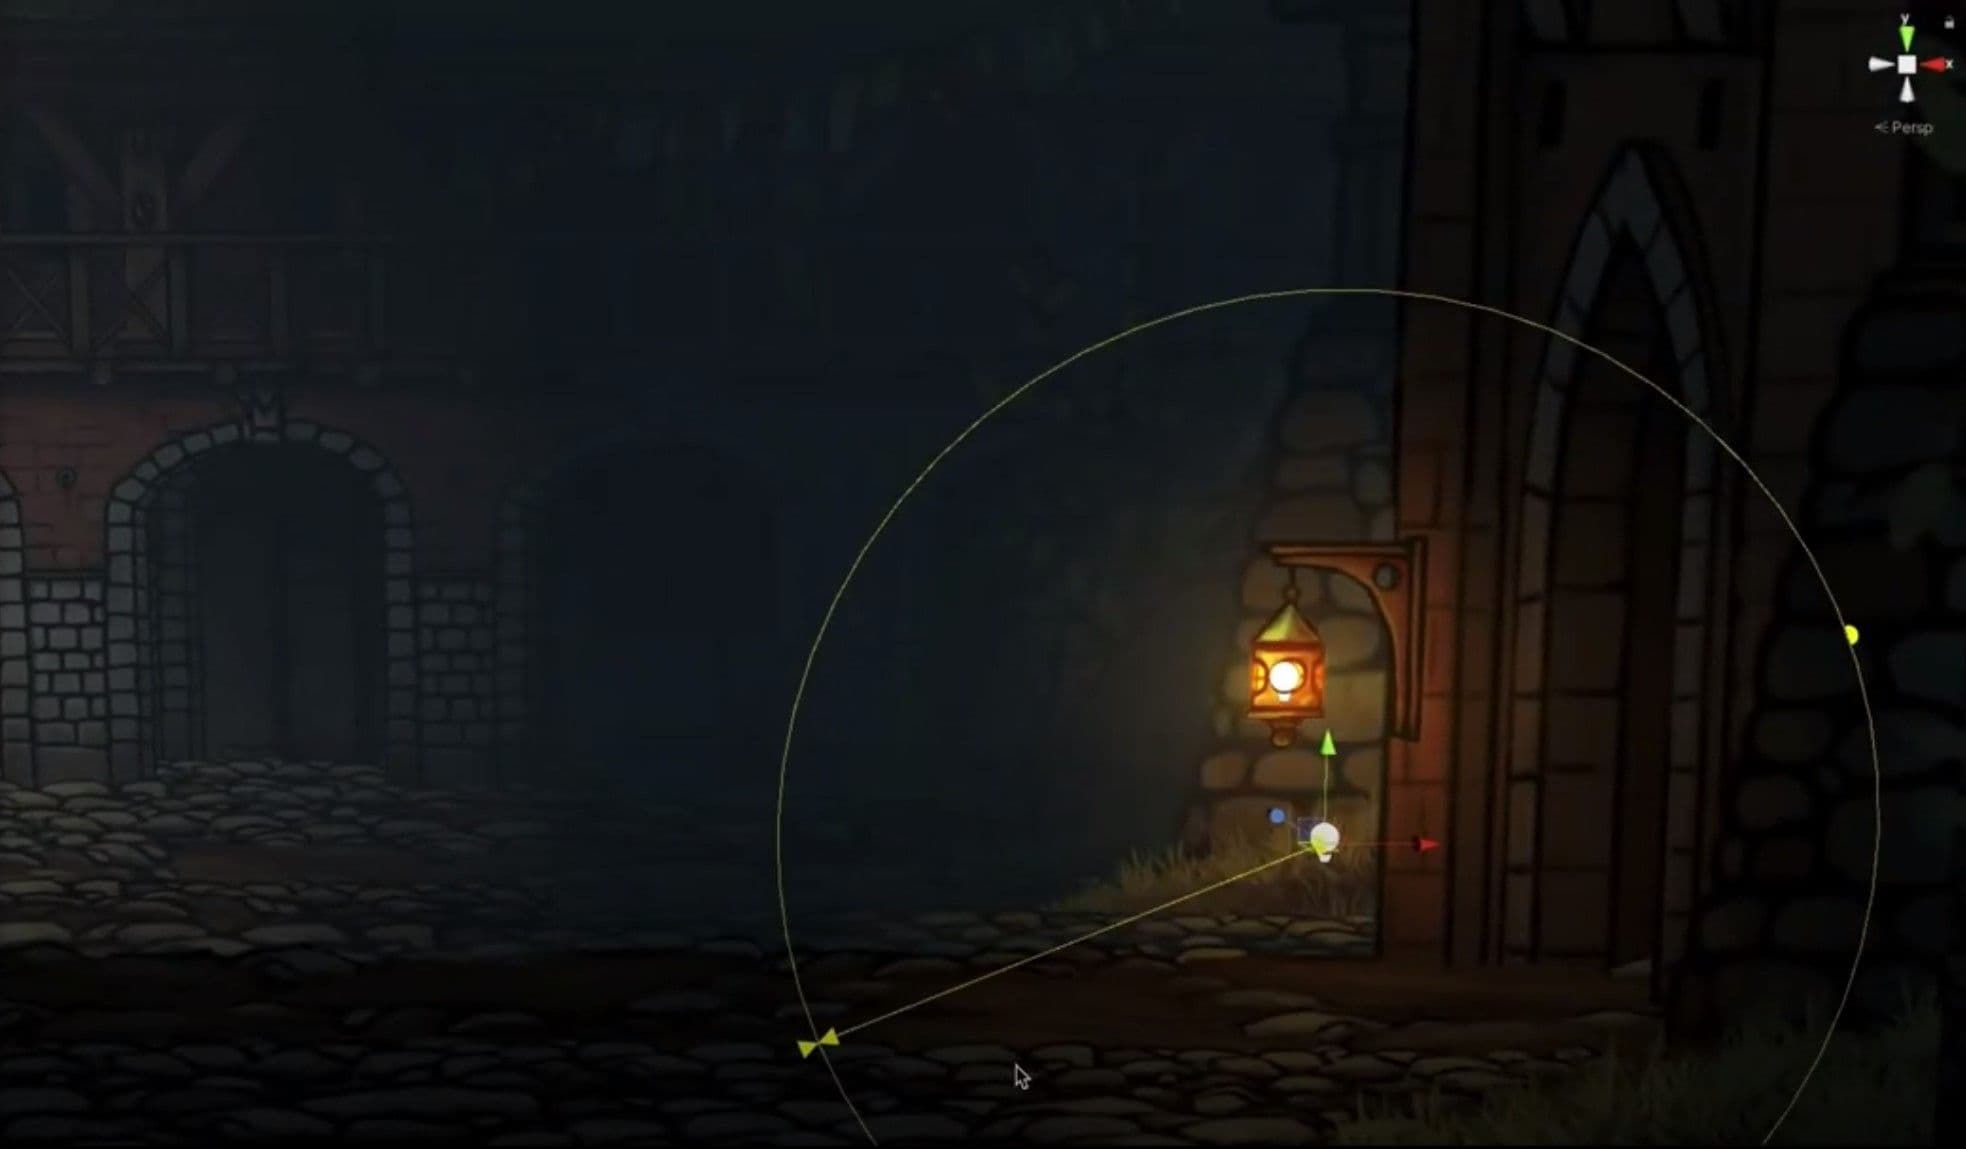
The Point Light is the most commonly used in the game, because it’s a 2D circle that you can place quickly to highlight important assets or to create artificial shadows. You can use it as a misty glow in the background by increasing the volume opacity or use it as a glow from a lamp by tweaking the falloff intensity of the light.
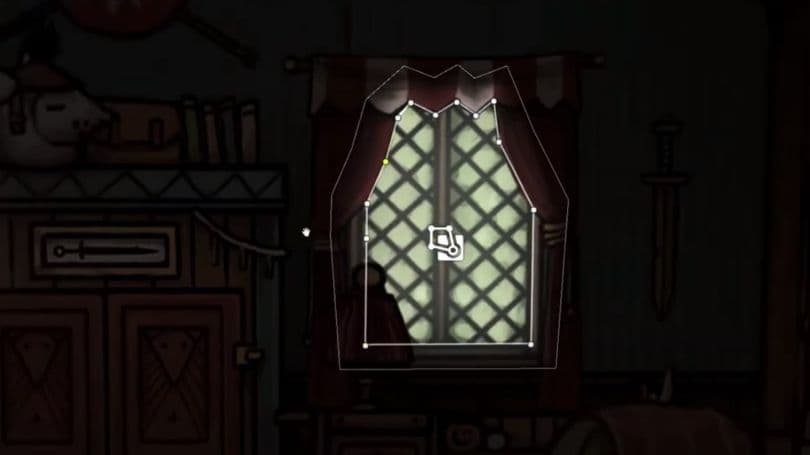
You can use the Freeform Light if you want to add a strong light source on an asset with a specific shape, like a window. You can simply trace the shape of the asset, tweak the falloff lighting, and set the light on the exact depth of the asset. That makes it look like the object is emitting light.
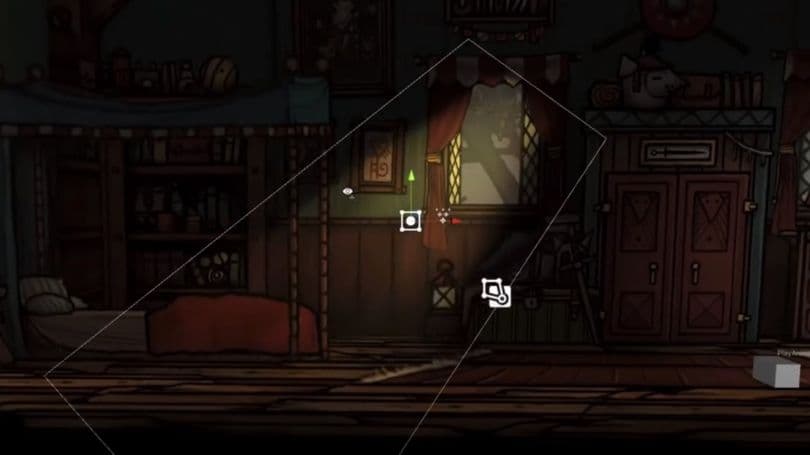
The Sprite Light allows you to set a specific asset to project as the light itself. The team used this on light beams that have a textured light source. This can be placed and rotated in the scene to show the light coming from different angles. By combining different light types, you can create scenes where the characters are illuminated with atmospheric light.
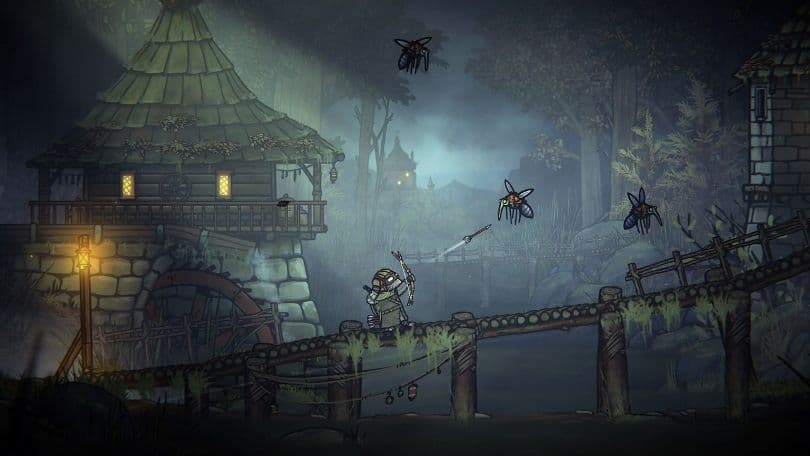
Once the scene is nicely lit up, you can start polishing it by placing Particle Effects to bring in movement and smooth over any messy-looking areas. You can place a Particle Fog on a select z depth and set it to render on the correct layer subdivision. Fog is a great effect for separating the individual layers to create more depth. In Tails of Iron, placing the fog in the front of the midground also grounds the characters in the world. This way, the fog moves slightly in the direction that the player is meant to go.
The next step is adding atmospheric effects like dust specks, rain, or falling leaves, depending on the scene. It’s good to place those closer to the camera to create a stronger parallax effect. The rain effect is a combination of falling water droplets and particles of animated water splashes placed on the ground. These particles, like almost every other asset, are assigned their own layers so that it’s consistent with the parallax effect in the game.
If a scene has tall grass, flowers or trees, make sure to give it a bit of movement. Lead Programmer Matt Taylor created a tool that converts all selected foliage Sprite Shaders from a scene into a single special shader that animates them together in the wind. The team can individually adjust the values of each asset. The tree leaves are placed in different-sized leaf chunks around the treetop to make the movement more natural.
The scene is tied together with some color processing and a vignette. They use a custom tool to draw a box over the area of the scene they want the post-processing to affect. They can drag it over the entire scene or over different elements that blend as the player walks through the scene. When a scene has multiple different states, like day and night, you can create a folder in that scene with all the lights, assets, and filters that get turned on or off in the game.
Finally, the team makes a final pass (or three) for the assets, placement, and everything else until the scene is polished. For more information or questions about Tails of Iron and the team behind it, follow @OddBugStudio on Twitter.
If you want to see what Unity’s 2D tools can do, make sure to download the Lost Crypt sample project. The project includes a tutorial window that walks you through features such as 2D Animation, 2D Sprite Shape, 2D Tilemaps, 2D Lights, Shader Graph for 2D, Secondary Textures, and Volume post-processing.

2D game art, animation, and lighting for artists is our biggest, most comprehensive 2D development guide, created for Unity developers and artists who want to make a commercial 2D game.