
This is the fifth in a series of articles that unpacks optimization tips for your Unity projects. Use them as a guide for running at higher frame rates with fewer resources. Once you’ve tried these best practices, be sure to check out the other pages in the series:
Physics can create intricate gameplay, but this comes with a performance cost. Once you know these costs, you can tweak the simulation to manage them appropriately. Use these tips to stay within your target frame rate and create smooth playback with Unity’s built-in Physics (NVIDIA PhysX).
See our latest optimization guides for Unity 6 developers and artists:
Meshes used in physics go through a process called cooking. This prepares the mesh so that it can work with physics queries like raycasts, contacts, and so on.
A MeshCollider has several CookingOptions to help you validate the mesh for physics. If you are certain that your mesh does not need these checks, you can disable them to speed up your cook time.
In the CookingOptions for each MeshCollider, simply uncheck the EnableMeshCleaning, WeldColocatedVertices, and CookForFasterSimulation. These options are valuable for procedurally generated meshes at runtime, but can be disabled if your meshes already have the proper triangles.
Also, if you are targeting PC, make sure you keep Use Fast Midphase enabled. This switches to a faster algorithm from PhysX 4.1 during the mid-phase of the simulation (which helps narrow down a small set of potentially intersecting triangles for physics queries).
Learn more in the CookingOptions documentation.
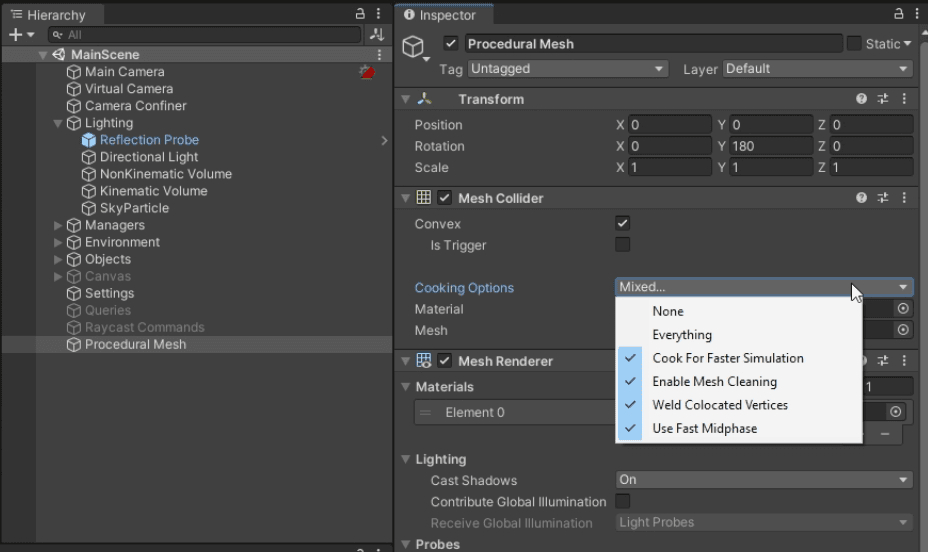
If you are generating meshes procedurally during gameplay, you can create a Mesh Collider at runtime. Adding a MeshCollider component directly to the mesh, however, cooks/bakes the physics on the main thread. This can consume significant CPU time.
Use Physics.BakeMesh to prepare a mesh for use with a MeshCollider and save the baked data with the mesh itself. A new MeshCollider referencing this mesh will reuse this prebaked data (rather than baking the mesh again). This can help reduce Scene load time or instantiation time later.
To optimize performance, you can offload mesh cooking to another thread with the C# job system.
Refer to this example for details on how to bake meshes across multiple threads.
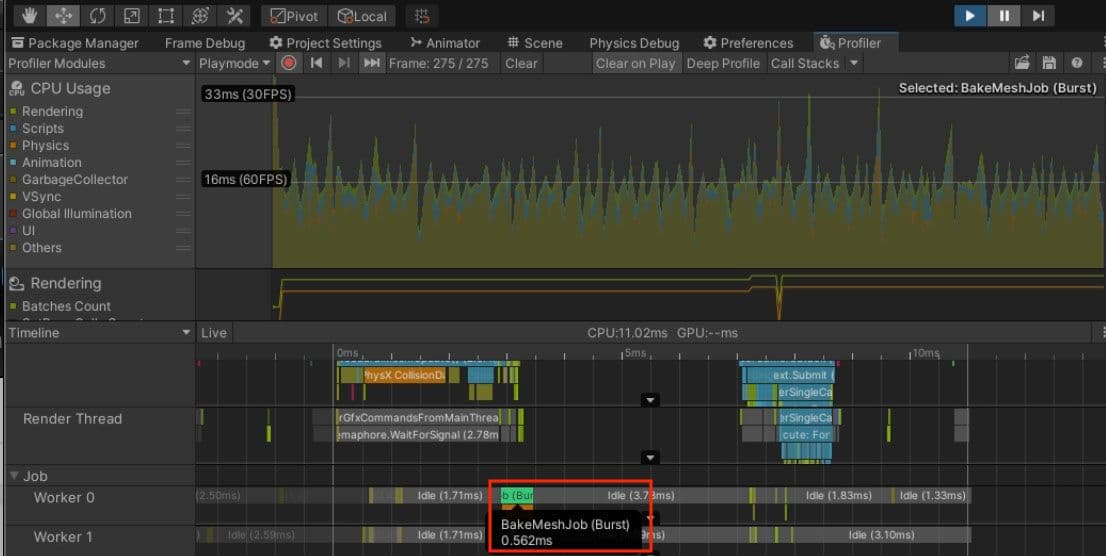
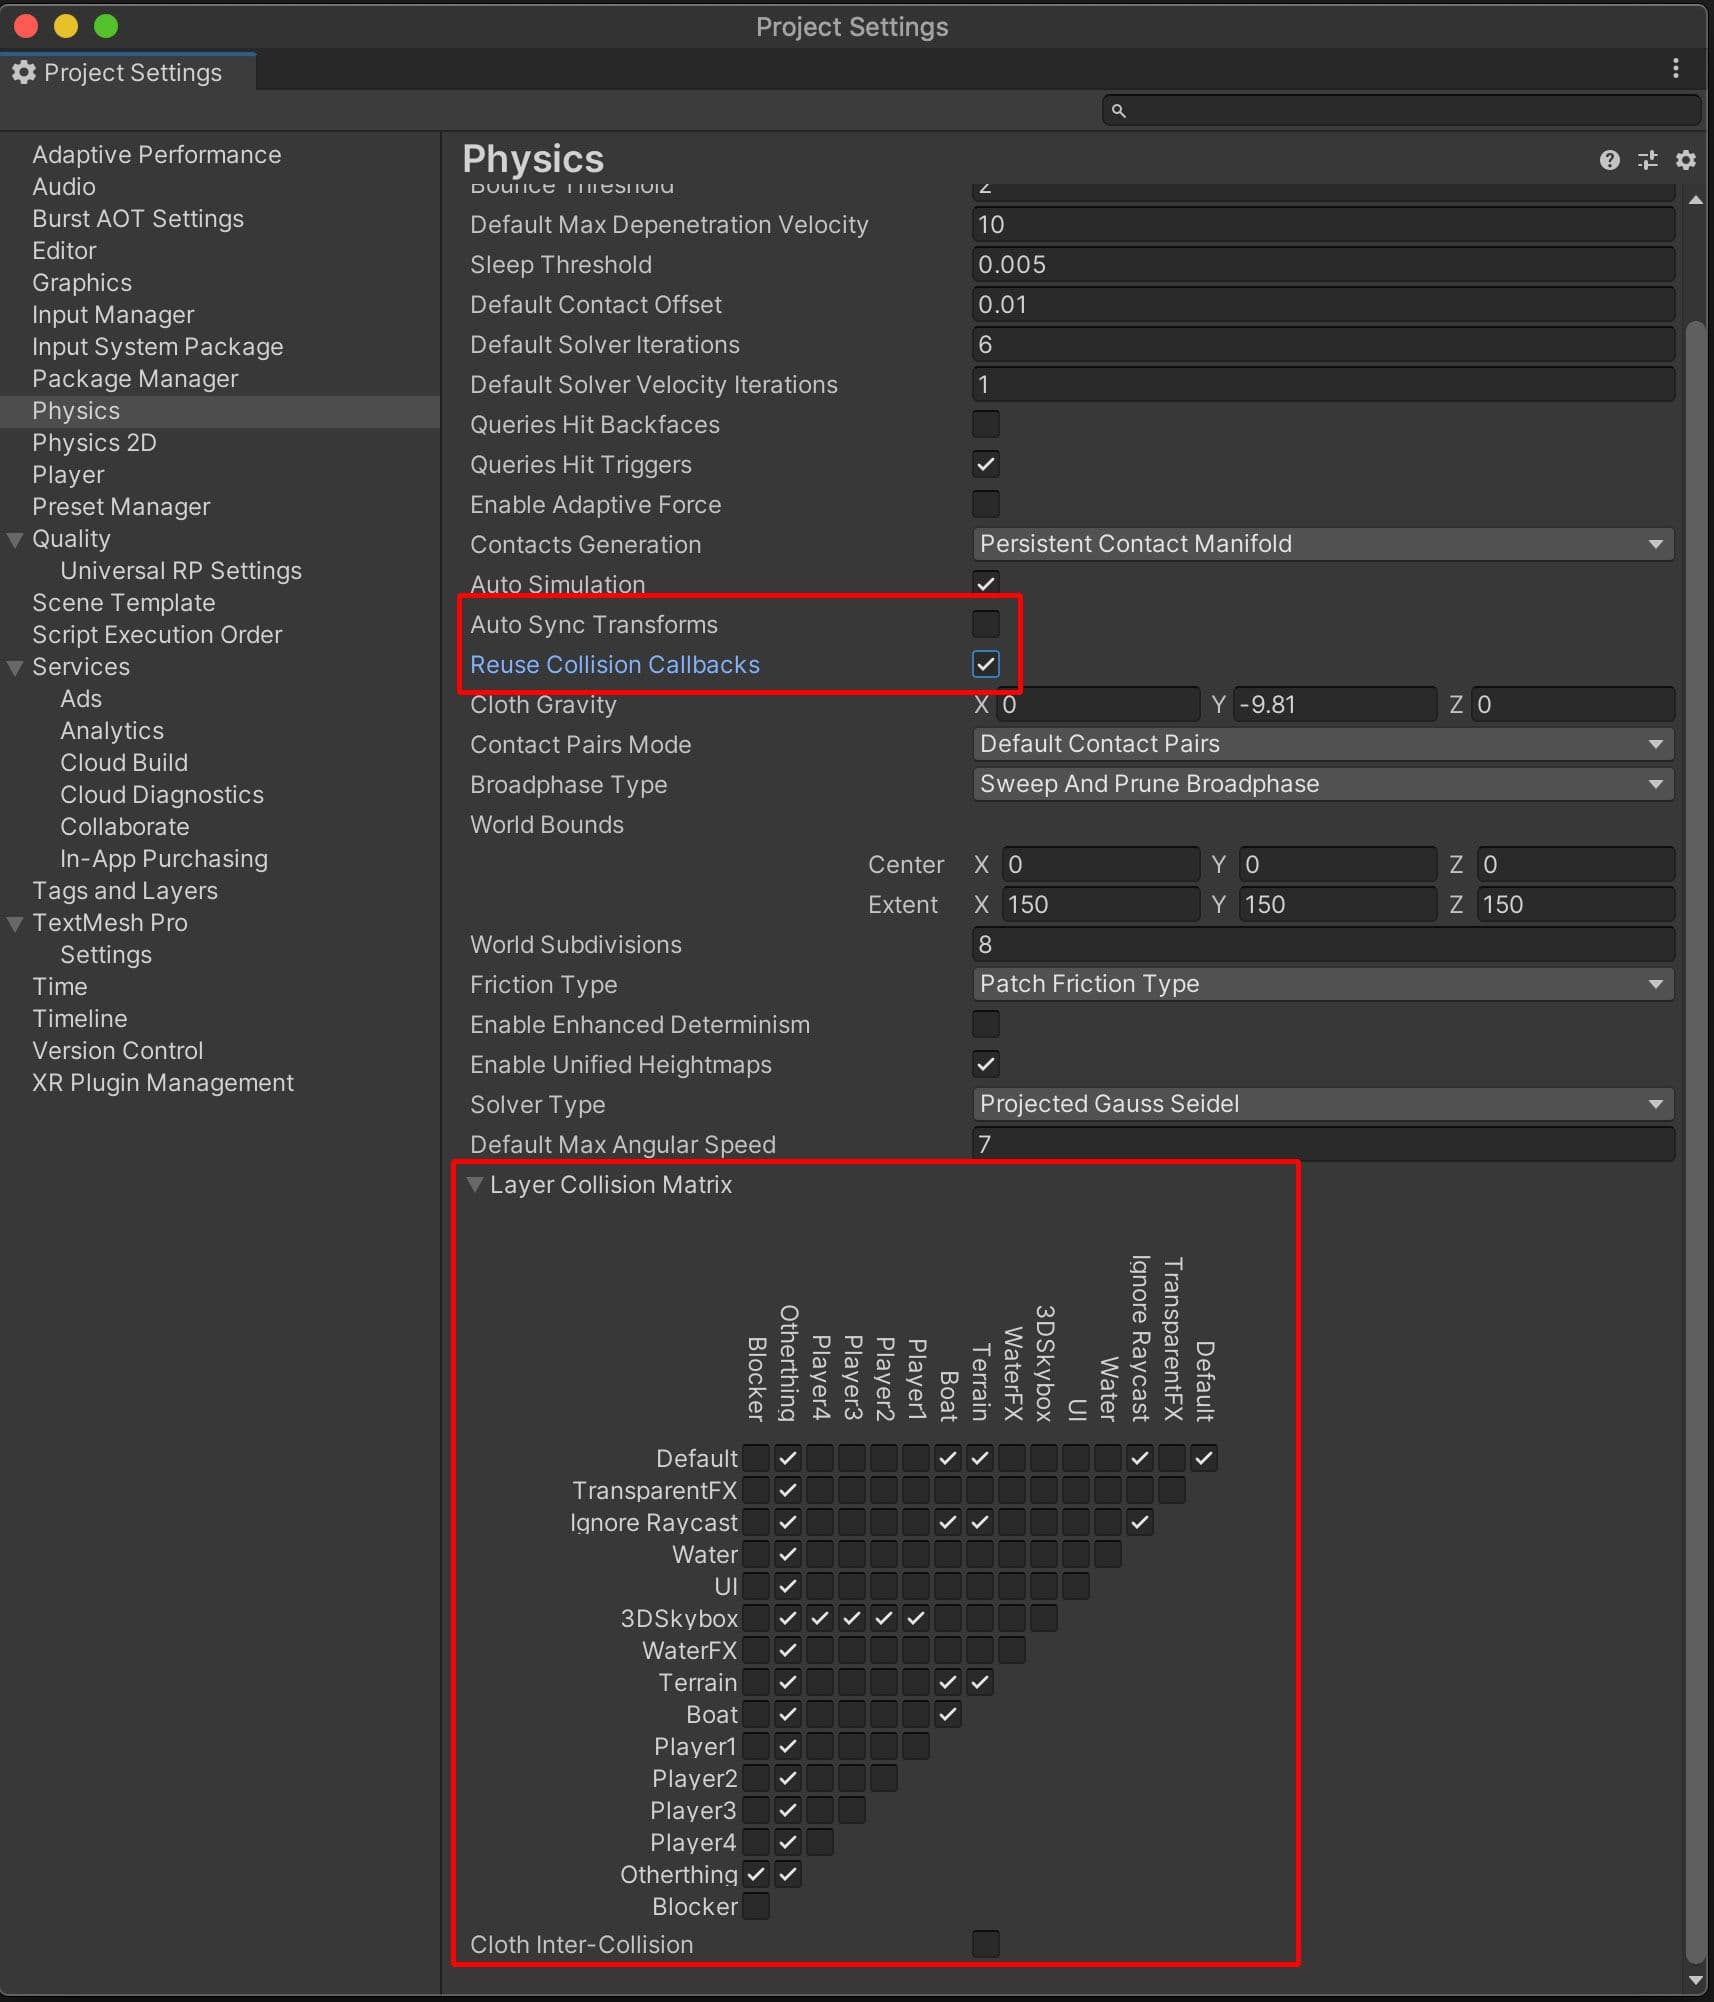
In the Player Settings, check Prebake Collision Meshes whenever possible. We also recommend reviewing the Collision Matrix setup to ensure that the player and game mechanic objects are in the correct layers.
Removing callbacks from triggers for unnecessary layers can be a big win, so try to simplify your Layer Collision Matrix. You can edit your Physics Settings via Project Settings > Physics.
Learn more in the Collision Matrix documentation.
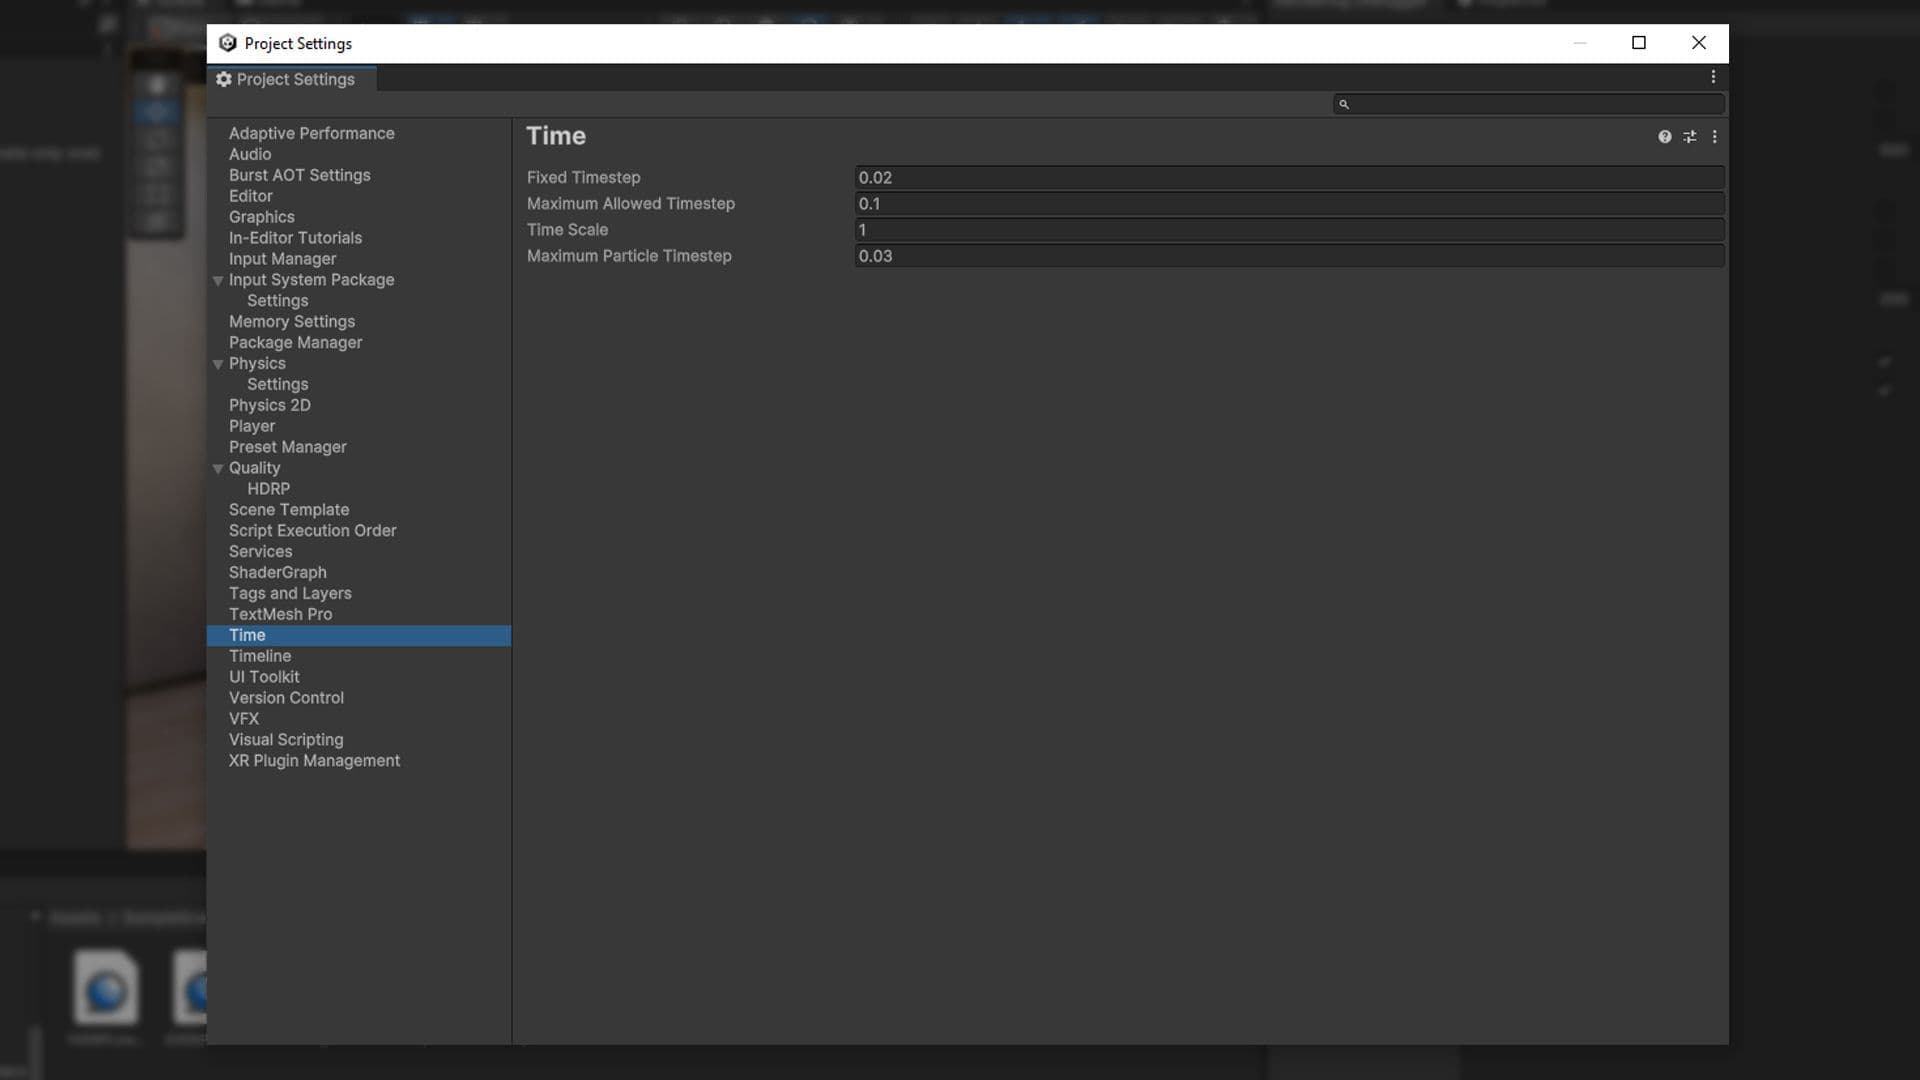
Physics engines work by running on a fixed time step. To see the fixed rate that your project is running at, go to Edit > Project Settings > Time.
The Fixed Timestep field defines the time delta used by each physics step. For example, the default value of 0.02 seconds (20 ms) is equivalent to 50 fps, or 50 Hz.
Because each frame in Unity takes a variable amount of time, it is not perfectly synced with the physics simulation. The engine counts up to the next physics time step. If a frame runs slightly slower or faster, Unity uses the elapsed time to know when to run the physics simulation at the proper time step.
In the event that a frame takes a long time to prepare, this can lead to performance issues. For example, if your game experiences a spike (e.g., instantiating many GameObjects or loading a file from disk), the frame could take 40 ms or more to run. With the default 20 ms Fixed Timestep, this would cause two physics simulations to run on the following frame in order to “catch up” with the variable time step.
Extra physics simulations, in turn, add more time to process the frame. On lower-end platforms, this potentially leads to a downward spiral of performance.
A subsequent frame taking longer to prepare makes the backlog of physics simulations longer as well. This leads to even slower frames and even more simulations to run per frame. The result is worse and worse performance.
Eventually the time between physics updates could exceed the Maximum Allowed Timestep. After this cutoff, Unity starts dropping physics updates, and the game stutters.
To avoid performance issues with physics:
Simulate the physics step manually if necessary by choosing the SimulationMode during the Update phase of the frame. This allows you to take control when to run the physics step. Pass Time.deltaTime to Physics.Simulate in order to keep the physics in sync with the simulation time. This approach can cause instabilities in the physics simulation in scenes with complex physics or highly variable frame times, so use it with caution.
Learn more in the Physics.Simulate documentation.
The Unity physics engine runs in two steps:
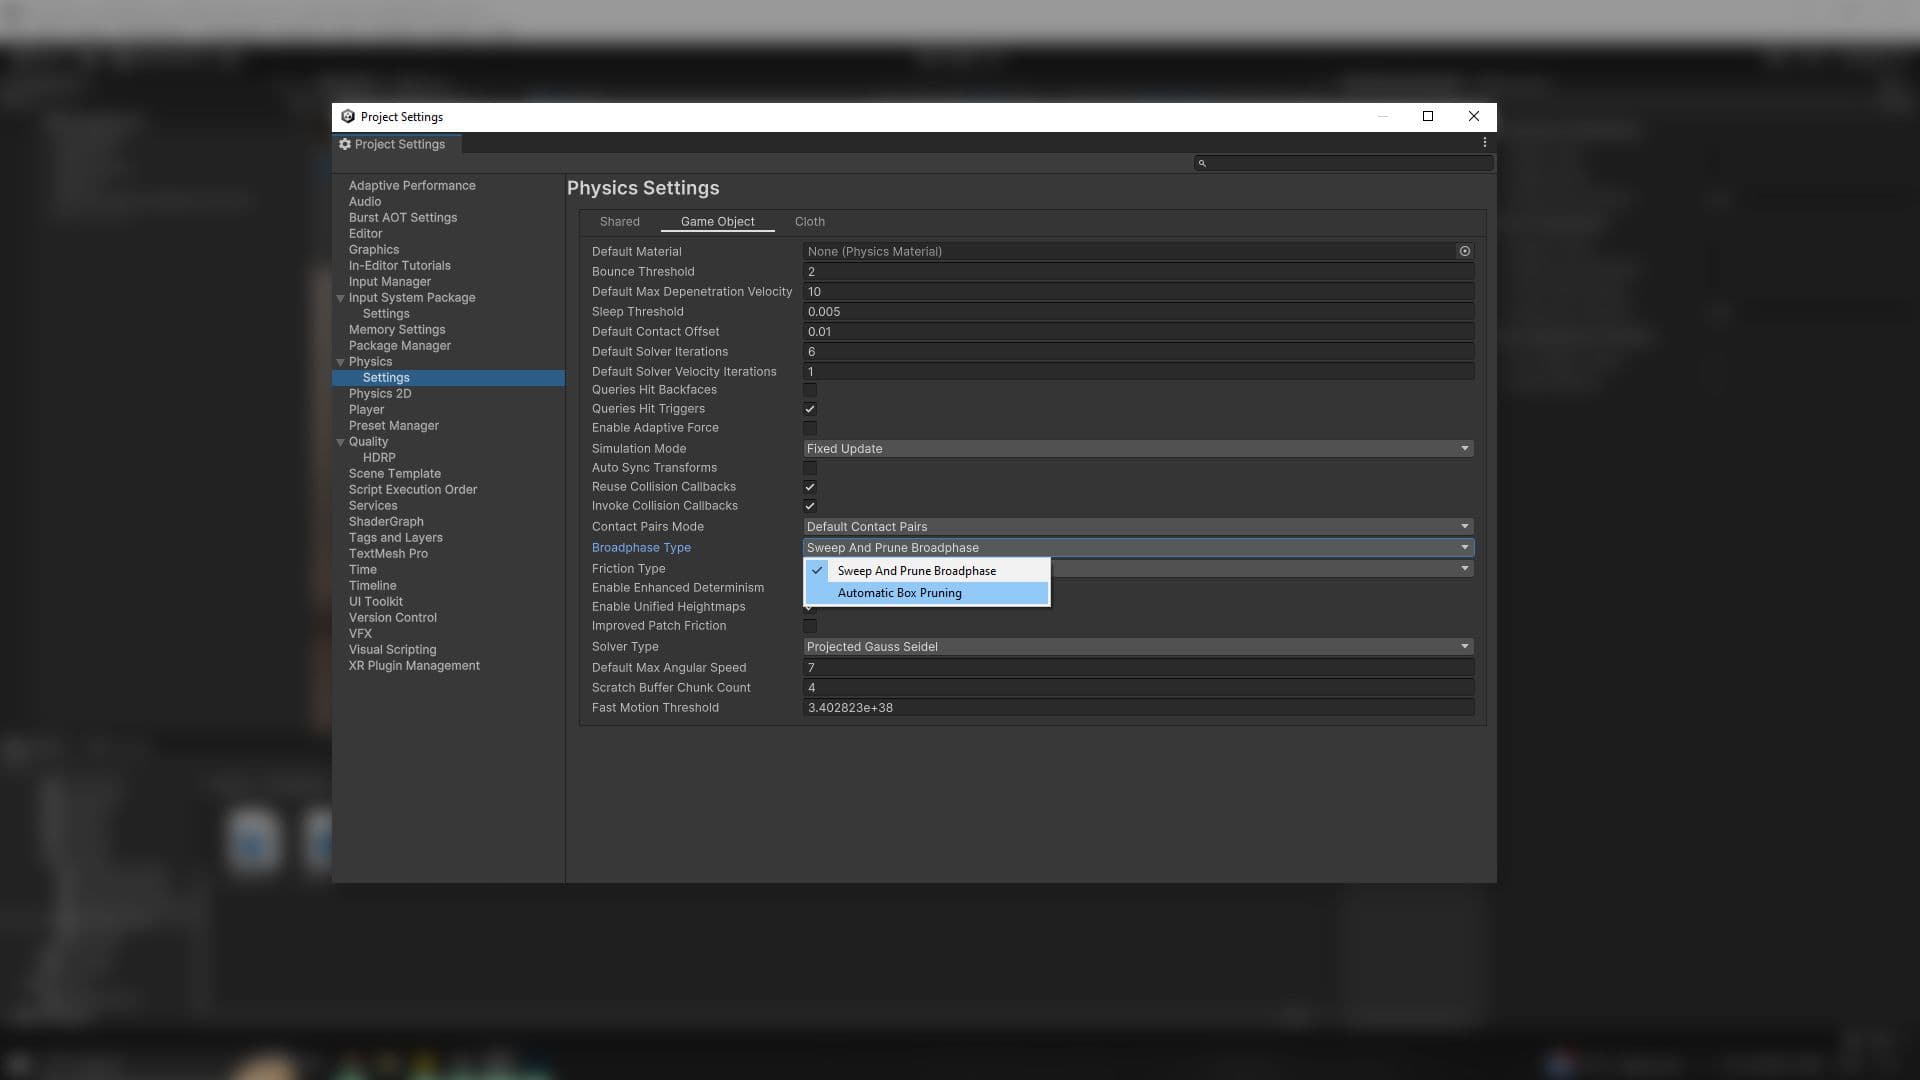
The broad phase default setting of Sweep and Prune BroadPhase (Edit > Project Settings > Physics > BroadPhase Type) can generate false positives for worlds that are generally flat and have many colliders.If your scene is large and mostly flat, avoid this issue and switch to Automatic Box Pruning or Multibox Pruning Broadphase. These options divide the world into a grid, where each grid cell performs sweep-and-prune.
Multibox Pruning Broadphase allows you to specify the world boundaries and the number of grid cells manually, while Automatic Box Pruning calculates that for you.
See the full list of Physics properties here.
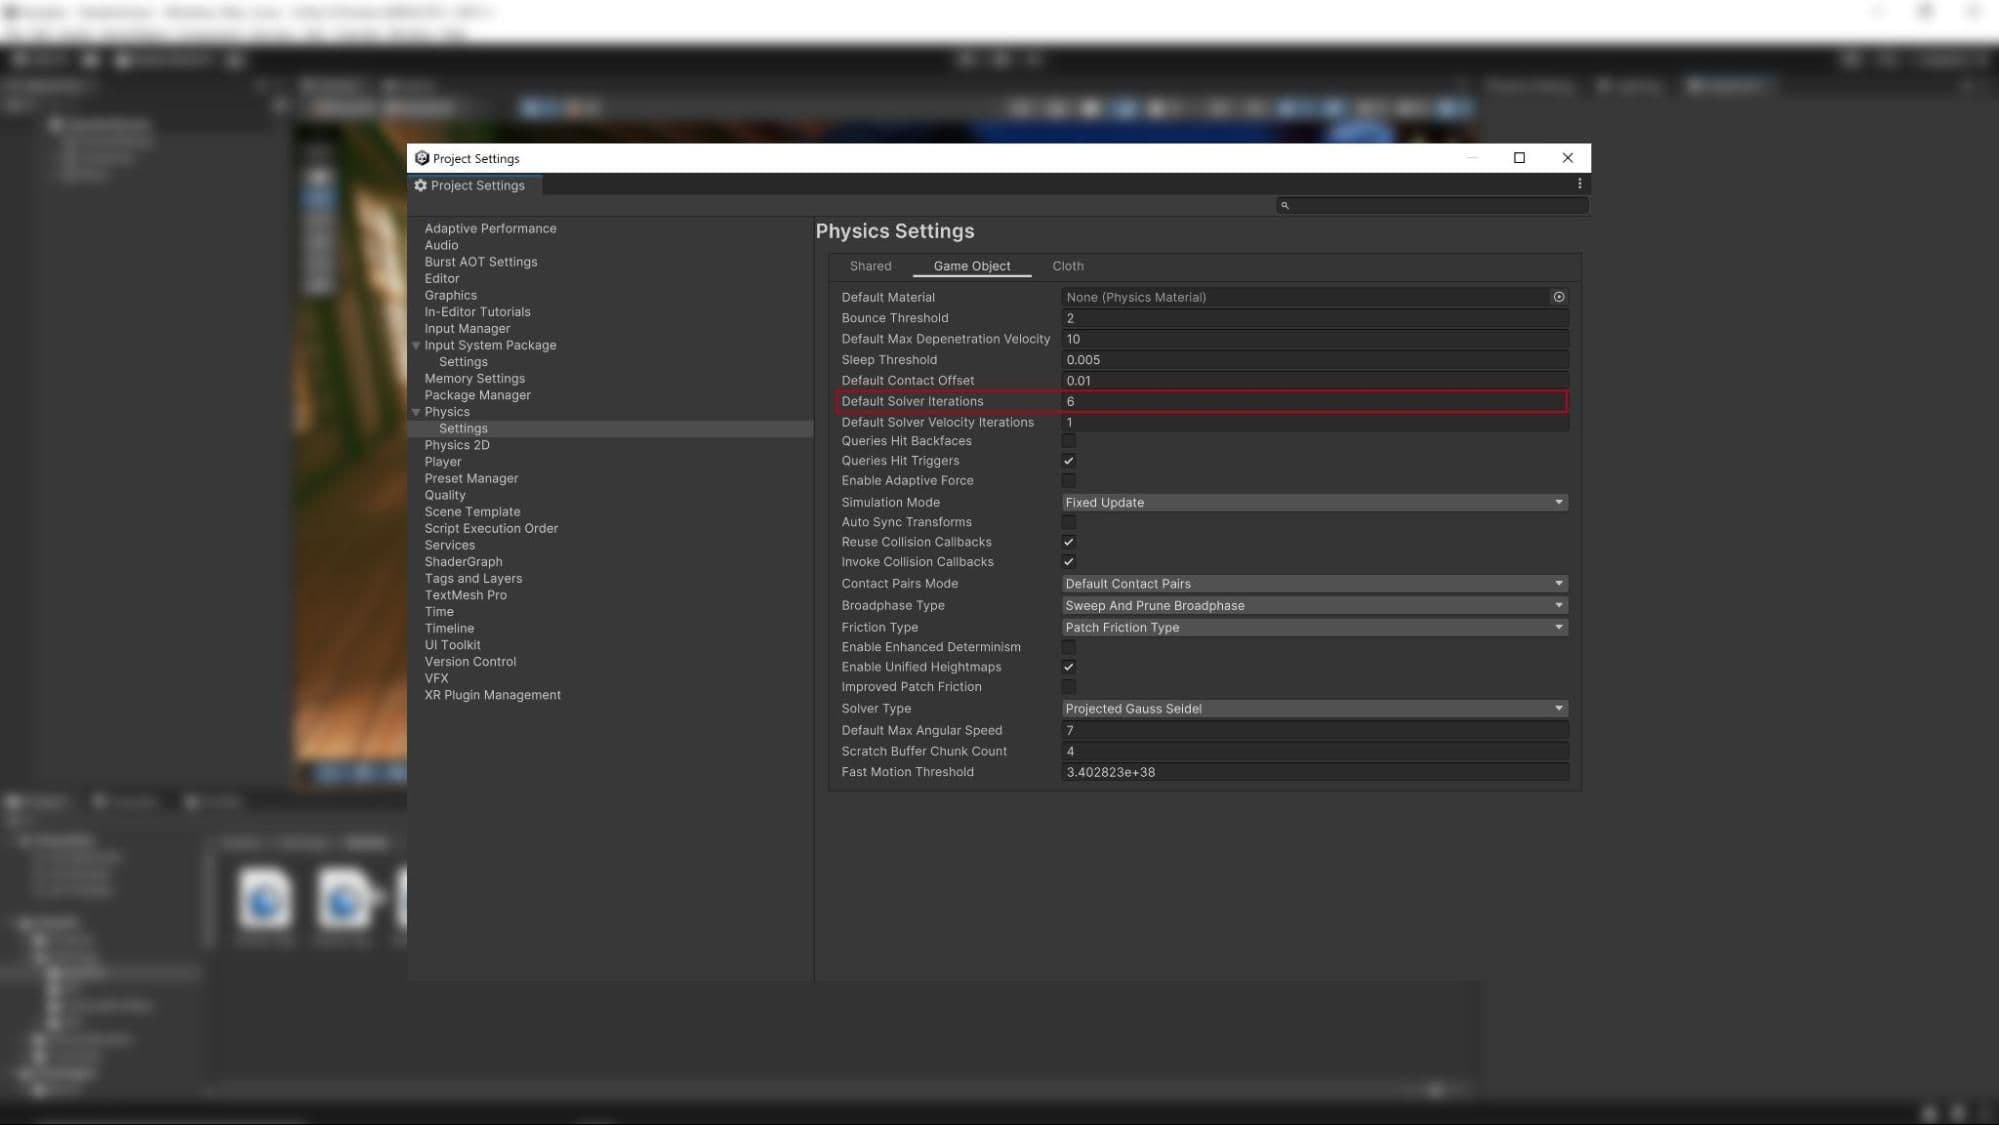
If you want to simulate a specific physics body more accurately, increase its Rigidbody.solverIterations.
This overrides the Physics.defaultSolverIterations, which can also be found in Edit > Project Settings > Physics > Default Solver Iterations.
To optimize your physics simulations, set a relatively low value in the project’s defaultSolveIterations. Then apply higher custom Rigidbody.solverIterations values to the individual instances that need more detail.
Get more information on Rigidbody.solverIterations.
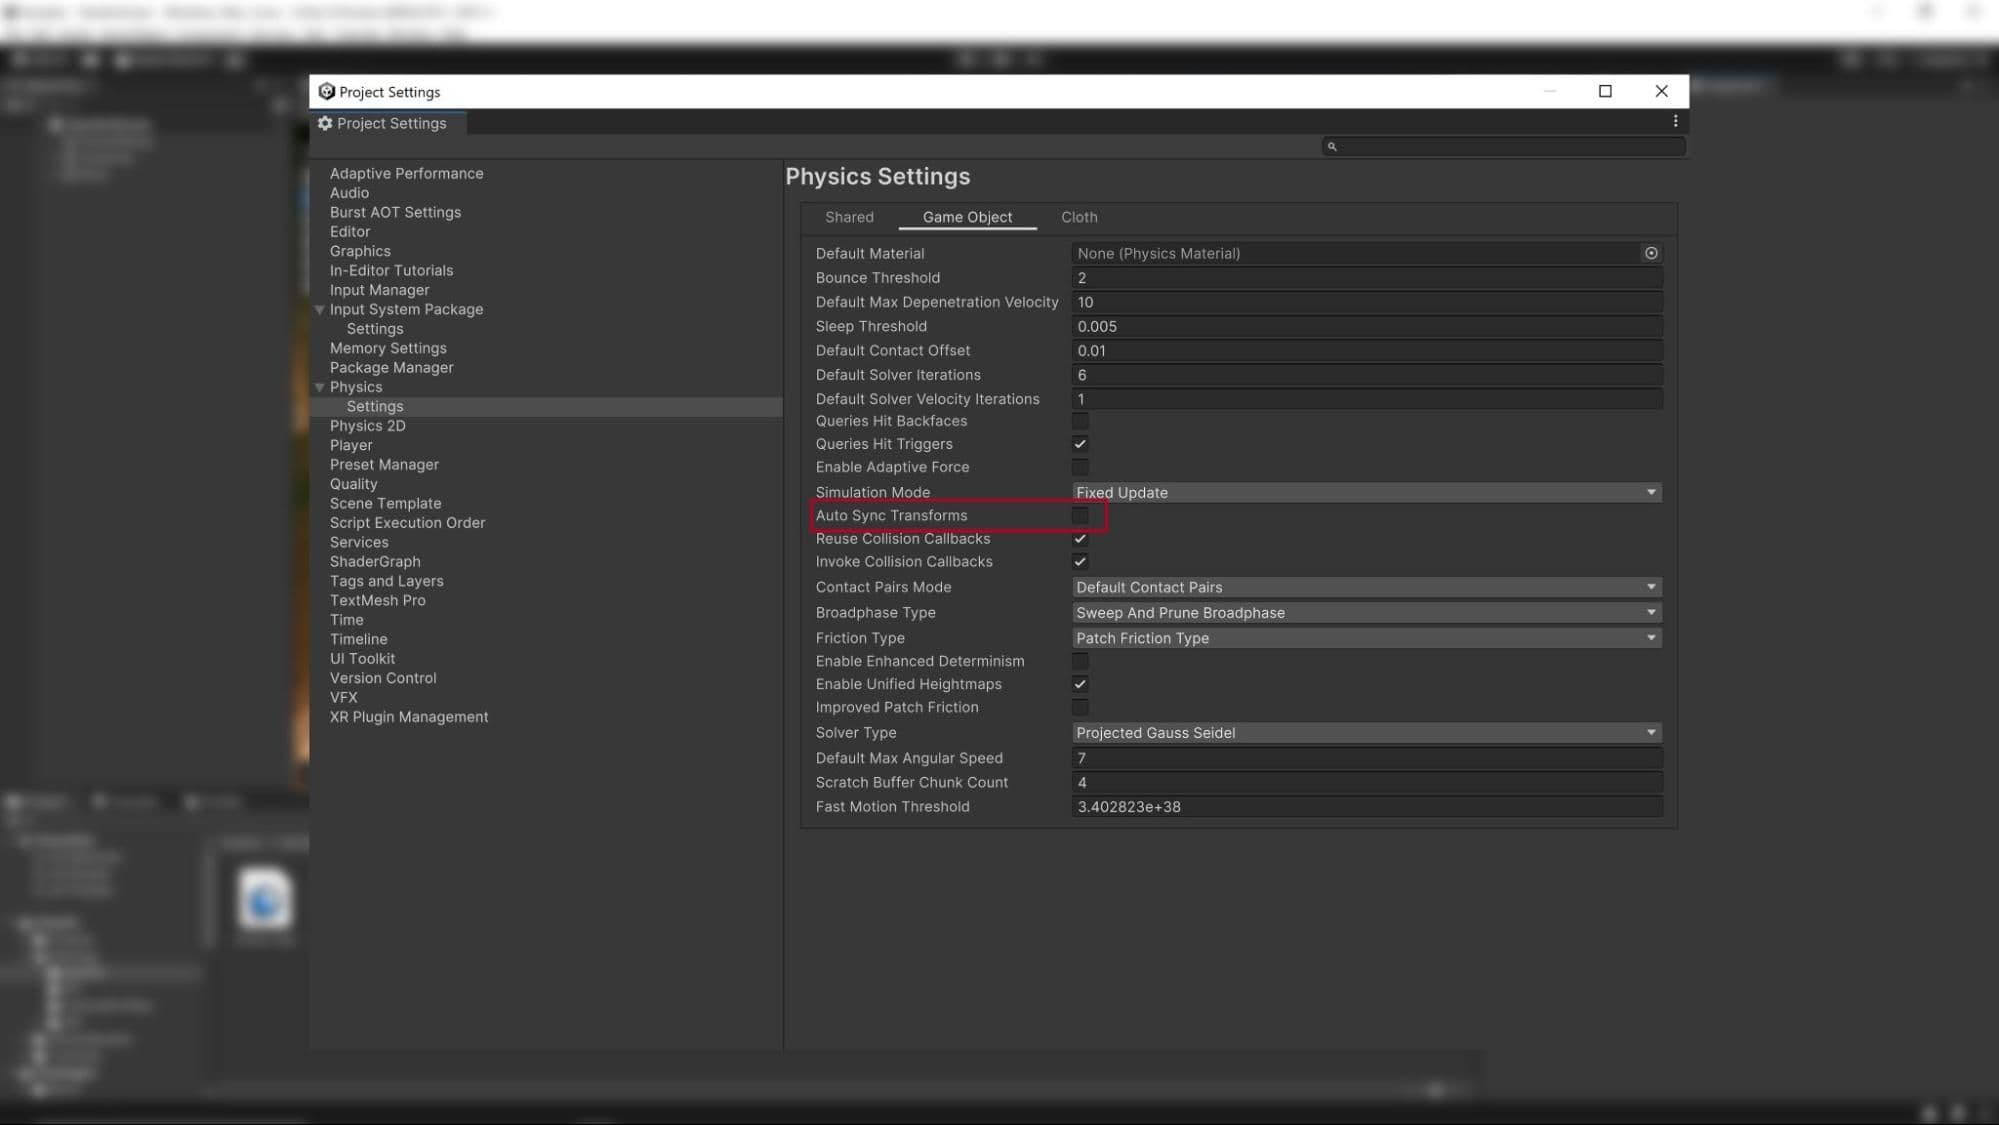
By default, Unity does not automatically synchronize changes to Transforms with the physics engine. Instead, it waits until the next physics update or until you manually call Physics.SyncTransforms. When this is enabled, any Rigidbody or Collider on that Transform or its children automatically sync with the physics engine.
When to manually sync
When autoSyncTransforms is disabled, Unity only synchronizes transformations before the physics simulation step in FixedUpdate or when explicitly requested through Physics.Simulate. You might need to perform additional syncs if you use APIs that read directly from the physics engine between Transform changes and the physics update. Examples include accessing Rigidbody.position or performing Physics.Raycast.
Performance best practice
Although autoSyncTransforms ensures up-to-date physics queries, it incurs a performance cost. Each physics-related API call forces a sync, which can degrade performance, especially with multiple successive queries. Follow these best practices:
Find out more about Physics.SyncTransforms.
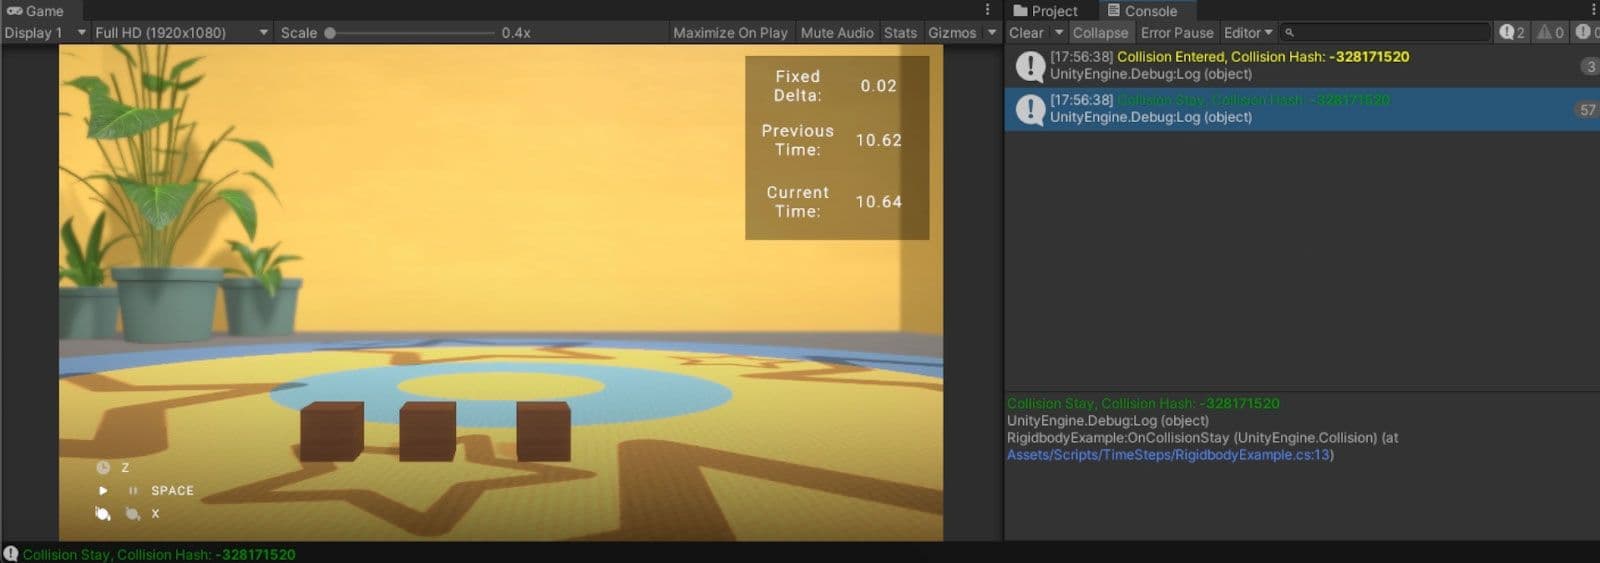
Contact arrays are generally significantly faster and so the general recommendation is to use those rather than reusing collision callbacks, however consider the following if you do have a specific use case for it.
The callbacks MonoBehaviour.OnCollisionEnter, MonoBehaviour.OnCollisionStay and MonoBehaviour.OnCollisionExit all take a collision instance as a parameter. This collision instance is allocated on the managed heap and must be garbage collected.
To reduce the amount of garbage generated, enable Physics.reuseCollisionCallbacks (also found in Projects Settings > Physics > Reuse Collision Callbacks). With this active, Unity only assigns a single collision pair instance to each callback. This reduces waste for the garbage collector and improves performance.
The general recommendation is to always enable Reuse Collision Callbacks for performance benefits. You should only disable this feature for legacy projects where the code relies on individual Collision class instances, making it impractical to store individual fields.
Learn more about Physics.reuseCollisionCallbacks.
Static colliders are GameObjects with a Collider component but without a Rigidbody.
Note that you can move a static collider, contrary to the term “static.” To do so, simply modify the position of the physics body. Accumulate the positional changes and sync before the physics update. You don’t need to add a Rigidbody component to the static collider just to move it.
However, if you want the static collider to interact with other physics bodies in a more complex way, give it a kinematic Rigidbody. Use Rigidbody.position and Rigidbody.rotation to move it instead of accessing the Transform component. This guarantees more predictable behavior from the physics engine.
Note: If an individual Static Collider 2D needs to be moved or reconfigured at runtime, then add a Rigidbody 2D component and set it to the Static Body Type, as it is faster to simulate the Collider 2D when it has its own Rigidbody 2D. If a group of Collider 2Ds needs to be moved or reconfigured at runtime, it is faster to have them all be children of the single hidden parent Rigidbody 2D than to move each GameObject individually.
Get more information about Rigidbodies.
To detect and collect colliders in 3D projects within a certain distance and in a certain direction, use raycasts and other physics queries like BoxCast. Note that
Physics queries that return multiple colliders as an array, like OverlapSphere or OverlapBox, need to allocate those objects on the managed heap. This means that the garbage collector eventually needs to collect the allocated objects, which can decrease performance if it happens at the wrong time.
To reduce this overhead, use the NonAlloc versions of those queries. For example, if you are using OverlapSphere to collect all potential colliders around a point, use OverlapSphereNonAlloc instead.
This allows you to pass in an array of colliders (the results parameter) to act as a buffer. The NonAlloc method works without generating garbage. Otherwise, it functions like the corresponding allocating method.
Note that you need to define a results buffer of sufficient size when using a NonAlloc method. The buffer does not grow if it runs out of space.
2D Physics
Note that the above advice does not apply to 2D physics queries, because in Unity's 2D physics system, methods do not have a "NonAlloc" suffix. Instead, all 2D physics methods, including those that return multiple results, provide overloads that accept arrays or lists. For instance, while the 3D physics system has methods like RaycastNonAlloc, the 2D equivalent simply uses an overloaded version of Raycast that can take an array or List<T> as a parameter, such as:
var results = new List<RaycastHit2D>();
int hitCount = Physics2D.Raycast(origin, direction, contactFilter, results);
By using overloads, you can perform non-allocating queries in the 2D physics system without needing specialized NonAlloc methods.
Learn more in the NonAlloc method documentation.
You can run raycast queries with Physics.Raycast. However, if you have a large number of raycast operations (e.g., calculating line of sight for 10,000 agents), this may take a significant amount of CPU time.
Use RaycastCommand to batch the query using the C# Job System. This offloads the work from the main thread so that the raycasts can happen asynchronously and in parallel.
See an example in the RaycastCommands documentation.
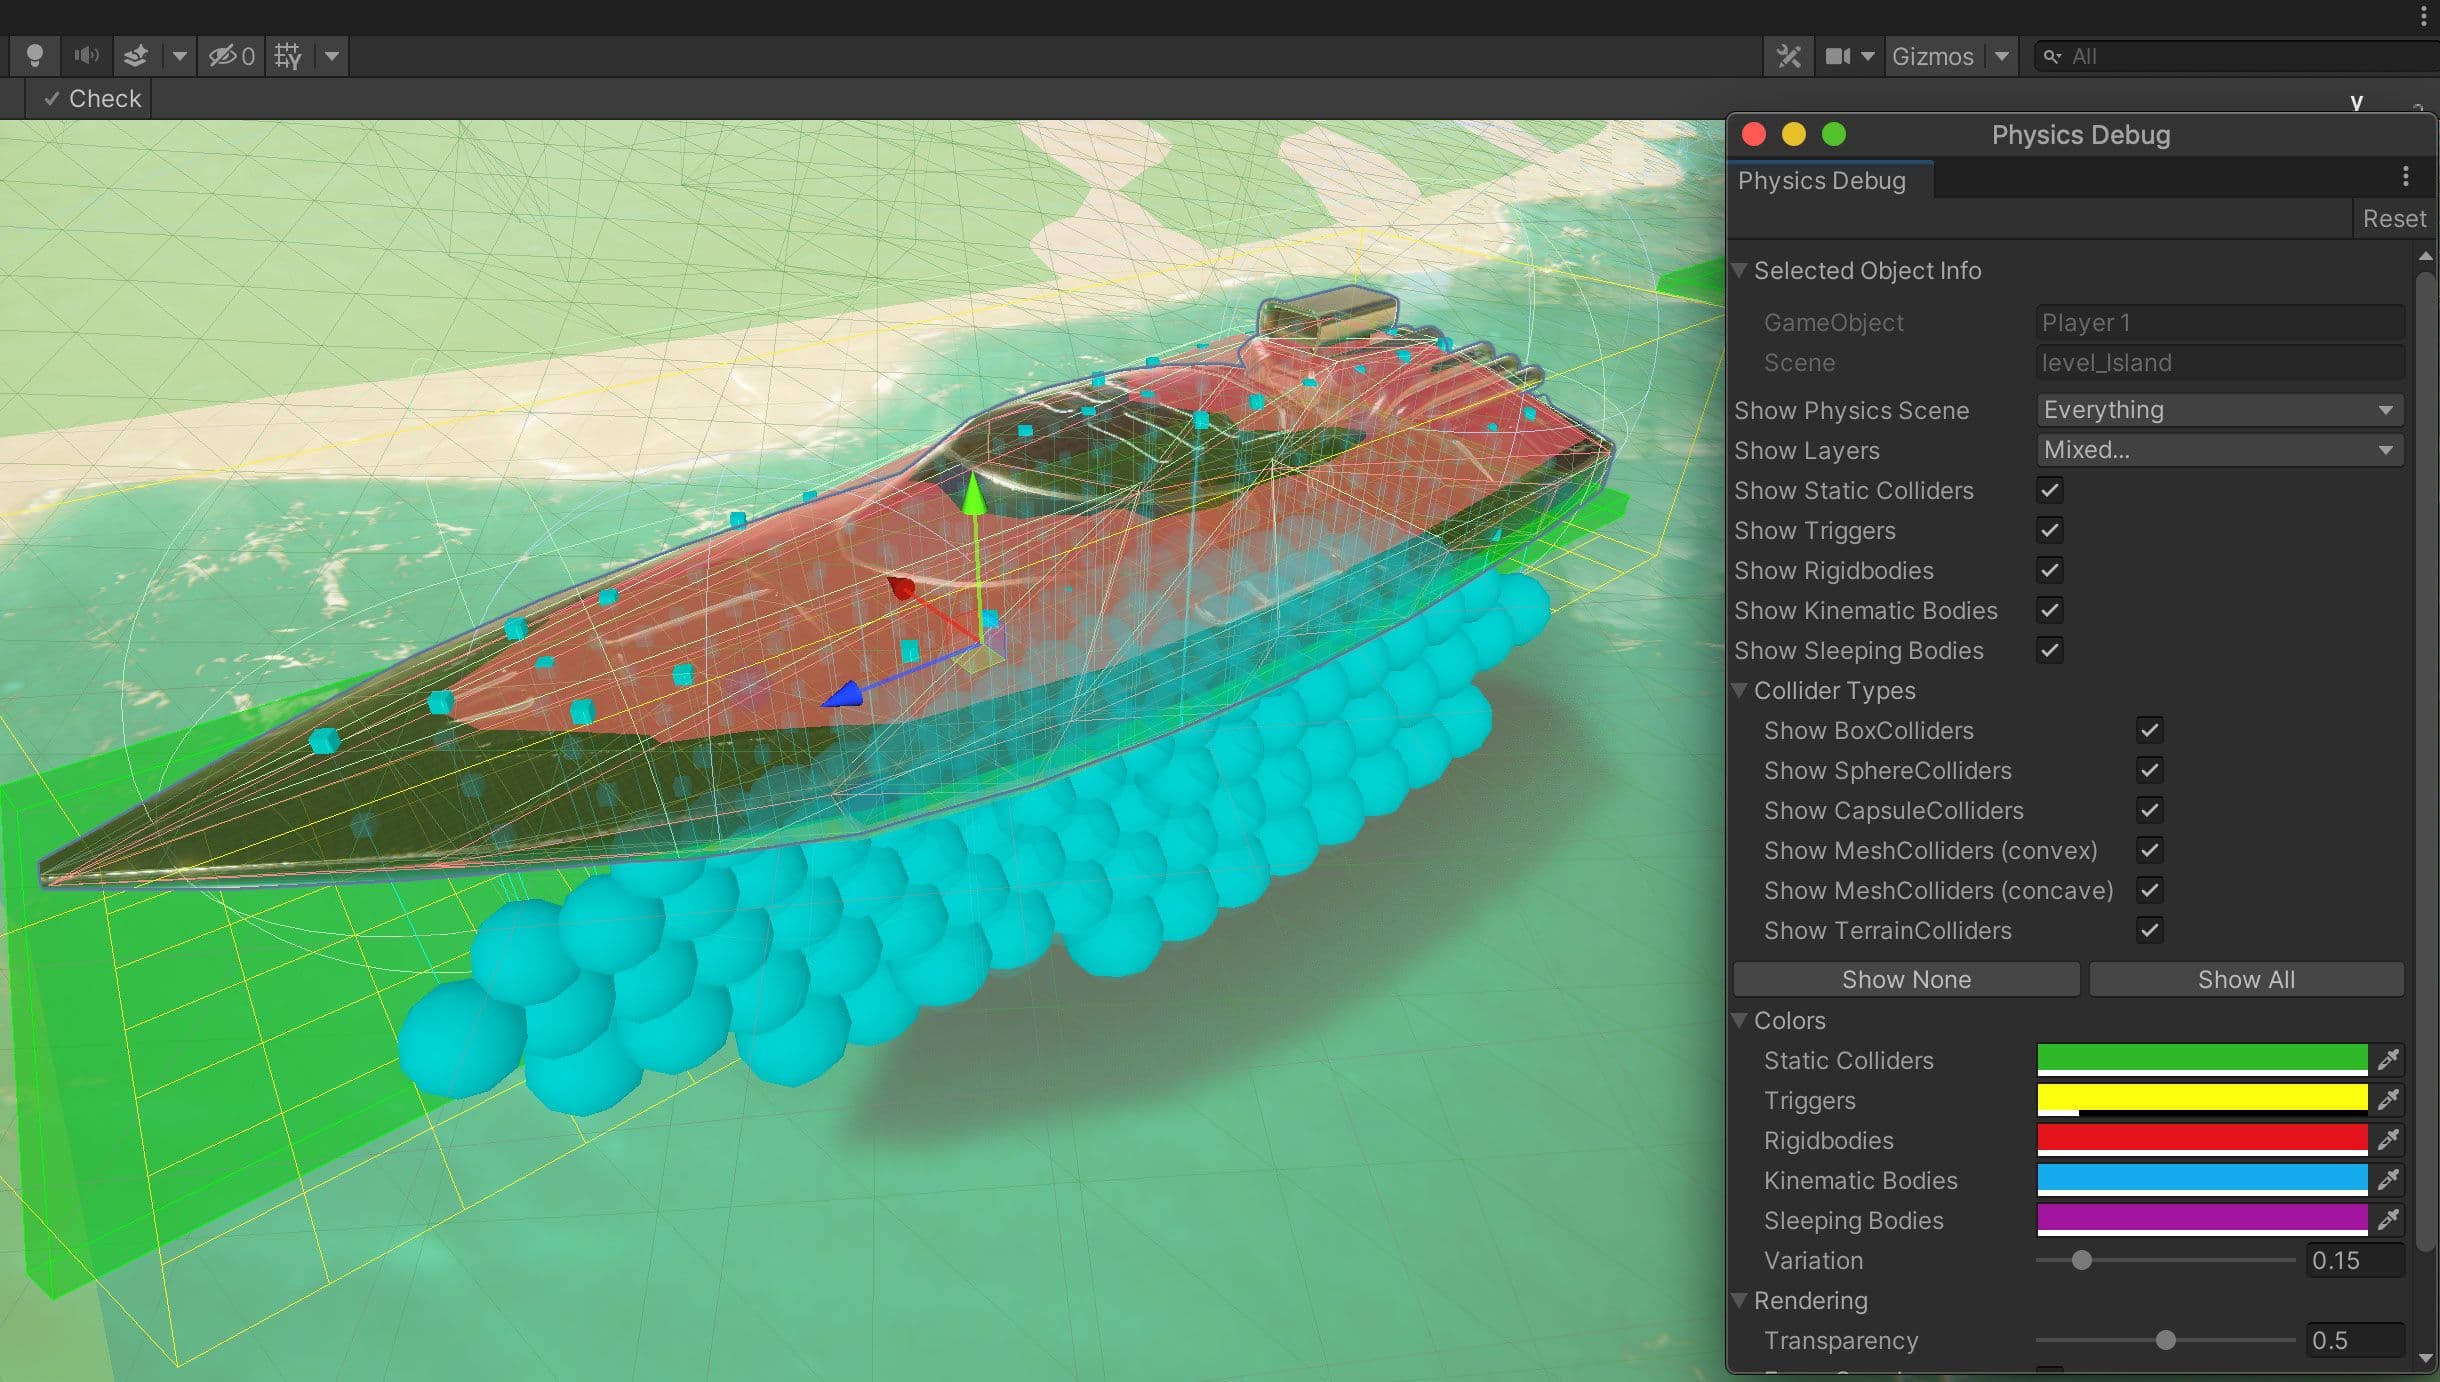
Use the Physics Debug window (Window > Analysis > Physics Debugger) to help troubleshoot any problem colliders or discrepancies. This shows a color-coded indicator of the GameObjects that can collide with one another.
For more information, see Physics Debugger documentation.

Find more best practices and tips from the Unity best practices hub. Choose from over 30 guides, created by industry experts, and Unity engineers and technical artists, that will help you develop efficiently with Unity’s toolsets and systems.