
Performance optimization for high-end graphics on PC and console
This is the second in a series of articles that unpacks optimization tips for your Unity projects. Use them as a guide for running at higher frame rates with fewer resources. Once you’ve tried these best practices, be sure to check out the other pages in the series:
- Configure your Unity project for stronger performance
- Managing GPU usage for PC and console games
- Advanced programming and code architecture
- Enhanced physics performance for smooth gameplay
See our latest optimization guides for Unity 6 developers and artists:
Unity’s graphics tools enable you to create optimized graphics in any style, across a range of platforms – from mobile to high-end consoles and desktop. This process usually depends on your artistic direction and render pipeline, so before you get started, we recommend reviewing the Render pipelines available.
Commit to a render pipeline
Optimizing scene lighting is not an exact science but more an iterative process. It involves trial and error and the process usually depends on the artistic direction and render pipeline.
Before you begin lighting your scenes, you will need to choose one of the available render pipelines. A render pipeline performs a series of operations that take the contents of a scene to display them onscreen.
Unity provides three prebuilt render pipelines with different capabilities andperformance characteristics, or, you can create your own.
1. The Universal Render Pipeline (URP) is a prebuilt Scriptable Render Pipeline (SRP). URP provides artist-friendly workflows to create optimized graphics across a range of platforms, from mobile to high-end consoles and PCs. URP is the successor to the Built-In Render Pipeline, providing graphics and rendering features unavailable with the older pipeline. In order to maintain performance, it makes tradeoffs to reduce the computational cost of lighting and shading. Choose URP if you want to reach the most target platforms, including mobile and VR.
Get a complete overview of the capabilities in URP in the e-book Introduction to the Universal Render Pipeline for advanced Unity creators (Unity 6 edition).
2. The High Definition Render Pipeline (HDRP) is another prebuilt SRP designed for cutting-edge, high-fidelity graphics. HDRP targets high-end hardware such as PC, Xbox, and PlayStation. It’s the recommended render pipeline for creating photorealistic realistic graphics with the highest level of realism in your game, with advanced lighting, reflections, and shadows. HDRP uses physically based lighting and materials and supports improved debugging tools.
Get a complete overview of the capabilities in HDRP in the e-book Lighting and environments in the High Definition Render Pipeline.
3. The Built-in Render Pipeline is Unity’s older, general-purpose render pipeline with limited customization. This pipeline will continue to be supported throughout the Unity 6.x cycle.
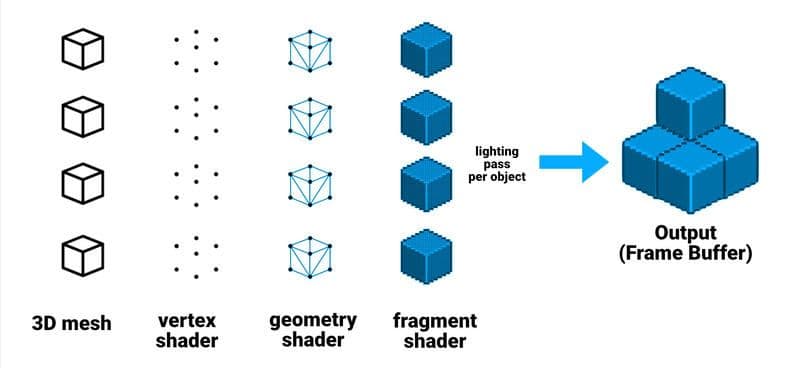
Forward rendering
In forward rendering, the graphics card projects the geometry and splits it into vertices. Those vertices are further broken down into fragments, or pixels, which render to screen to create the final image.
The pipeline passes each object, one at a time, to the graphics API. Forward rendering comes with a cost for each light. The more lights in your scene, the longer rendering will take.
The Built-in Pipeline’s forward renderer draws each light in a separate pass per object. If you have multiple lights hitting the same GameObject, this can create significant overdraw, where overlapping areas need to draw the same pixel more than once. Minimize the number of realtime lights to reduce overdraw.
Rather than rendering one pass per light, the URP culls the lights per-object. This allows for the lighting to be computed in one single pass, resulting in fewer draw calls compared to the Built-In Render Pipeline’s forward renderer.
Forward +
Forward+ rendering improves upon standard Forward rendering by culling lights spatially rather than per object. This increases the overall number of lights that can be utilized in rendering a frame. In Deferred rendering it supports the Native RenderPass API, allowing G-buffer and lighting passes to be combined into a single render pass.
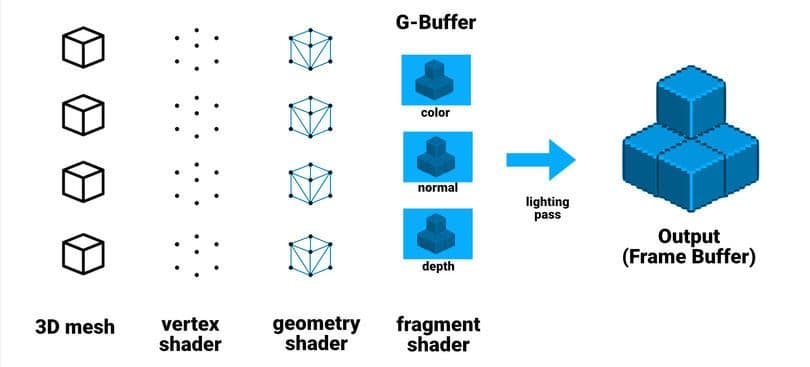
Deferred rendering
In deferred shading, lighting is not calculated per object.
Deferred shading instead postpones lighting calculation – to a later stage. Deferred shading uses two passes.
In the first pass, or the G-Buffer geometry pass, Unity renders the GameObjects. This pass retrieves several types of geometric properties and stores them in a set of textures. G-buffer textures can include:
- diffuse and specular colors
- surface smoothness
- occlusion
- world space normals
- emission + ambient + reflections + lightmaps
In the second pass, or lighting pass, Unity renders the scene’s lighting based on the G-buffer. Imagine iterating over each pixel and calculating the lighting information based on the buffer instead of the individual objects. Thus, adding more non-shadow casting lights in deferred shading does not incur the same performance hit as with forward rendering.
Though choosing a rendering path is not an optimization per se, it can affect how you optimize your project. The other techniques and workflows in this section may vary depending on what render pipeline and which rendering path you’ve chosen.
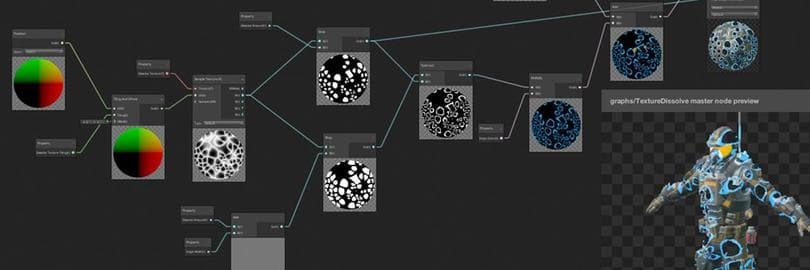
Shader Graphs
Both HDRP and URP support Shader Graph, a visual interface for shader creation. This allows some users to create complex shading effects that may have been previously out of reach. Use the 150+ nodes in the visual graph system to create more shaders. You can also make your own custom nodes with the API.
Begin each Shader Graph with a compatible master node, which determines the graph’s output. Add nodes and operators with the visual interface, and construct the shader logic.
This Shader Graph then passes into the render pipeline’s backend. The final result is a ShaderLab shader, functionally similar to one written in HLSL or Cg.
Optimizing a Shader Graph follows many of the same rules that apply to traditional HLSL/Cg Shaders. The more processing your Shader Graph does, the more it will impact the performance of your application.
If you are CPU-bound, optimizing your shaders won’t improve frame rate, but may still improve your battery life for mobile platforms.
If you are GPU-bound, follow these guidelines for improving performance with Shader Graphs:
- Decimate your nodes: Remove unused nodes. Don’t change any defaults or connect nodes unless those changes are necessary. Shader Graph compiles out any unused features automatically. When possible, bake values into textures. For example, instead of using a node to brighten a texture, apply the extra brightness into the texture asset itself.
- Use a smaller data format: Switch to a smaller data structure when possible. Consider using Vector2 instead of Vector3 if it does not impact your project. You can also reduce precision if the situation allows (e.g. half instead of float).
- Reduce math operations: Shader operations run many times per second, so optimize any math operators when possible. Try to blend results instead of creating a logical branch. Use constants, and combine scalar values before applying vectors. Finally, convert any properties that do not need to appear in the Inspector as in-line Nodes. All of these incremental speedups can help your frame budget.
- Branch a preview: As your graph gets larger, it may become slower to compile. Simplify your workflow with a separate, smaller branch just containing the operations you want to preview at the moment, then iterate more quickly on this smaller branch until you achieve the desired results.
If the branch is not connected to the master node, you can safely leave the preview branch in your graph. Unity removes nodes that do not affect the final output during compilation.
- Manually optimize: Even if you’re an experienced graphics programmer, you can still use a Shader Graph to lay down some boilerplate code for a script-based shader. Select the Shader Graph asset, then select Copy Shader from the context menu.
Create a new HLSL/Cg Shader and then paste in the copied Shader Graph. This is a one-way operation, but it lets you squeeze additional performance with manual optimizations.
Remove built-in shader settings
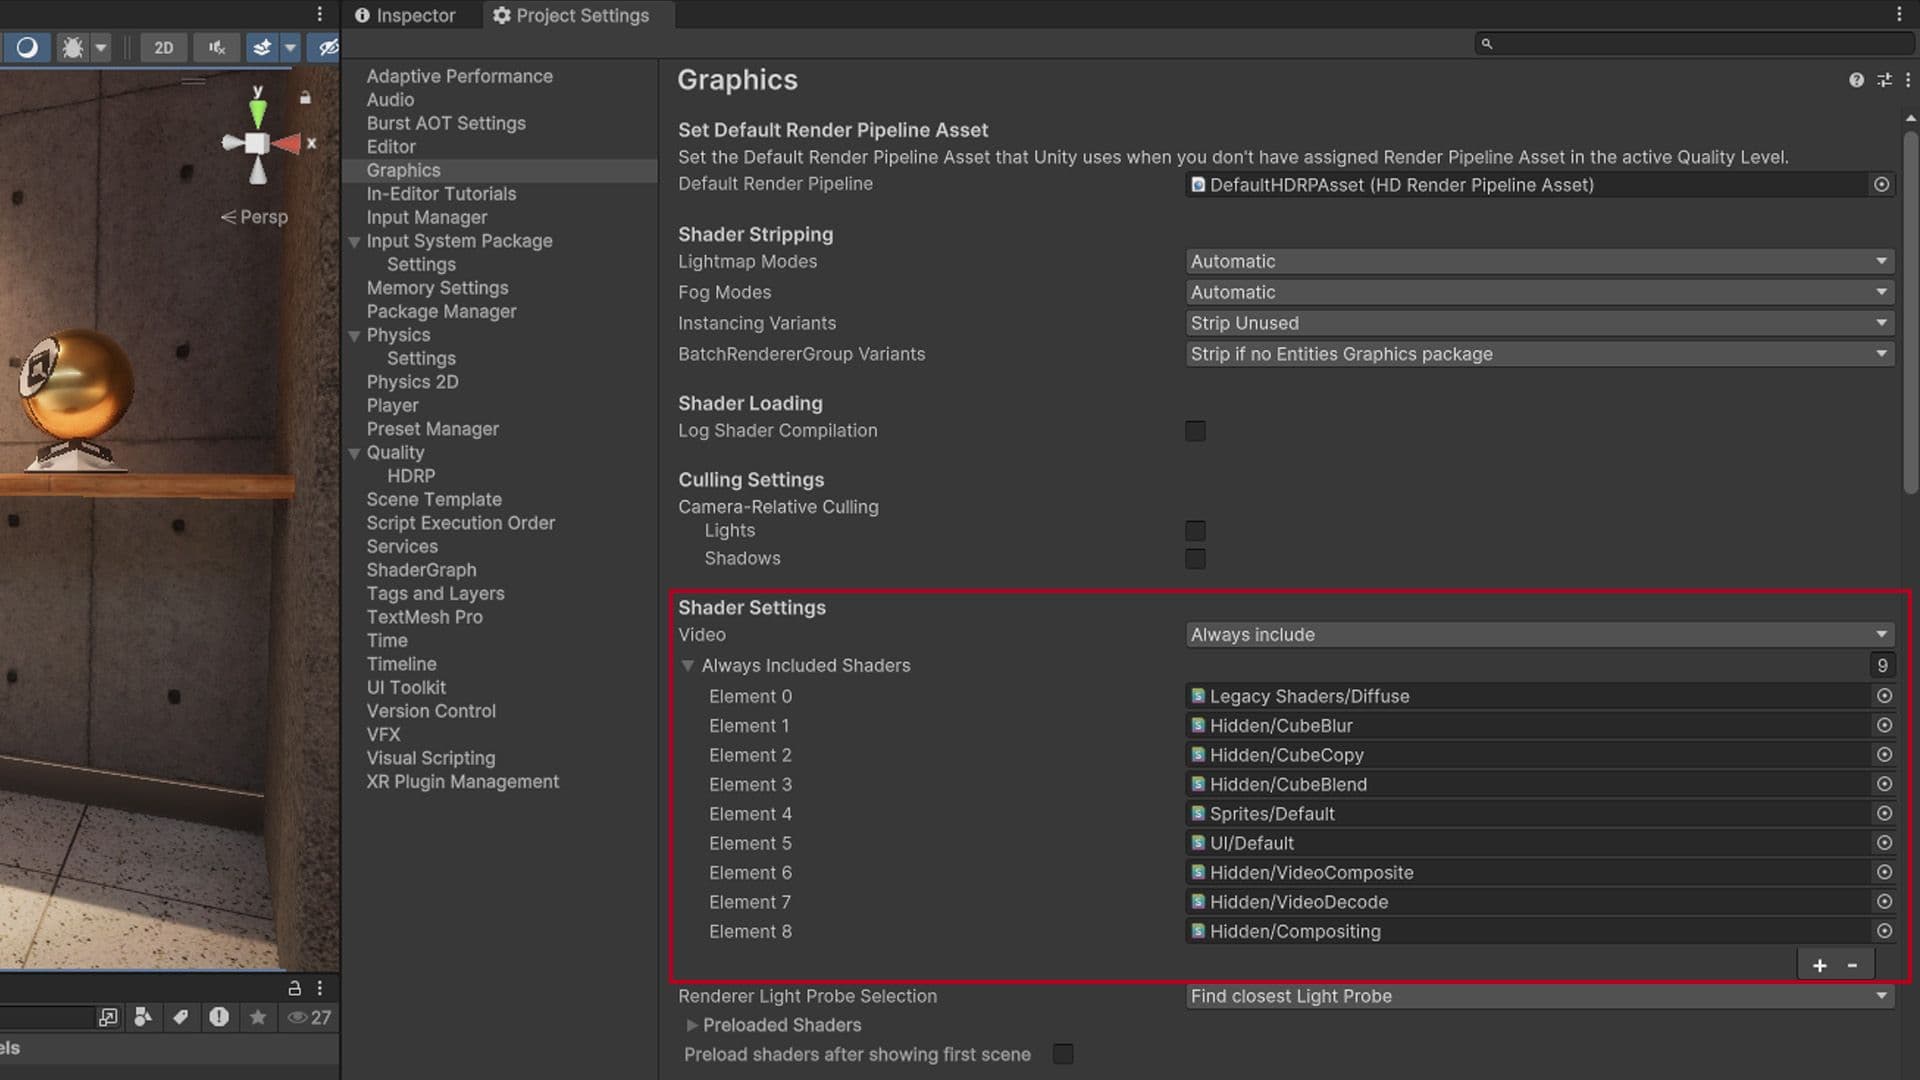
Remove every shader that you don’t use from the Always Included list of shaders in the Graphics Settings (Edit > ProjectSettings > Graphics). Add shaders here that you’ll need for the lifetime of the application.
Strip shader variants
Shader variants can be useful for platform-specific features but increase build times and file size.
You can use the Shader compilation pragma directives to compile the shader differently for target platforms. Then, use a shader keyword (or Shader Graph Keyword node) to create shader variants with certain features enabled or disabled.
You can prevent shader variants from being included in your build if you know that they are not required.
Parse the Editor.log for shader timing and size. Locate the lines that begin with “Compiled shader” and “Compressed shader.” In an example log, your TEST shader may show you:
Compiled shader 'TEST Standard (Specular setup)' in 31.23s
d3d9 (total internal programs: 482, unique: 474)
d3d11 (total internal programs: 482, unique: 466)
metal (total internal programs: 482, unique: 480)
glcore (total internal programs: 482, unique: 454)
Compressed shader 'TEST Standard (Specular setup)' on d3d9 from 1.04MB to 0.14MB
Compressed shader 'TEST Standard (Specular setup)' on d3d11 from 1.39MB to 0.12MB
Compressed shader 'TEST Standard (Specular setup)' on metal from 2.56MB to 0.20MB
Compressed shader 'TEST Standard (Specular setup)' on glcore from 2.04MB to 0.15MB
This tells you a few things about this shader:
- The shader expands into 482 variants due to #pragma multi_compile and shader_feature.
- Unity compresses the shader included in the game data to roughly the sum of the compressed sizes: 0.14+0.12+0.20+0.15 = 0.61MB.
- At runtime, Unity keeps the compressed data in memory (0.61MB), while the data for your currently used graphics API is uncompressed. For example, if your current API was Metal, that would account for 2.56MB.
After a build, Project Auditor can parse the Editor.log to display a list of all shaders, shader keywords, and shader variants compiled into a project. It can also analyze the Player.log after the game is run. This shows you what variants the application actually compiled and used at runtime.
Employ this information to build a scriptable shader stripping system and reduce the number of variants. This can improve build times, build sizes, and runtime memory usage.
Read the Stripping scriptable shader variants blog post to see this process in detail.
Smooth edges with anti-aliasing
Anti-aliasing helps smooth the image, reduce jagged edges, and minimize specular aliasing.
If you are using Forward rendering with the Built-in Render Pipeline, Multisample Anti-aliasing (MSAA) is available in the Quality settings. MSAA produces high-quality anti-aliasing, but it can be expensive. The MSAA Sample Count from the drop-down menu (None, 2X, 4X, 8X) defines how many samples the renderer uses to evaluate the effect.
If you are using Forward rendering with the URP or HDRP, you can enable MSAA on the Render Pipeline Asset.
Alternatively, you can add anti-aliasing as a post-processing effect. This appears on the Camera component under Anti-aliasing:
- Fast approximate anti-aliasing (FXAA) smooths edges on a per-pixel level. This is the least resource-intensive anti-aliasing and slightly blurs the final image.
- Subpixel morphological anti-aliasing (SMAA) blends pixels based on the borders of an image. This has much sharper results than FXAA and is suited for flat, cartoon-like, or clean art styles.
In HDRP, you can also use FXAA and SMAA with the Post Anti-aliasing setting on the Camera. URP and HDRP also offer an additional option:
- Temporal anti-aliasing (TAA) smooths edges using frames from the history buffer. This works more effectively than FXAA but requires motion vectors in order to work. TAA can also improve ambient occlusion and volumetrics. It is generally higher quality than FXAA, but costs more resources and can produce occasional ghosting artifacts.

Spatial temporal post-processing
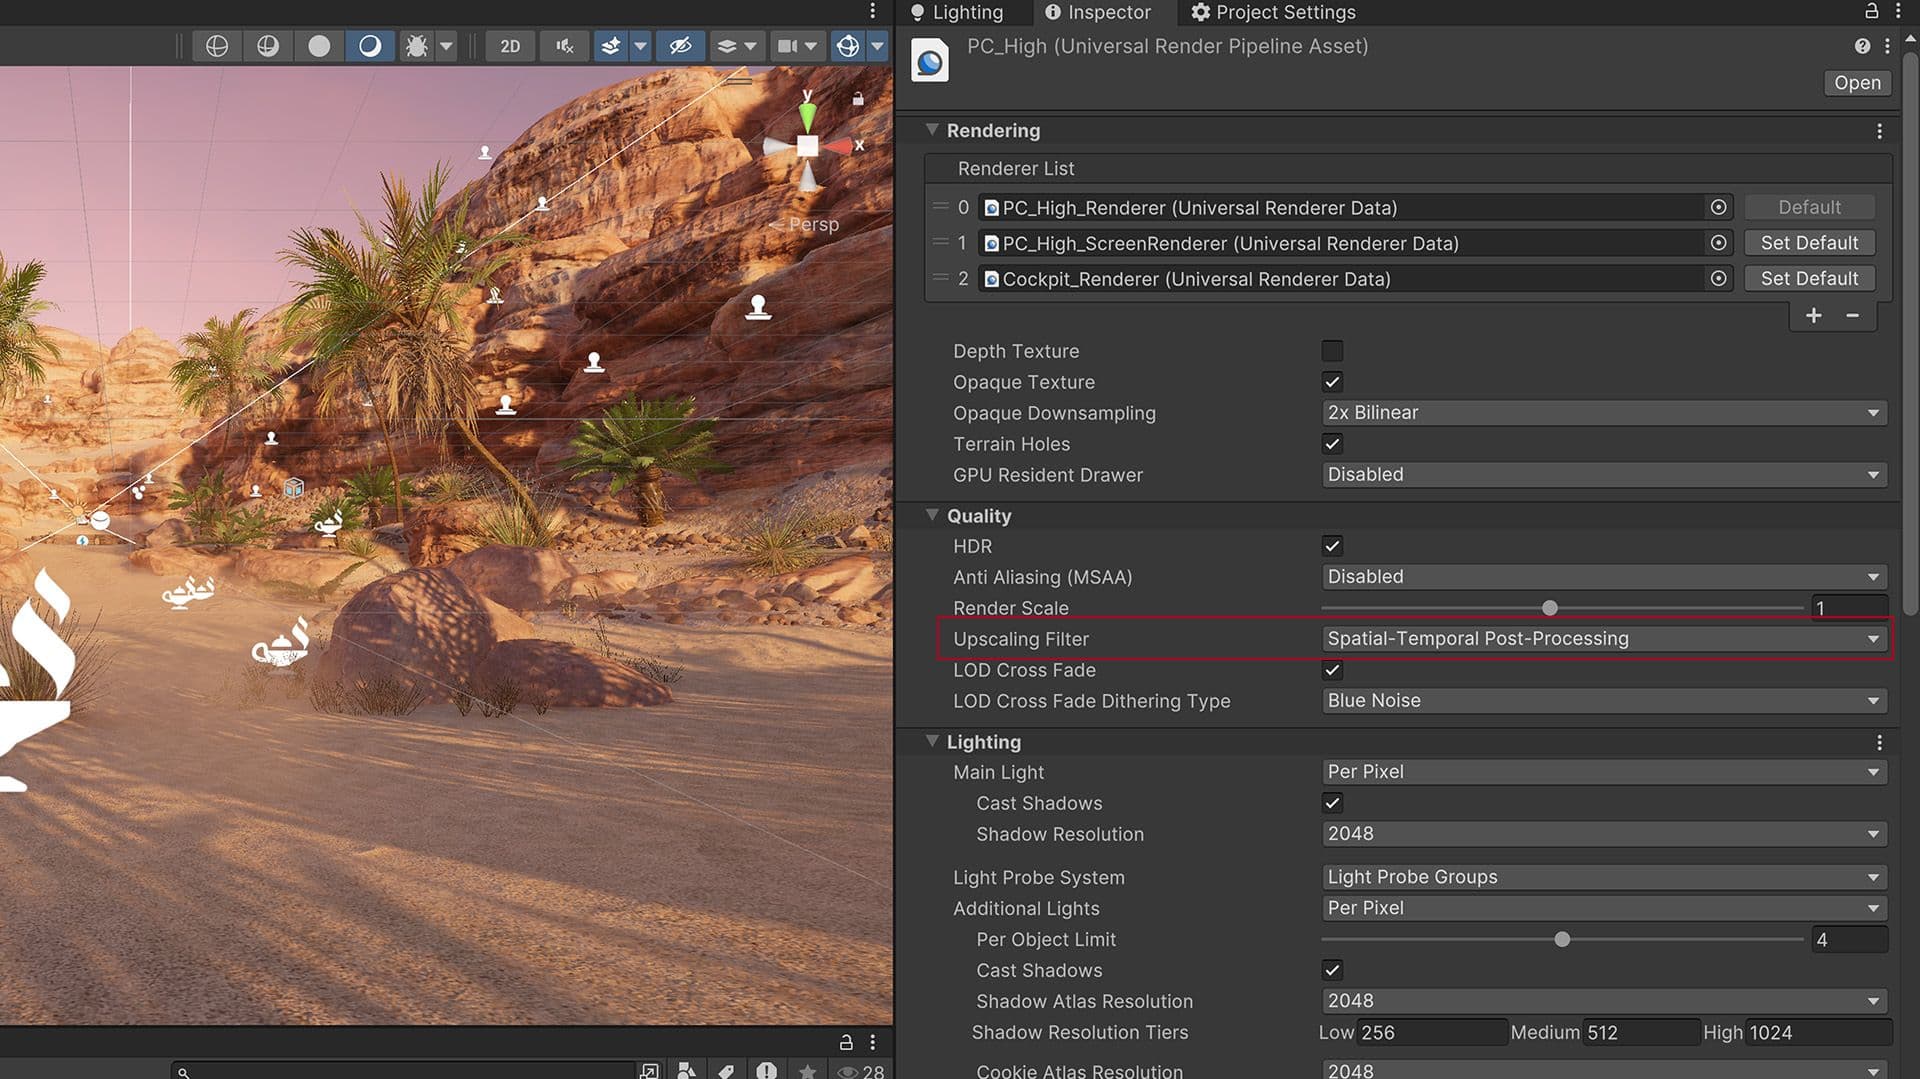
Spatial-Temporal Post-Processing (STP) is designed to enhance visual quality across a wide range of platforms like mobile, consoles, and PCs. STP is a spatio-temporal anti-aliasing upscaler that works with both HDRP and URP render pipelines, offering high-quality content scaling without the need for changes to existing content. This solution is particularly optimized for GPU performance, ensuring faster rendering times and making it easier to achieve high performance while maintaining visual quality.
To enable STP in the URP:
- Select the active URP Asset in the Project window.
- In the Inspector navigate to Quality > Upscaling Filter and select Spatial-Temporal Post-Processing.
Bake lightmaps
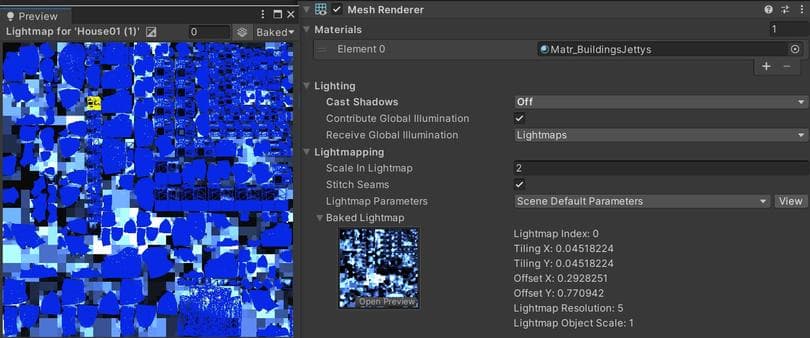
The fastest option to create lighting is one that doesn’t need to be computed per-frame. To do this, use Lightmapping to “bake” static lighting just once, instead of calculating it in real-time.
Add dramatic lighting to your static geometry using Global Illumination (GI). Mark objects with Contribute GI so you can store high-quality lighting in the form of lightmaps.
The process of generating a lightmapped environment takes longer than just placing a light in the scene in Unity, but this:
- Runs faster, 2-3 times faster for two-per-pixel lights
- Looks better – GI can calculate realistic-looking direct and indirect lighting. The lightmapper smooths and denoises the resulting map.
Baked shadows and lighting can then render without the same performance hit of real-time lighting and shadows.
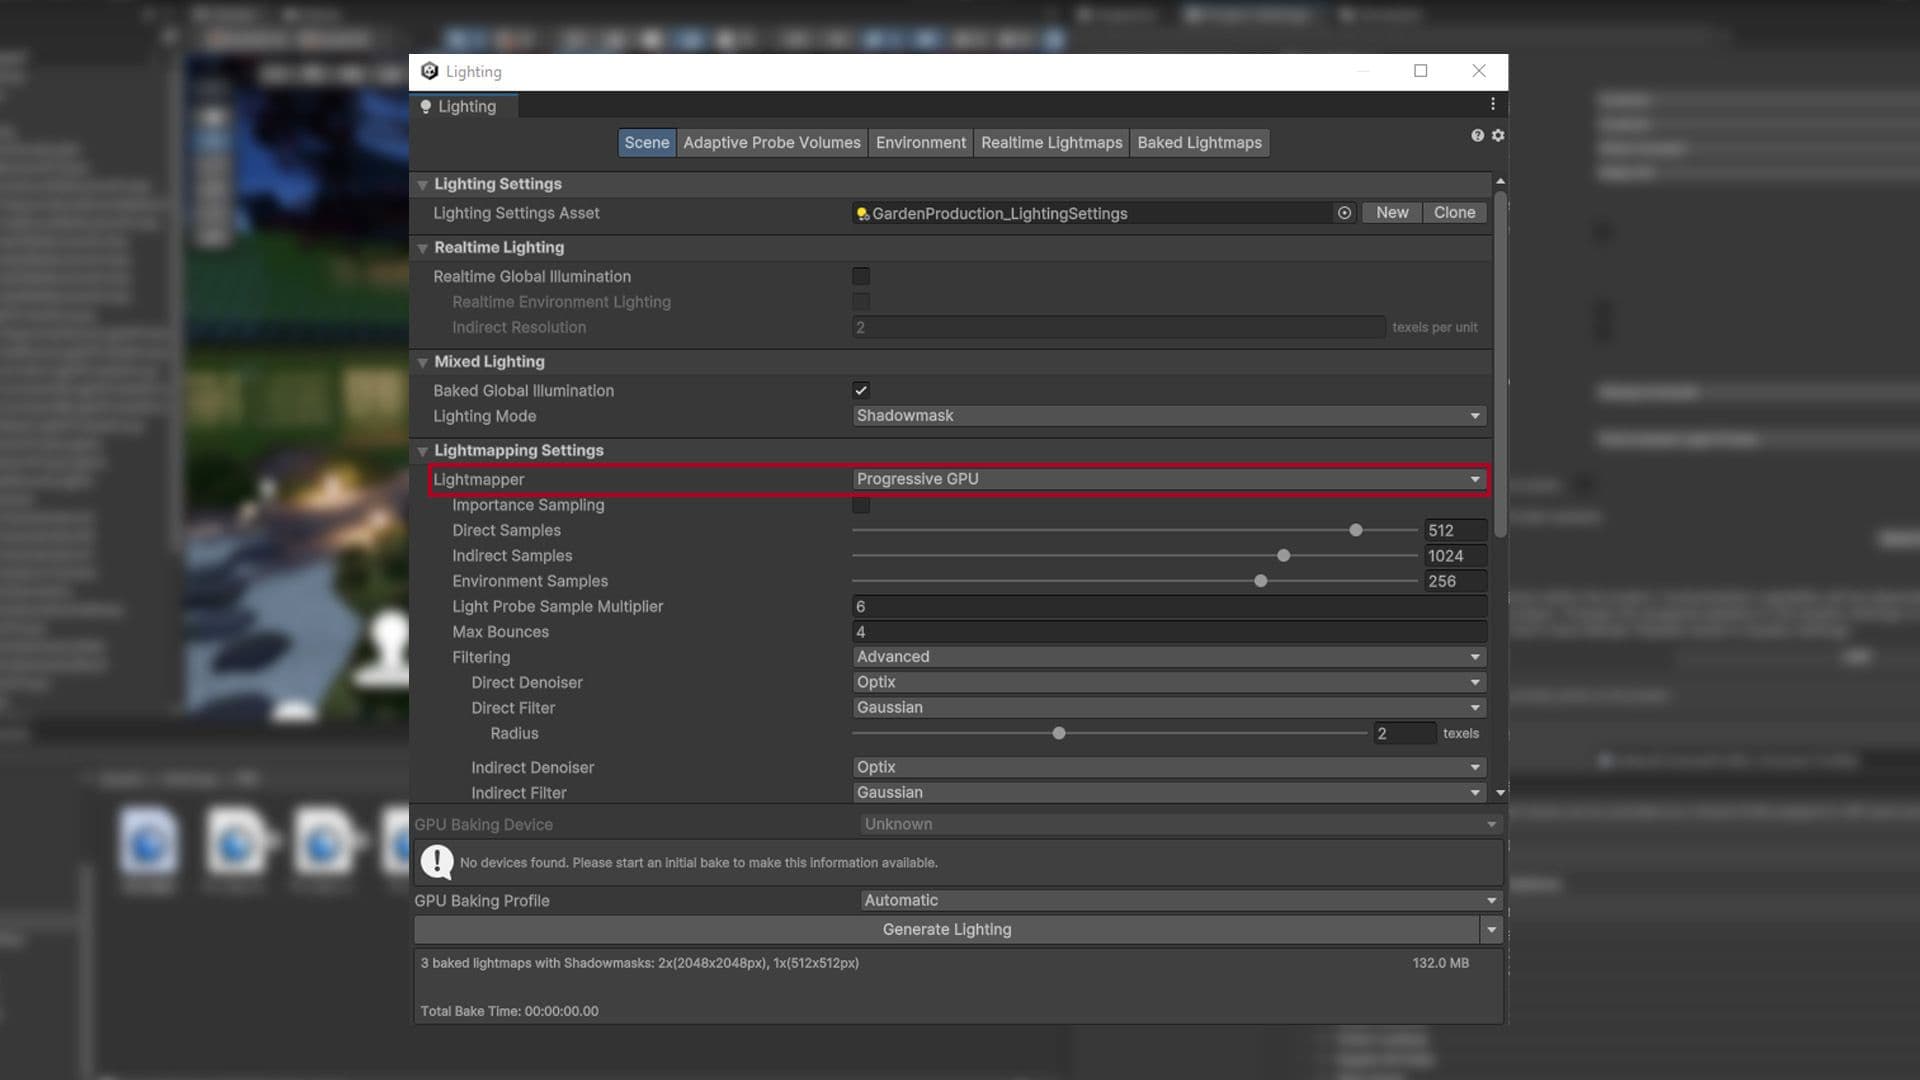
Complex scenes may require long bake times. If your hardware supports the Progressive GPU Lightmapper, this option can dramatically speed up your lightmap generation, up to tenfold in some cases.
Follow this guide to get started with Lightmapping in Unity.
Minimize Reflection Probes
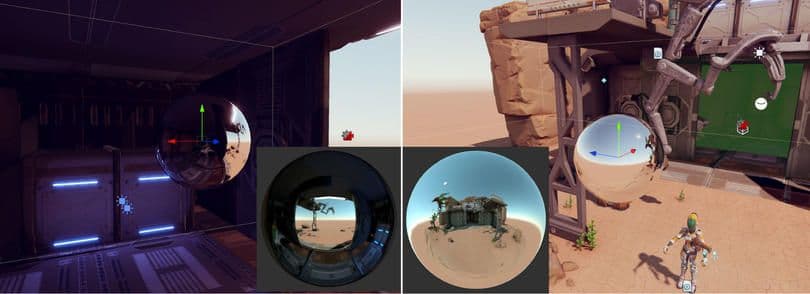
A Reflection Probe component can create realistic reflections, but this can be very costly in terms of batches. Use low-resolution cubemaps, culling masks, and texture compression to improve runtime performance. Use Type: Baked to avoid per-frame updates.
If using Type: Realtime is necessary in URP, avoid Every Frame if possible. Adjust the Refresh Mode and Time Slicing settings to reduce the update rate. You can also control the refresh with the Via Scripting option and render the probe from a custom script.
If using Type: Realtime is necessary in HDRP, use On Demand mode. You can also modify the Frame Settings in Project Settings > HDRP Default Settings. Reduce the quality and features under Realtime Reflection for improved performance.
Reduce the quality and features under Real-time Reflection for improved performance.
Use Adaptive Probe Volumes
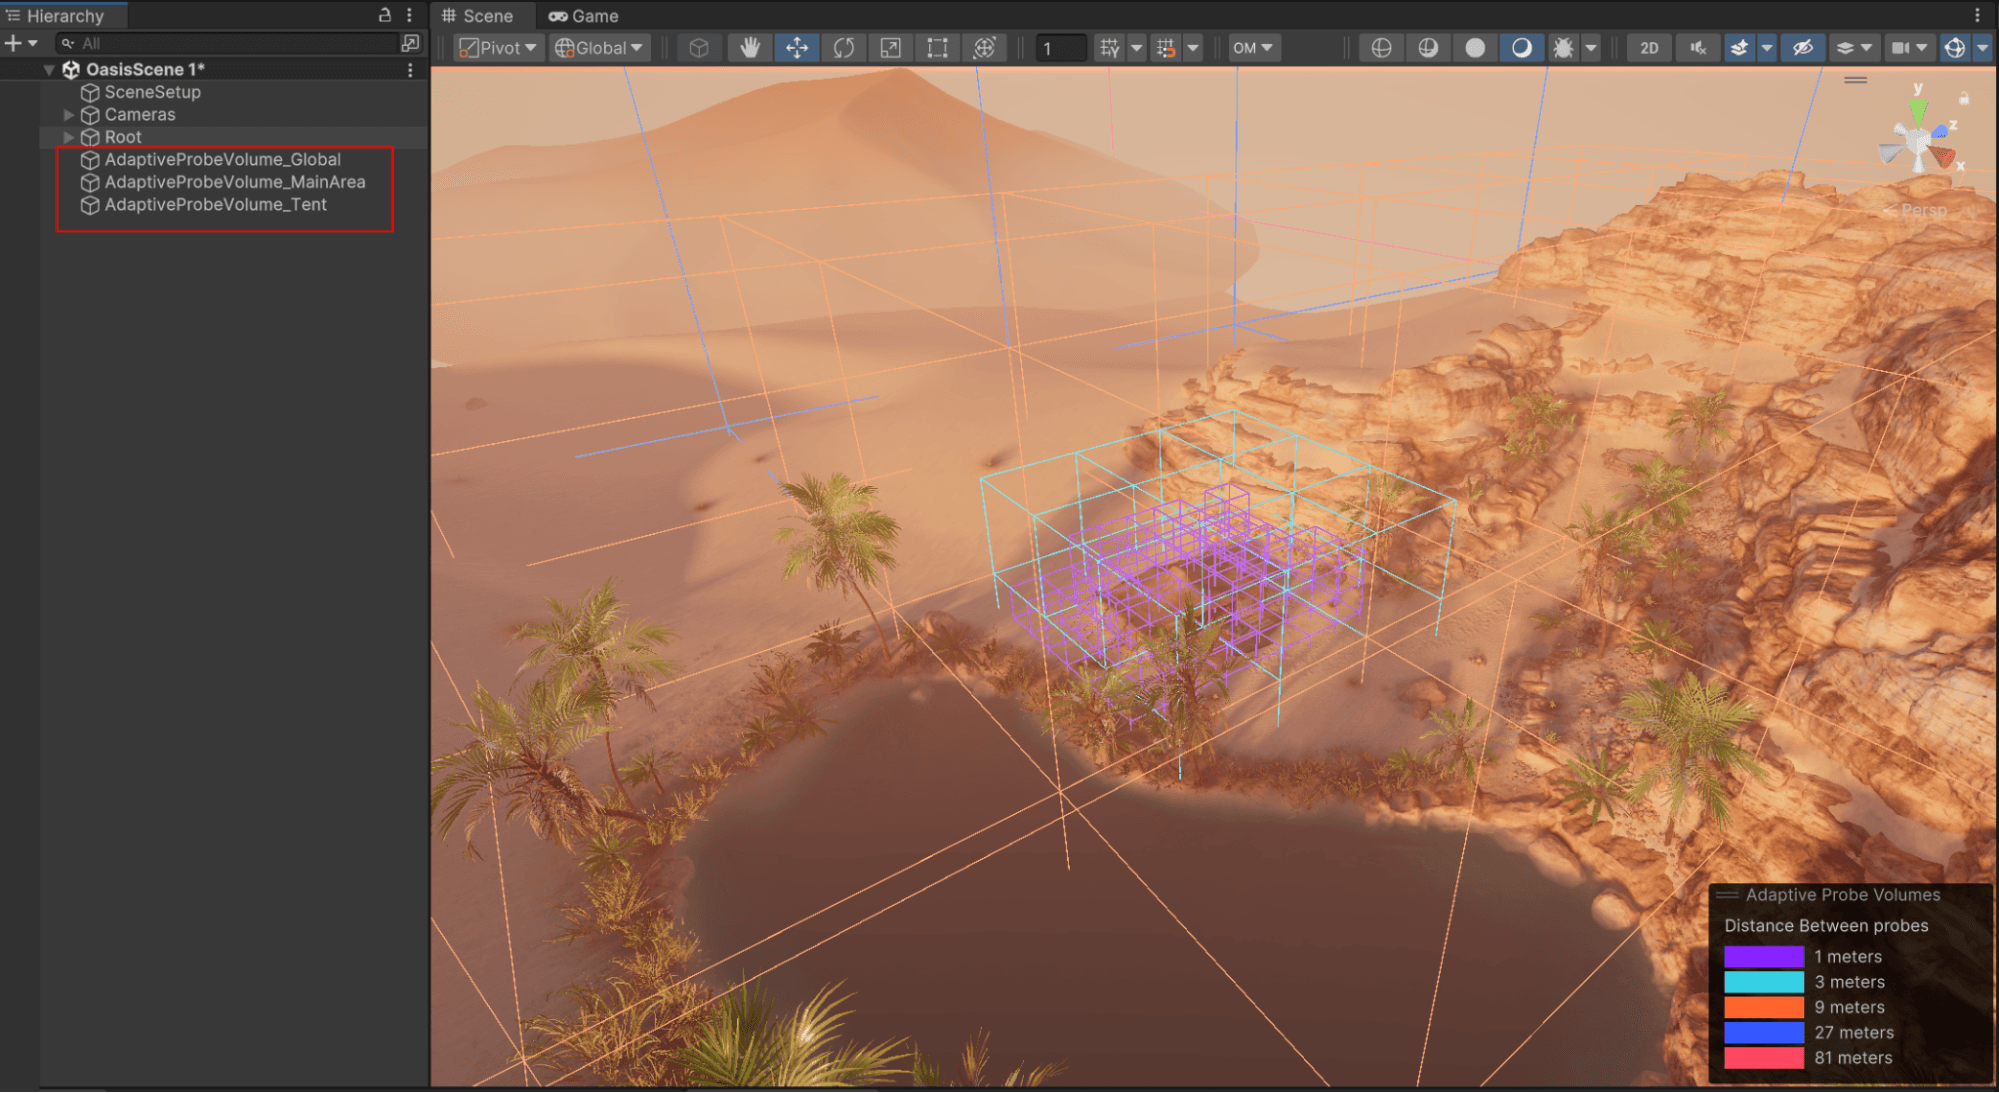
Unity 6 introduces Adaptive Probe Volumes (APVs) which provide a sophisticated solution for handling global illumination in Unity, allowing for dynamic and efficient lighting in complex scenes. APVs can optimize both performance and visual quality, particularly on mobile and lower-end devices, while offering advanced capabilities for high-end platforms.
APVs offer a range of features to enhance global illumination, particularly in dynamic and large scenes. URP now supports per-vertex sampling for improved performance on lower-end devices, while VFX particles benefit from indirect lighting baked into probe volumes.
APV data can be streamed from disk to CPU and GPU, optimizing lighting information for large environments. Developers can bake and blend multiple lighting scenarios, allowing real-time transitions like day/night cycles. The system also supports sky occlusion, integrates with the Ray Intersector API for more efficient probe calculations, and offers control over Light Probe sample density to reduce light leaking and speed up iterations. The new C# baking API also enables independent baking of APV from lightmaps or reflection probes.
To get started using APVs, check out the talk Efficient and impactful lighting with Adaptive Probe Volumes from GDC 2023.
Disable shadows
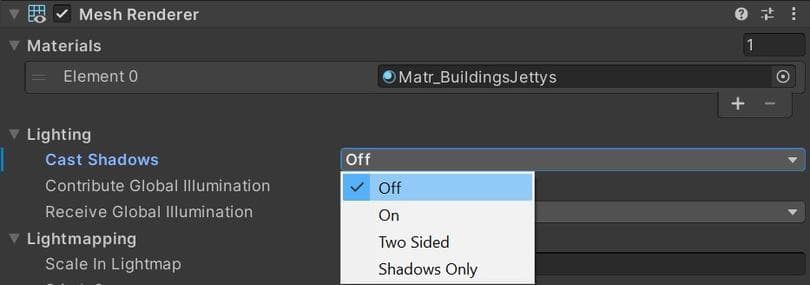
Shadow casting can be disabled per MeshRenderer and light. Disable shadows whenever possible to reduce draw calls.
You can also create fake shadows using a blurred texture applied to a simple mesh or quad underneath your characters. Otherwise, you can create blob shadows with custom shaders.
In particular, avoid enabling shadows for point lights. Each point light with shadows requires six shadow map passes per light – compare that with a single shadow map pass for a spotlight. Consider replacing point lights with spotlights where dynamic shadows are absolutely necessary. If you can avoid dynamic shadows, use a cubemap as a Light.cookie with your point lights instead.
Substitute a shader effect
In some cases, you can apply simple tricks rather than adding multiple extra lights. For example, instead of creating a light that shines straight into the camera to give a rim lighting effect, use a Shader which simulates rim lighting (see Surface Shader examples for an implementation of this in HLSL).
Use Light Layers
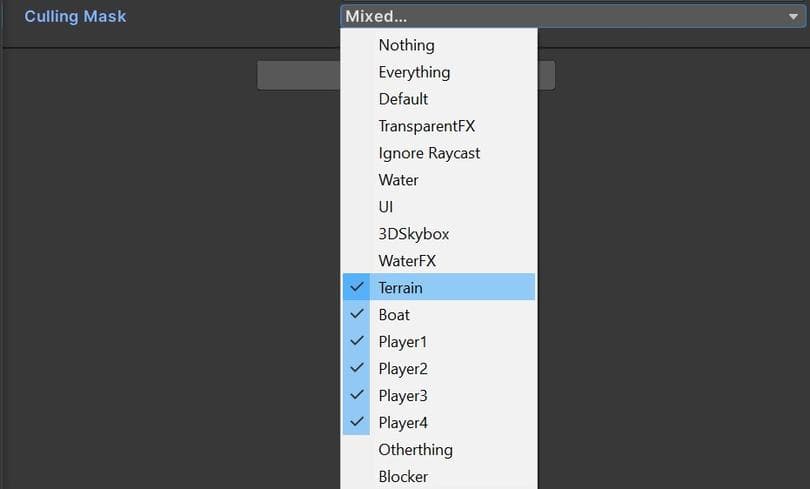
For complex scenes with many lights, separate your objects using layers, then confine each light’s influence to a specific Culling Mask.
Use the GPU Lightmapper
The GPU Lightmapper is production ready in Unity 6. It dramatically accelerates lighting data generation by leveraging the GPU, offering significantly faster bake times compared to traditional CPU lightmapping. It introduces a new light baking backend that simplifies the codebase and delivers more predictable results. Additionally, the minimum GPU requirement has been lowered to 2GB, and also includes a new API for moving light probe positions at runtime, which is particularly useful for procedurally generated content, alongside various quality-of-life improvements.

You can find many more best practices and tips for advanced Unity developers and creators from the Unity best practices hub. Choose from over 30 guides, created by industry experts, and Unity engineers and technical artists, that will help you develop efficiently with Unity’s toolsets and systems.