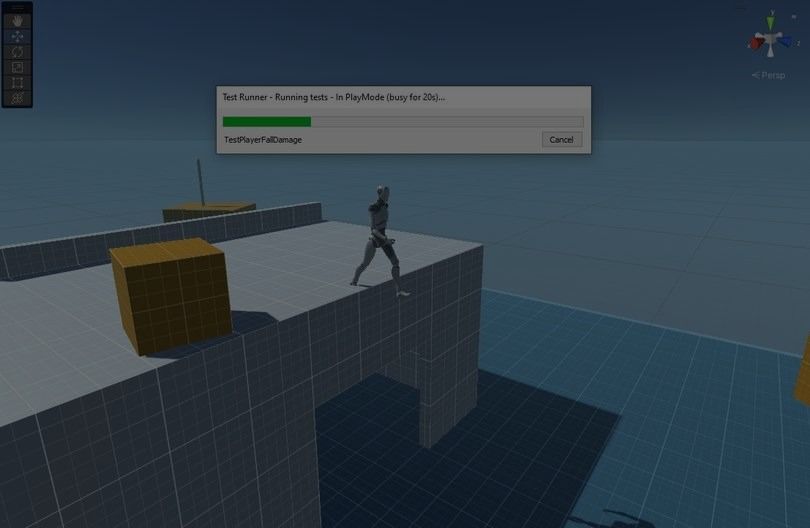
In game development, manual testing can quickly become repetitive and prone to error. Have you ever found yourself in one of these seemingly endless testing cycles as you work on a new feature or try to fix a bug?
By automating your code testing, you can spend more time on creative game development and less on repetitive (but important) QA tasks which ensure that adding, removing, or changing code does not break your project.
Unity helps you create, manage, and run automated tests for your games with the Unity Test Framework.
Unity Test Framework (UTF) allows you to test your project code in both Edit and Play modes. You can also target test code for various platforms such as standalone, iOS, or Android.
The UTF is installed by adding it to your project with the Package Manager.
Under the hood, UTF integrates with NUnit, which is a well-known open source testing library for .NET languages.
There are two main categories of tests you can write with UTF, Edit mode and Play mode:
Edit mode tests run in the Unity Editor and have access to both Editor and game code. This means you can test your custom Editor extensions or use tests to modify settings in the Editor and enter Play mode, which is useful for adjusting Inspector values and then running automated tests with many different settings.
Play mode tests let you exercise your game code at runtime. Tests are generally run as coroutines using the [UnityTest] attribute. This allows you to test code that can run across multiple frames. By default, Play mode tests will run in the Editor, but you can also run them in a standalone player build for various target platforms.
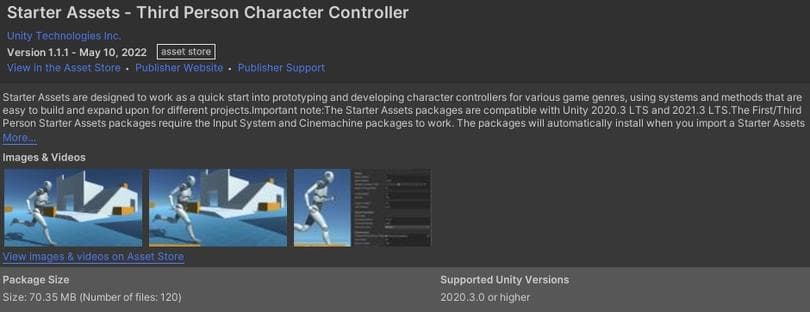
To follow along with this example, you’ll need to install the Starter Assets – Third Person Character Controller package from the Unity Asset Store and import it into a new project.
Install UTF via Window > Package Manager. Search for Test Framework under the Unity Registry in the Package Manager. Make sure to select version 1.3.3 (the latest version at time of writing).
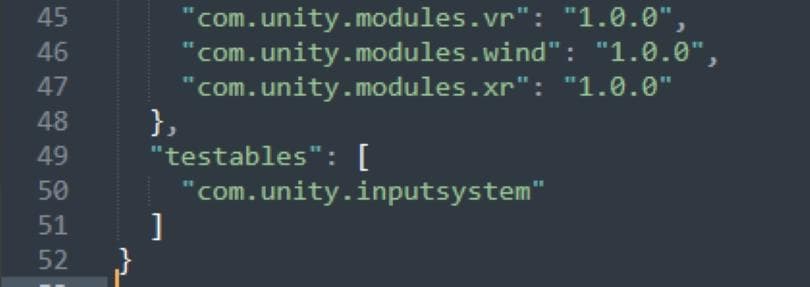
Once UTF is installed, open the Packages/manifest.json file with a text editor, and add a testables section after dependencies, like this:
,
"testables": [
"com.unity.inputsystem"
]
Save the file. This will be useful later on, when you’ll need to reference the Unity.InputSystem.TestFramework assembly for testing and emulating player input.
Return to the Editor and allow the newer version to install.
Click Window > General > Test Runner to view the Test Runner editor window.
In this part of the tutorial, the focus will be on creating Play mode tests. Rather than use the Create Test Assembly Folder options in the Test Runner Window, you’ll create them using the Project window.
With the root of your Project Assets folder highlighted, right-click and choose Create > Testing > Tests Assembly Folder.
A Tests project folder is added, containing a Tests.asmdef (assembly definition) file. This is required for tests to reference your game modules and dependencies.
The Character Controller code will be referenced in tests and will also need an assembly definition. Next, you’ll set up some assembly definitions and references to facilitate testing between the modules.
Right-click the Assets/StarterAssets/InputSystem project folder, and choose Create > Assembly Definition. Name it something descriptive, for example StarterAssetsInputSystem.
Select the new StarterAssetsInputSystem.asmdef file and, using the Inspector, add an Assembly Definition Reference to Unity.InputSystem. Click Apply.
Right-click the Assets/StarterAssets/ThirdPersonController/Scripts project folder, and choose Create > Assembly Definition. Name it something descriptive, for example ThirdPersonControllerMain.
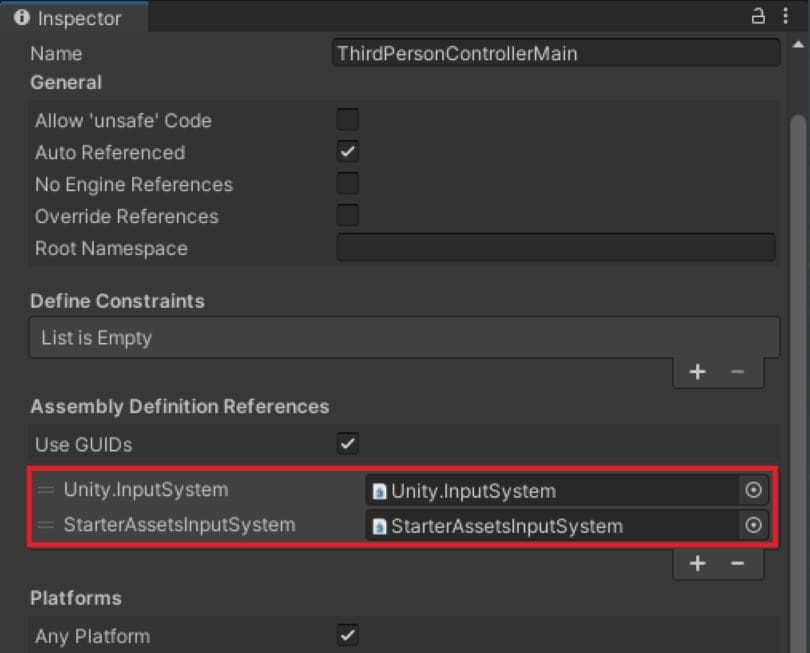
As you did with the previous assembly definition, open ThirdPersonControllerMain in the Inspector and select references for:
- Unity.InputSystem
- StarterAssetsInputSystem
Click Apply.
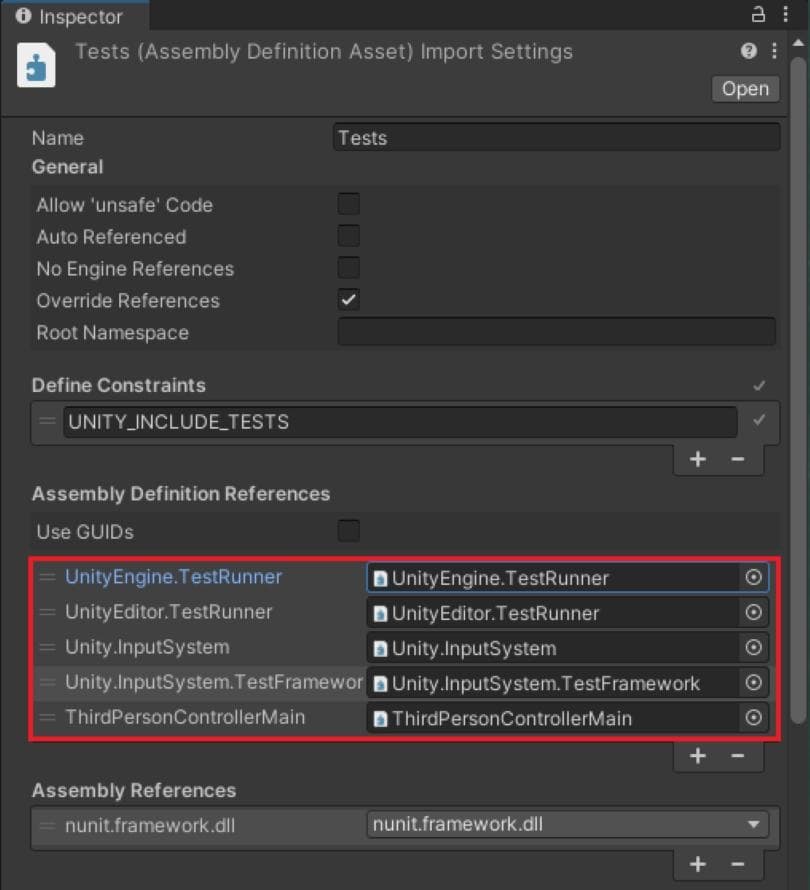
To emulate parts of the Input System, you’ll need to reference it in your tests. Additionally, you’ll need to reference the StarterAssets namespace in an assembly that you’ll create for the Third Person Controller code.
Open Tests.asmdef in the Inspector and add a reference to the following assembly definitions:
- UnityEngine.TestRunner
- UnityEditor.TestRunner
- Unity.InputSystem
- Unity.InputSystem.TestFramework
- ThirdPersonControllerMain
Click Apply.
Your first test will cover some basics around loading and moving the main character from the Third Person Controller package.
Start off by setting up the new project with a simple test environment scene and a character Prefab resource to work with.
Open the scene named Assets/StarterAssets/ThirdPersonController/Scenes/Playground.unity and save a copy of it using the File > Save As menu to this new path: Assets/Scenes/SimpleTesting.unity
If you notice pink materials in the Game view, use the Render Pipeline Converter to upgrade materials from the Built-In Render Pipeline to the Universal Render Pipeline (URP). See this article for a quick overview.
Create a new folder in your Project Assets folder called Resources. Note: The folder name “Resources” is important here to allow for the Unity Resources.Load() method to be used.
Drag and drop the PlayerArmature GameObject in the Scene view into the new Resources folder, and choose to create an Original Prefab when prompted. Rename the Prefab asset Character.
This will be the base character Prefab used in your tests going forward.
Remove the PlayerArmature GameObject from the new SimpleTesting scene, and save the changes to the scene.
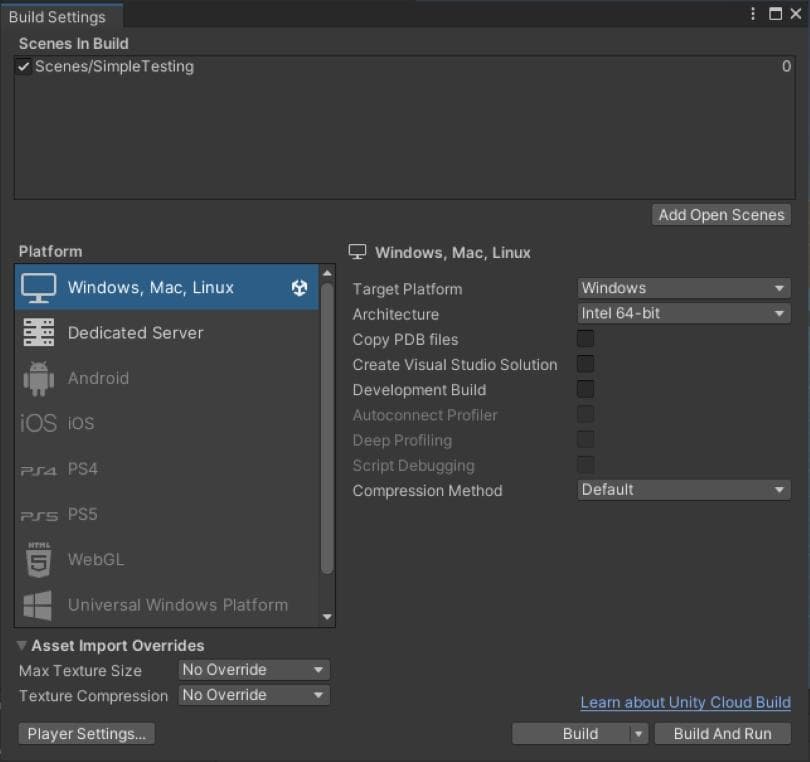
For the last step in the initial test setup, go to File > Build Settings, and choose Add Open Scenes to add the Scenes/SimpleTesting scene to the build settings.
Select the Tests folder in the Project Assets folder. Right-click and choose Create > Testing > C# Test Script.
Name the new Script CharacterTests. Open the script in your IDE to take a closer look.
Two method stubs are supplied with the initial class file, demonstrating some test basics.
Next, you’ll ensure tests load a “testing focused” game scene. This should be a scene containing the bare minimum required to test the system or component you’re focusing on.
Update the CharacterTests class to add two new using statements, and implement the InputTestFixture class:
using UnityEngine.InputSystem;
using UnityEngine.SceneManagement;
public class CharacterTests : InputTestFixture
Add two private fields to the top of the CharacterTests class:
GameObject character = Resources.Load<GameObject>("Character");
Keyboard keyboard;
The character field will store a reference to the Character Prefab, loaded from the Resources folder. Keyboard will hold a reference to the Keyboard input device provided by the InputSystem.
Override the base InputTestFixture class’ Setup() method by providing your own in the CharacterTests class:
public override void Setup()
{
SceneManager.LoadScene("Scenes/SimpleTesting");
base.Setup();
keyboard = InputSystem.AddDevice<Keyboard>();
var mouse = InputSystem.AddDevice<Mouse>();
Press(mouse.rightButton);
Release(mouse.rightButton);;
}
The Setup() method runs the base class Setup() method and then sets up your own CharacterTests class by loading the test scene and initializing the keyboard input device.
The mouse input is added purely for the Third Person Controller to begin to receive input from the simulated/virtual keyboard device. This is almost like a ‘set focus’ action.
For your first test, you’ll instantiate the character from the Prefab and assert that it is not null. Add the following method to your test class:
[Test]
public void TestPlayerInstantiation()
{
GameObject characterInstance = GameObject.Instantiate(character, Vector3.zero, Quaternion.identity);
Assert.That(characterInstance, !Is.Null);
}
While you’re there, you might want to clean up the sample template test methods. Remove the CharacterTestsSimplePasses and CharacterTestsWithEnumeratorPasses methods.

Save the script and head back to the Test Runner window in the Editor. Highlight the TestPlayerInstantiation test and click Run Selected.
The green checkmark signifies a passing test. You have asserted that the character can be loaded from resources, instantiated into the test scene, and is not null at that point.
You might have noticed that the [Test] annotation was used for this test instead of the [UnityTest] annotation. The UnityTest attribute allows coroutines to run tests over multiple frames. In this case, you just need to instantiate the character and assert that it was loaded.
Generally, you should use the NUnit Test attribute instead of the UnityTest attribute in Edit mode, unless you need to yield special instructions, need to skip a frame, or wait for a certain amount of time in Play mode.
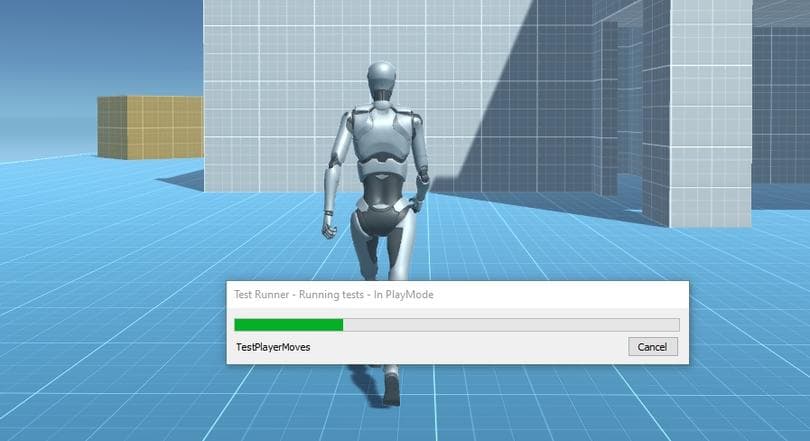
Next, you’ll use the UnityTest as you assert that holding down the forward controller key moves the character forward.
Add the new test method provided below to your CharacterTests class.
Two new test helper methods have appeared; Press() and Release(). These are both provided by the InputTestFixture base class and help you by emulating InputSystem control pressing and releasing.
The TestPlayerMoves() method does the following:
Instantiates an instance of the character from the character Prefab at location (X: 0, Y: 0, Z: 0)
Presses the up arrow key on the virtual keyboard for 1 second, then releases it
Waits 1 more second (for the character to slow down and stop moving)
Asserts that the character has moved to a position on the Z axis greater than 1.5 units.
Save the file, return to the Test Runner, and run the new test.
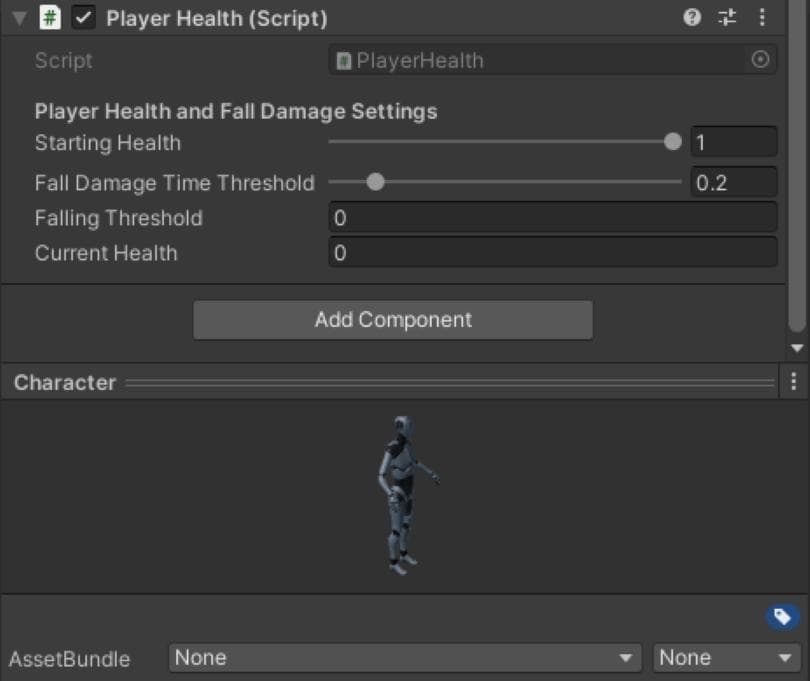
Next, you’ll test a custom Monobehaviour script by adding a simple Player Health component.
Create a new script under Assets/StarterAssets/ThirdPersonController/Scripts. Name it PlayerHealth.
Open the script in your IDE and replace the contents with the code provided below.
There is a lot of new code added here. To summarize it, this script will determine if the player character is in a falling state. If the ground is hit once in a falling state, then the character’s health is reduced by 10%.
Locate the Character Prefab under Assets/Resources. Open the Prefab and add the new PlayerHealth script component.
Next, you’ll use the test scene to assert that the player’s health drops after falling off a ledge.
Using the [UnityTest] attribute, you can write a Play mode test that tests for fall damage. When falling for more than 0.2 seconds, the player should take 0.1f damage (the equivalent of 10% of the maximum health).
In the SimpleTesting scene, you’ll see a staircase leading up to a ledge. This is a test platform to spawn the character on top of and test the PlayerHealth script.
Open CharacterTests.cs again and add a new test method named TestPlayerFallDamage:
[UnityTest]
public IEnumerator TestPlayerFallDamage()
{
// spawn the character in a high enough area in the test scene
GameObject characterInstance = GameObject.Instantiate(character, new Vector3(0f, 4f, 17.2f), Quaternion.identity);
// Get a reference to the PlayerHealth component and assert currently at full health (1f)
var characterHealth = characterInstance.GetComponent<PlayerHealth>();
Assert.That(characterHealth.Health, Is.EqualTo(1f));
// Walk off the ledge and wait for the fall
Press(keyboard.upArrowKey);
yield return new WaitForSeconds(0.5f);
Release(keyboard.upArrowKey);
yield return new WaitForSeconds(2f);
// Assert that 1 health point was lost due to the fall damage
Assert.That(characterHealth.Health, Is.EqualTo(0.9f));
}
You will also need to add a using reference to the StarterAssets namespace at the very top of the class file:
using StarterAssets;
The test above follows a typical arrange, act, assert (AAA) pattern, commonly found in testing:
The Assert section verifies that the action of the method under test behaves as expected.
Next, you’ll test a custom Monobehaviour script by adding a simple Player Health component.
Create a new script under Assets/StarterAssets/ThirdPersonController/Scripts. Name it PlayerHealth.
Open the script in your IDE and replace the contents with the code provided below.
There is a lot of new code added here. To summarize it, this script will determine if the player character is in a falling state. If the ground is hit once in a falling state, then the character’s health is reduced by 10%.
Locate the Character Prefab under Assets/Resources. Open the Prefab and add the new PlayerHealth script component.
Next, you’ll use the test scene to assert that the player’s health drops after falling off a ledge.
Using the [UnityTest] attribute, you can write a Play mode test that tests for fall damage. When falling for more than 0.2 seconds, the player should take 0.1f damage (the equivalent of 10% of the maximum health).
In the SimpleTesting scene, you’ll see a staircase leading up to a ledge. This is a test platform to spawn the character on top of and test the PlayerHealth script.
Open CharacterTests.cs again and add a new test method named TestPlayerFallDamage:
[UnityTest]
public IEnumerator TestPlayerFallDamage()
{
// spawn the character in a high enough area in the test scene
GameObject characterInstance = GameObject.Instantiate(character, new Vector3(0f, 4f, 17.2f), Quaternion.identity);
// Get a reference to the PlayerHealth component and assert currently at full health (1f)
var characterHealth = characterInstance.GetComponent<PlayerHealth>();
Assert.That(characterHealth.Health, Is.EqualTo(1f));
// Walk off the ledge and wait for the fall
Press(keyboard.upArrowKey);
yield return new WaitForSeconds(0.5f);
Release(keyboard.upArrowKey);
yield return new WaitForSeconds(2f);
// Assert that 1 health point was lost due to the fall damage
Assert.That(characterHealth.Health, Is.EqualTo(0.9f));
}
You will also need to add a using reference to the StarterAssets namespace at the very top of the class file:
using StarterAssets;
The test above follows a typical arrange, act, assert (AAA) pattern, commonly found in testing:
The Arrange section of a unit test method initializes objects and sets the value of the data that is passed to the method under test.
The Act section invokes the method under test with the arranged parameters. In this case, invoking the method under test is handled by a physics interaction when the player hits the ground after falling.
The Assert section verifies that the action of the method under test behaves as expected.
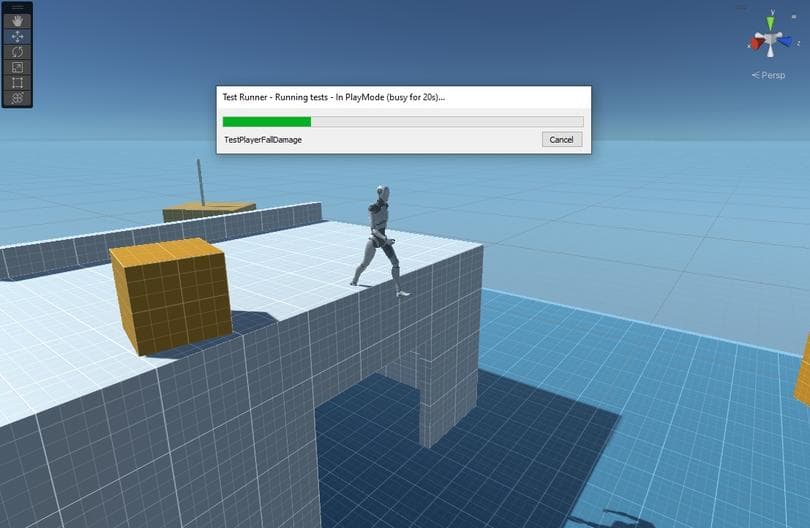
Back in the Editor, run the new test. Running in Play mode, you’ll see the character walk off the edge, fall (exceeding the 0.2 second threshold to categorize a fall), and take damage after hitting the ground.
Tests not only serve the purpose of testing that code changes do not break functionality, they can also serve as documentation or pointers to help developers think about other aspects of the game when tweaking settings.

As mentioned earlier, running Play mode tests in the Test Runner by default runs them in Play mode using the Unity Editor. You can change them to run under a standalone player too.
Use the Run Location drop-down selection in the Test Runner window to switch tests to run in Standalone player builds.
Once you have started to build a suite of tests, the next step is to run them automatically after builds are complete. Automated unit and integration tests that run after build are useful for catching regressions or bugs as early as possible. They can also run as part of a remote automated build system in the cloud.
Oftentimes you will want to capture test run results in a custom format so that results can be shared with a wider audience. In order to capture test results outside of the Unity Editor, you’ll need to split up the build and run processes.
Create a new script in your Tests project folder named SetupPlaymodeTestPlayer.
The SetupPlaymodeTestPlayer class will implement the ITestPlayerBuildModifier interface. You’ll use this to override and “hook” into the ModifyOptions method, which receives the build’s player options, and allows you to modify them.
using System.IO;
using UnityEditor;
using UnityEditor.TestTools;
[assembly: TestPlayerBuildModifier(typeof(SetupPlaymodeTestPlayer))]
public class SetupPlaymodeTestPlayer : ITestPlayerBuildModifier
{
public BuildPlayerOptions ModifyOptions(BuildPlayerOptions playerOptions)
{
playerOptions.options &= ~(BuildOptions.AutoRunPlayer | BuildOptions.ConnectToHost);
var buildLocation = Path.GetFullPath("TestPlayers");
var fileName = Path.GetFileName(playerOptions.locationPathName);
if (!string.IsNullOrEmpty(fileName))
buildLocation = Path.Combine(buildLocation, fileName);
playerOptions.locationPathName = buildLocation;
return playerOptions;
}
}
This custom Player Build modifier script does the following when tests are run in Play mode (Run Location: On Player):
Disables auto-run for built players and skips the player option that tries to connect to the host it is running on
Changes the build path location to a dedicated path within the project (TestPlayers)
With this complete, you can now expect builds to be located in the TestPlayers folder whenever they finish building. This now completes the build modifications and severs the link between build and run.
Next, you’ll implement result reporting. This will allow you to write test results out to a custom location, ready for automated report generation and publishing.
Create a new script in your Tests project folder named ResultSerializer (provided below). This class will use an assembly reference to TestRunCallback and implement the ITestRunCallback interface.
This implementation of ITestRunCallback includes a customized RunFinished method, which is what sets up a player build with tests to write out the test results to an XML file named testresults.xml.
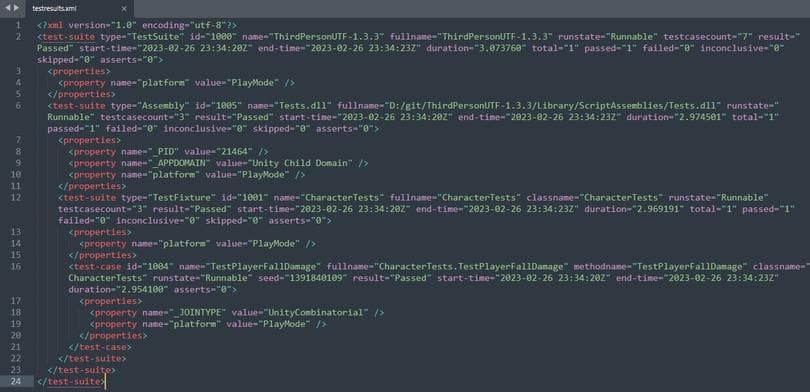
With SetupPlaymodeTestPlayer.cs and ResultSerializer.cs combined, the build and run processes are now split. Running tests will output the results to testresults.xml located on the player platform’s Application.persistentDataPath location.
To use some of the types in these hook classes, you’ll need to add an extra reference to Tests.asmdef. Update it to add the UnityEditor.UI.EditorTests assembly definition reference.
Running the Tests in the Player will now yield a player build output under your project in the TestPlayers folder and a testresults.xml file in the Application.persistentDataPath location.

Unity Test Framework course
The Test Framework package includes a testing course featuring sample exercises to help you learn more about testing with Unity. Be sure to grab the project files for the course using the Package Manager.
Using Package Manager > Packages: Unity Registry > Test Framework, locate the Samples drop-down list and import the course exercises.
The exercises will be imported into your project and located under Assets/Samples/Test Framework. Each sample includes an exercise folder for you to work under, as well as a solution to compare your own work against as you follow along.
QA your code with UTF
This Unite Copenhagen talk about UTF goes into more detail and offers some other interesting use cases for test customization. Be sure to check it out to see what else is possible.
Debugging in Unity
Speed up your debugging workflow in Unity with articles on:
- Microsoft Visual Studio 2022
- Microsoft Visual Studio Code
Advanced technical e-books
Unity provides a number of advanced guides to help professional developers optimize game code. Create a C# style guide: Write cleaner code that scales compiles advice from industry experts on how to create a code style guide to help your team develop a clean, readable, and scalable codebase.
Another popular guide with our users is 70+ tips to increase productivity with Unity. It’s packed with time-saving tips to improve your day-to-day aggregate workflow with Unity 2020 LTS, including tips even experienced developers might have missed out on.
Documentation
Explore the latest TestRunner API further, learn about other UTF Custom attributes, and discover further lifecycles to hook into with the UTF documentation.
Find all of Unity’s advanced e-books and articles in the Unity best practices hub.