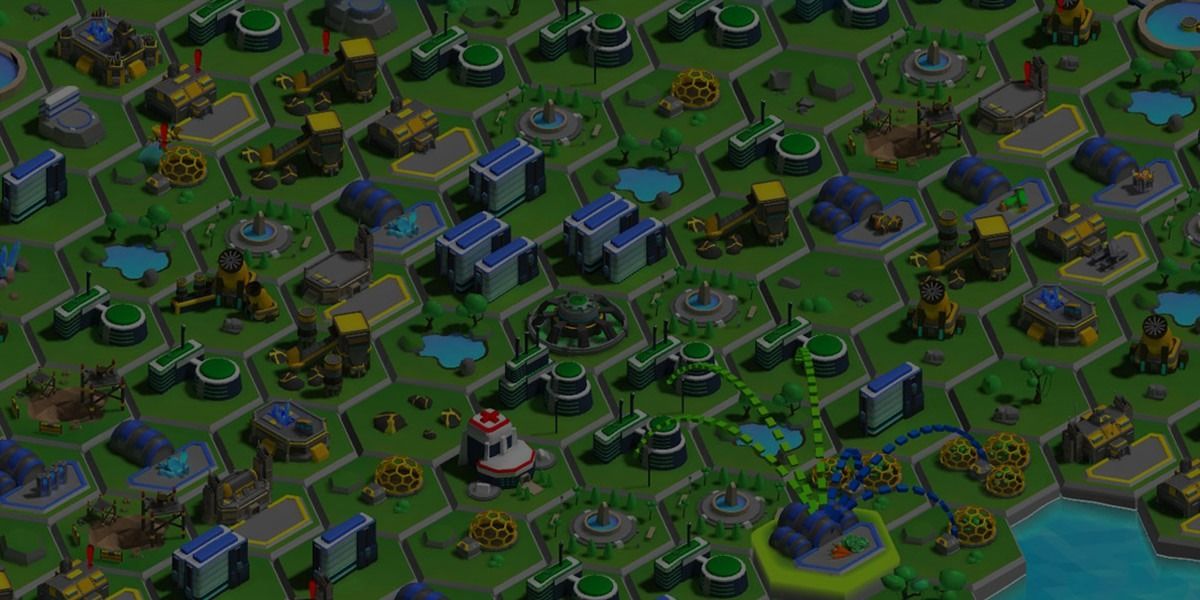
What you will get from this page: tips from Michelle Martin, software engineer at MetalPop Games, on how to optimize games for a range of mobile devices, so you can reach as many potential players as possible.
With their mobile strategy game, Galactic Colonies, MetalPop Games faced the challenge of making it possible for players to build huge cities on their low-end devices, without their frame rate dropping or their device overheating. See how they found a balance between good-looking visuals and solid performance.
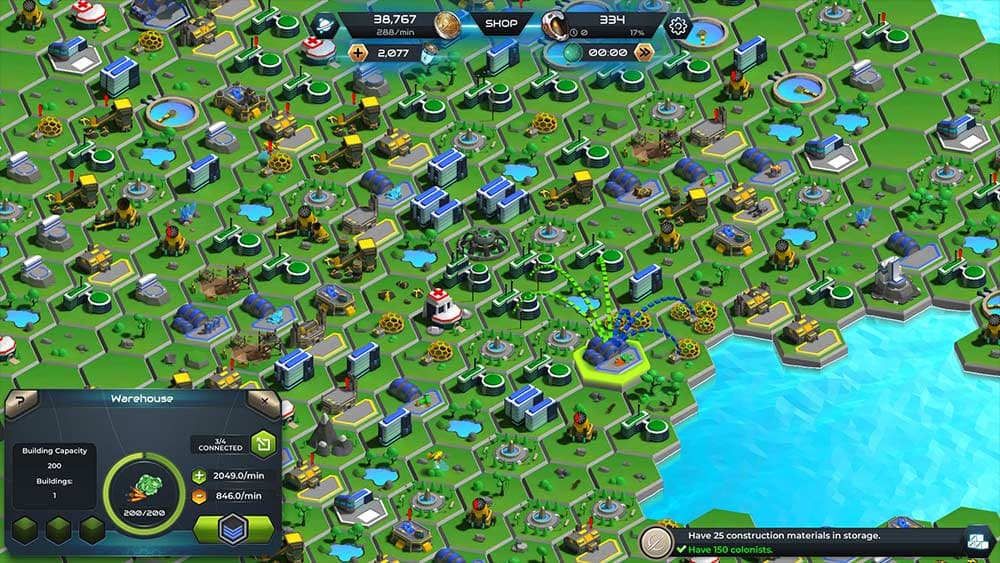
As powerful as mobile devices are today, it’s still difficult to run large and good looking game environments at a solid frame rate. Achieving solid 60fps in a large-scale 3D environment on an older mobile device can be a challenge.
As developers, we could just target high-end phones and assume that most players will have hardware sufficient to run our game smoothly. But this will result in locking out a huge amount of potential players, as there are still many older devices in use. Those are all potential customers you don’t want to exclude.
In our game, Galactic Colonies, players colonize alien planets and build huge colonies made up from a large number of individual buildings. While smaller colonies might only have a dozen buildings, larger ones can easily have hundreds of them.
This is what our goal list looked like when we started building our pipeline:
Good lighting in your game is key to making the 3D models look great. In Unity that is easy: set up your level, place your dynamic lights and you are good to go. And if you need to keep an eye on performance, just bake all your lights and add some SSAO and other eye candy via the post-processing stack. There you go, ship it!
For mobile games you need a good bag of tricks and workarounds to set up lighting. For example, unless you target high-end devices you don’t want to use any post-processing effects. Likewise, a large scene full of dynamic lights will also lower your framerate drastically.
Realtime lighting can be expensive on a desktop PC. On mobile devices resource limitations are even tighter and you can’t always afford all those nice features you’d like to have.
So, you don’t want to drain your users’ phone batteries more than necessary by having too many fancy lights in your scene.
If you constantly push the hardware’s limits, the phone will run hot–and consequently, throttle down to protect itself. To avoid this you can bake every light that doesn’t cast realtime shadows.
The process of light baking is the precalculation of highlights and shadows for a (static) scene the information for which is then stored in a lightmap. The renderer then knows where to make a model lighter or darker, creating the illusion of light.
Rendering things this way is fast because all the expensive and slow light calculations have been done offline, and at runtime the renderer (shader) just needs to look the result up in a texture.
The tradeoff here is that you will have to ship some extra lightmap textures, which will increase your build size and require some extra texture memory at runtime. You will also lose some space because your meshes will need lightmap UVs and get a bit bigger. But overall you will gain a tremendous speed boost.
But for our game this was not an option, since the game world is built in real-time by the player. The fact that new regions are constantly being discovered, new buildings added or existing ones upgraded, prevents any kind of efficient light baking. Simply hitting the Bake buttton will not work when you have a dynamic world which can be constantly changed by the player.
Therefore, we faced a number of problems that arise when baking lights for highly modular scenes.
Light-baking data in Unity is stored and directly associated with the scene data. This is not a problem if you have individual levels and pre-built scenes and only a handful of dynamic objects. You can prebake the lighting and be done.
Obviously, this doesn’t work when you create levels dynamically. In a city building game, the world isn’t pre-created. Instead it is largely assembled dynamically and on-the-fly by the player’s decision of what to build and where to build it. This is usually done by instantiating Prefabs wherever the player decides to build something.
The only solution to this problem is to store all relevant light-baking data inside the Prefab instead of the scene. Unfortunately there is no easy way to copy the data of which lightmap to use, its coordinates, and scale into a Prefab.
The best approach to achieve a solid pipeline that handles light baked Prefabs is to create the Prefabs in a different, separate scene (multiple scenes, in fact) and then load them into the main game when needed. Each modular piece is light baked and will then be loaded into the game when needed.
Take a close look at how light baking works in Unity and you’ll see that rendering a light baked mesh is really just applying another texture to it, and brightening, darkening (or sometimes colorizing) the mesh a bit. All you need is the lightmap texture and the UV coordinates, both of which are created by Unity during the light baking process.
During the light baking, process Unity creates a new set of UV coordinates (which point to the lightmap texture) and an offset and scale for the individual mesh. Re-baking lights changes these coordinates each time.
To develop a solution for this problem it’s helpful to understand how UV channels work and how to utilize them best.
Each mesh can have multiple sets of UV coordinates (called UV channels in Unity). In the majority of cases, one set of UVs is enough, as the different textures (Diffuse, Spec, Bump, etc) all store the information in the same place in the image.
But when objects share a texture, such as a lightmap, and need to look up the information of a specific place in one large texture, there’s often no way around adding another set of UVs to use with this shared texture.
The drawback of multiple UV coordinates is that they consume additional memory. If you use two sets of UVs instead of one, you double the amount of UV coordinates for every single one of the mesh’s vertices. Every vertex now stores two floating-point numbers, which are uploaded to the GPU when rendering.
Unity generates the coordinates and the lightmap, using the regular light baking functionality. The engine will write the UV coordinates for the lightmap into the second UV channel of the model. It’s important to note that the primary set of UV coordinates can’t be used for this, because the model needs to be unwrapped.
Imagine a box using the same texture for each of its sides: The individual sides of the box all have the same UV coordinates, because they reuse the same texture. But this won’t work for a lightmapped object, since each side of the box is hit by lights and shadows individually. Each side needs its own space in the lightmap with its individual lighting data. Hence, the need for a new set of UVs.
In order to set up a new light-baked Prefab, all we need to do is store both the texture and it’s coordinates so that they aren’t lost and copy them into the Prefab.
After the light baking is done, we run a script that runs through all the meshes in the scene and writes the UV coordinates into the actual UV2 channel of the mesh, with the values for offset and scaling applied.
The code to modify the meshes is relatively straight forward (see below example).
To be more specific: This is done to a copy of the meshes, and not the original, because we’ll do further optimizations to our meshes during the baking process.
The copies are automatically generated, saved into a Prefab, and assigned a new material with a custom shader and the newly created lightmap. This leaves our original meshes untouched, and the light-baked Prefabs are immediately ready to use.
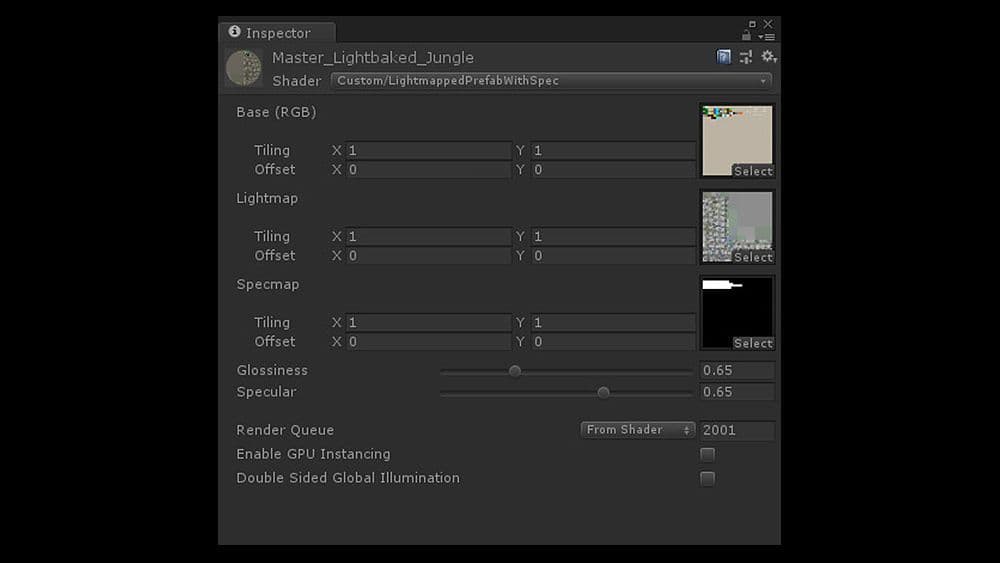
This makes the workflow very simple. To update the style and look of the graphics, just open the appropriate scene, make all modifications until you’re happy, and then start the automated bake-and-copy process. When this process finishes the game will start using the updated Prefabs and meshes with the updated lighting.
The actual lightmap texture is added by a custom shader, which applies the lightmap as a second light texture to the model during rendering. The shader is very simple and short, and aside from applying the color and lightmap, it calculates a cheap, fake specular/gloss effect.
Here is the shader code; the image above is of a material setup using this shader.
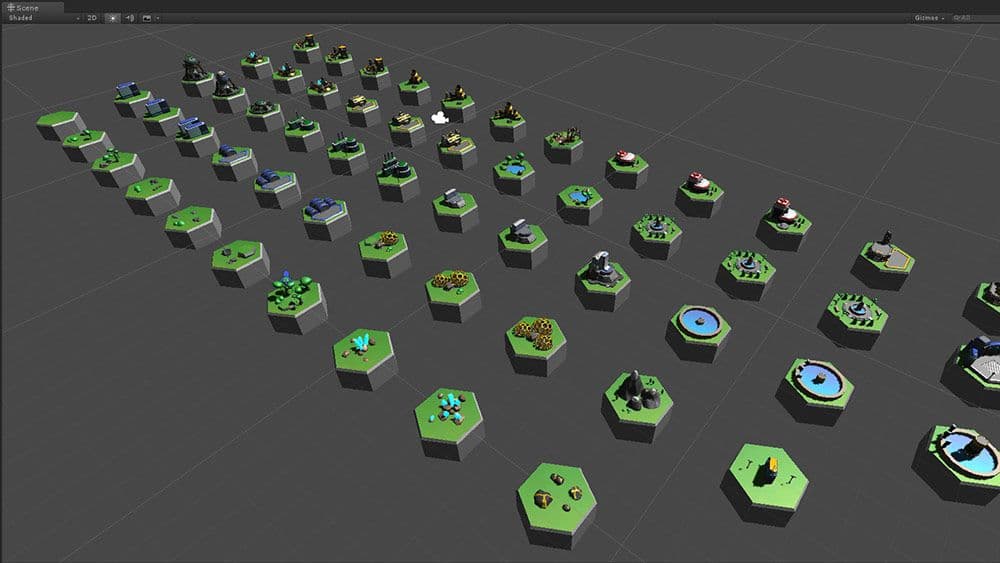
In our case we have four different scenes with all the Prefabs set up. Our game features different biomes such as tropical, ice, desert, etc. and we split up our scenes accordingly.
All the Prefabs which are used in a given scene share a single lightmap. This means one single extra texture, in addition to the Prefabs sharing only one material. As a result we were able to render all models as static and batch render almost our entire world in only one draw call.
The light baking scenes, wherein all of our tiles/buildings are set up, have extra light sources to create localized highlights. You can place as many lights in the setup scenes as you need since they will all be baked down anyway.
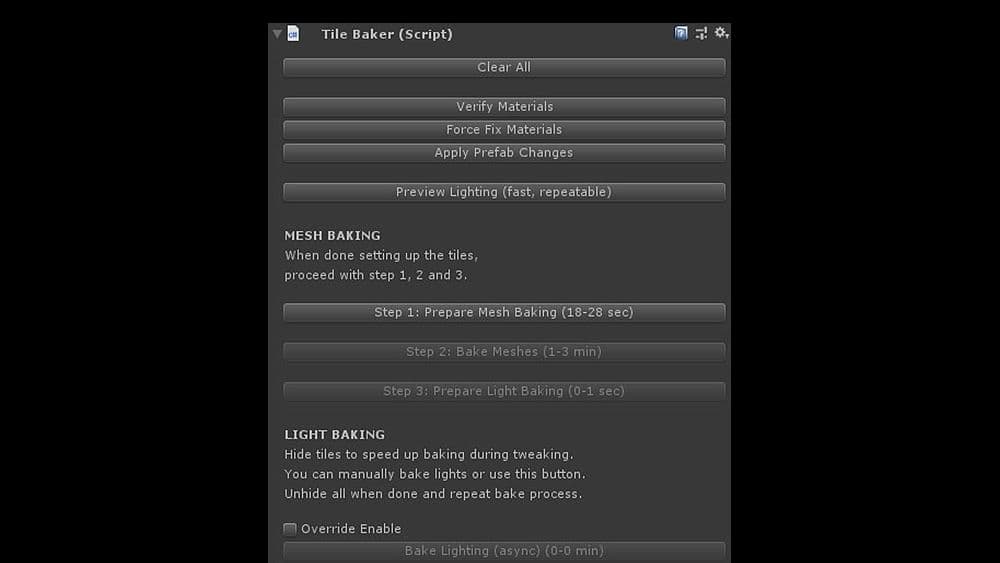
The bake process is handled in a custom UI dialog which takes care of all the necessary steps. It ensures that:
Properly named Prefabs are created out of the meshes so that the game code can load and use them directly. The meta files are also changed during this process, so that references to the meshes of Prefabs don’t get lost.
This workflow allows us to tweak our buildings as much as we want to, light them the way we like them, and then let the script take care of everything.
When we switch back to our main scene and run the game, it just works - no manual involvement or other updates necessary.

One of the obvious drawbacks of a scene in which 100% of the lighting is pre-baked, is that it’s difficult to have any dynamic objects or motion. Anything that throws a shadow would require realtime light and shadow calculation, which, of course, we would like to avoid altogether.
But without any moving objects, the 3D environment would just appear static and dead.
We were willing to live with some restrictions of course, as our top priority was achieving good visuals and fast rendering. To create the impression of a living, moving space colony or city, not a whole lot of objects needed to actually move around. And most of these didn’t necessarily require shadows, or at least the shadows’ absence wouldn’t be noted.
We started by splitting all the city building blocks into two separate Prefabs. A static portion, which contained the majority of vertices, all the complex bits of our meshes - and a dynamic one, containing as few vertices as possible.
The dynamic portions of a Prefab are animated bits placed on top of the static ones. They are not light-baked and we used a very fast and cheap fake lighting shader to create the illusion that the object was dynamically lit.
The objects also either have no shadow, or we created a fake shadow as part of the dynamic bit. Most of our surfaces are flat, so in our case that wasn’t a big obstacle.
There are no shadows on the dynamic bits but it’s barely noticeable, unless you know to look for it. The lighting of the dynamic Prefabs is also fake–there is no realtime lighting at all.
The first cheap shortcut we took was to hardcode the position of our light source (sun) into the fake lighting shader. It’s one less variable the shader needs to look up and fill dynamically from the world.
It’s always faster to work with a constant than a dynamic value. This got us basic lighting, light and dark sides of the meshes.
To make things a bit shinier we added a fake specular/gloss calculation to the shaders for both the dynamic and the static objects. Specular reflections help to create a metallic look but convey the curvature of a surface.
Since specular highlights are a form of reflection, the angle of the camera and the light source relative to each other is required to correctly calculate it. When the camera moves or rotates, the specular changes. Any shader calculating would require access to the camera position and every light source in the scene.
However, in our game, we only have one light source that we’re using for specular: the sun. In our case, the sun never moves and can be considered a directional light. We can simplify the shader a lot by using only one single light and assuming a fixed position and incoming angle for it.
Even better, our camera in Galactic Colonies is showing the scene from a top-down view, like most city building games. The camera can be tilted a little bit, and zoomed in and out, but it couldn’t rotate around the up axis.
Overall, it is always looking at the environment from above. To fake a cheap specular look, we pretended that the camera was completely fixed, and the angle between the camera and the light was always the same.
This way we could again hardcode a constant value into the shader and achieve a cheap spec/gloss effect that way.
Using a fixed angle for the specular is of course technically incorrect but it is practically impossible to really tell the difference as long as the camera angle doesn’t change much.
To the player, the scene will still look correct, which is the whole point of realtime lighting.
Lighting an environment in a realtime video game is and has always been about visually appearingcorrect, rather than beingphysically simulated correctly.
Because almost all of our meshes share one material, with lots of the details coming from the lightmap and the vertices, we added in a specular texture map, to tell the shader when and where to apply the spec value, and how strong. The texture is accessed using the primary UV channel, so it doesn’t require an additional set of coordinates. And because there isn’t much detail in it, it is very low resolution, using up barely any space.
For some of our smaller dynamic bits with a low vertex count, we could even make use of Unity’s automatic dynamic batching, further speeding up rendering.
All these baked shadows can sometimes create new problems, especially when working with relatively modular buildings. In one case we had a warehouse the player could build that would display the type of goods stored in it on the actual building.
This causes problems since we have a light-baked object on top of a light-baked object. Lightbake-ception!
We approached the problem by using yet another cheap trick:
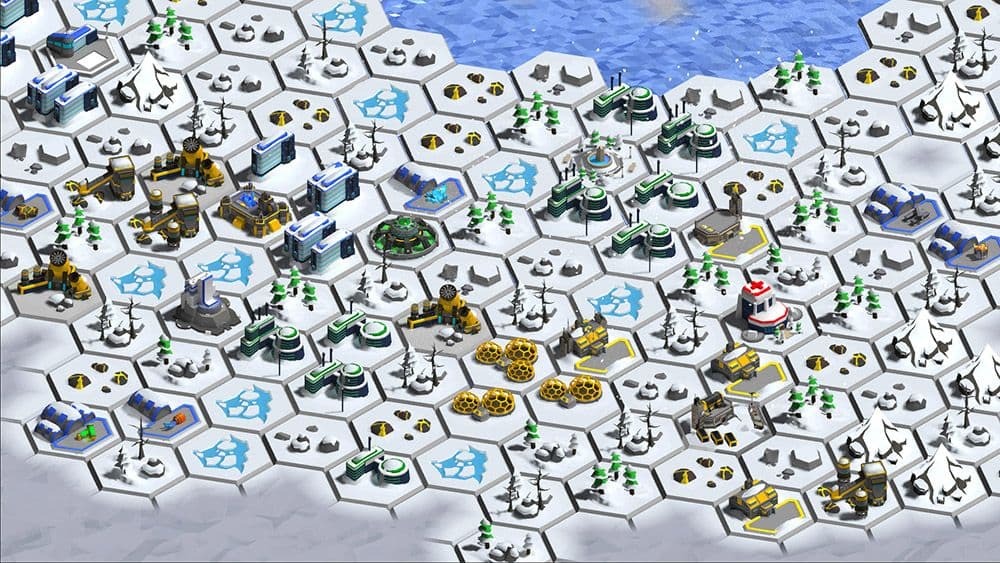
Building and baking our Prefabs this way allows us to have huge maps with hundreds of buildings while keeping a super low draw calls count. Our whole game world is more or less rendered with only one material and we are at a point where the UI uses up more draw calls than our game world. The fewer different materials Unity has to render, the better it is for your game’s performance.
This leaves us ample room to add more things to our world, such as particles, weather effects and other elements of eye candy.
This way even players with older devices are able to build large cities with hundreds of buildings while keeping a stable 60fps.