Optimize your mobile game performance: Get expert tips on physics, UI, and audio settings


Our Integrated Success team supports Unity customers with their complex technical issues. We sat down with this team of senior software engineers and asked them to share some of their expertise on mobile game optimization.
Our Unity Studio Productions team knows the source code inside out and works with a plethora of Unity customers to help them get the most out of the engine. In their work, they dive deep into creator projects to help identify points where performance could be optimized for greater speed, stability, and efficiency.
As our engineers began to share their insight on mobile game optimization, we pretty quickly realized that there was way too much great information for the single blog post we had planned. Instead, we decided to turn their mountain of knowledge into a full-length e-book (which you can download here), as well as a series of blog posts that spotlight some of these 75+ actionable tips.
In this second installment in this series, we’re zooming in on how to improve performance with the UI, physics, and audio settings. In case you missed it, check out our previous post on profiling, memory, and code architecture – and stay tuned for our next one, dedicated to assets, project configuration, and graphics.
Want it all now? Download the free e-book.
Let’s get right into it!
Unity’s built-in Physics (Nvidia PhysX) can be expensive on mobile, but the following tips can help you squeeze out more frames per second.
In the PlayerSettings, check Prebake Collision Meshes whenever possible.

Make sure that you edit your Physics settings (Project Settings > Physics) and simplify your Layer Collision Matrix wherever possible.
Disable Auto Sync Transforms and enable Reuse Collision Callbacks.


Mesh colliders can be expensive. Substitute more complex mesh colliders with primitive or simplified mesh colliders to approximate the original shape.

Use class methods like MovePosition or AddForce to move your Rigidbody objects. Translating their Transform components directly can lead to physics world recalculations, which are expensive in complex scenes. Move physics bodies in FixedUpdate rather than Update.
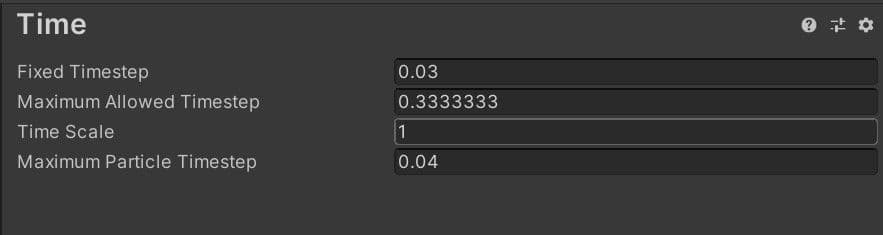
The default Fixed Timestep in the Project Settings is 0.02 (50 Hz). Change this to match your target frame rate (for example, 0.03 for 30 fps).
If your frame rate drops at runtime, however, this means that Unity would call FixedUpdate multiple times per frame and potentially create a CPU performance issue with physics-heavy content.
The Maximum Allowed Timestep limits how much time physics calculations and FixedUpdate events can use in the event that the frame rate drops. Lowering this value means that during a performance hitch, physics and animation could slow down, while also reducing their impact on the frame rate.
Use the Physics Debug window (Window > Analysis > Physics Debugger) to help troubleshoot any problem colliders or discrepancies. This shows a color-coded indicator of the GameObjects that can collide with one another.

For more information, see Physics Debug Visualization in the Unity documentation.
Unity UI (UGUI) can often be a source of performance issues. The Canvas component generates and updates meshes for the UI elements and issues draw calls to the GPU. Its functioning can be expensive, so keep the following factors in mind when working with UGUI.
If you have one large Canvas with thousands of elements, updating a single UI element forces the whole Canvas to update, which can potentially generate a CPU spike.
Take advantage of UGUI’s ability to support multiple Canvases. Divide UI elements based on how frequently they need to be refreshed. Keep static UI elements on a separate Canvas, and dynamic elements that update at the same time on smaller sub-canvases.
Ensure that all UI elements within each Canvas have the same Z value, materials, and textures.
You might have UI elements that only appear sporadically in the game (e.g., a health bar that appears when a character takes damage). If your invisible UI element is active, it might still be using draw calls. Explicitly disable any invisible UI components and re-enable them as needed.
If you only need to turn off the Canvas’s visibility, disable the Canvas component rather than GameObject. This can save rebuilding meshes and vertices.
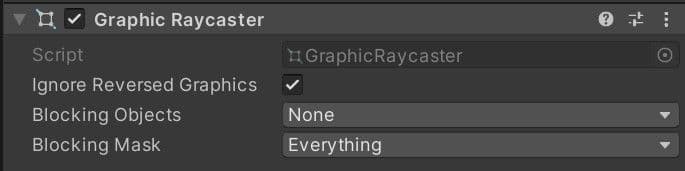
Input events like onscreen touches or clicks require the GraphicRaycaster component. This simply loops through each input point on screen and checks if it’s within a UI’s RectTransform.
Remove the default GraphicRaycaster from the top Canvas in the hierarchy. Instead, add the GraphicRaycaster exclusively to the individual elements that need to interact (buttons, scrollrects, and so on).
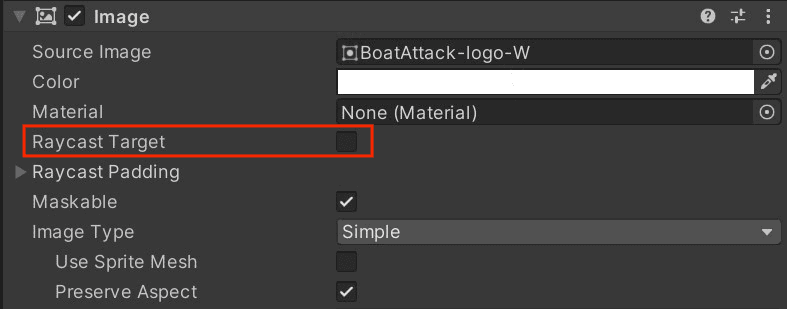
Also, disable Raycast Target on all UI text and images that don’t need it. If the UI is complex with many elements, all of these small changes can reduce unnecessary computation.
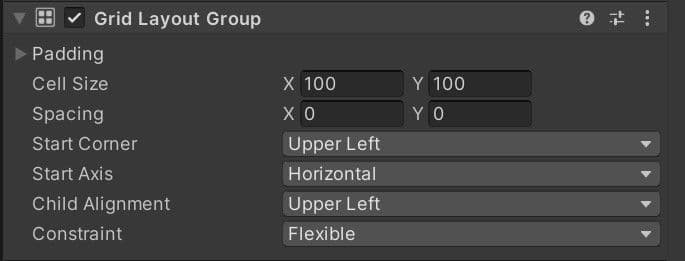
Layout Groups update inefficiently, so use them sparingly. Avoid them entirely if your content isn’t dynamic, and use anchors for proportional layouts instead. Otherwise, create custom code to disable the Layout Group components after they set up the UI.
If you do need to use Layout Groups (Horizontal, Vertical, Grid) for your dynamic elements, avoid nesting them to improve performance.
Large List and Grid views are expensive. If you need to create a large List or Grid view (e.g., an inventory screen with hundreds of items), consider reusing a smaller pool of UI elements rather than creating a UI element for every item. Check out this sample GitHub project to see this in action.
Layering lots of UI elements (e.g., cards stacked in a card battle game) creates overdraw. Customize your code to merge layered elements at runtime into fewer elements and batches.
With mobile devices now using very different resolutions and screen sizes, create alternate versions of the UI to provide the best experience on each device.
Use the Device Simulator to preview the UI across a wide range of supported devices. You can also create virtual devices in XCode and Android Studio.

If your pause or start screen covers everything else in the scene, disable the camera that is rendering the 3D scene. Likewise, disable any background Canvas elements hidden behind the top Canvas.
Consider lowering the Application.targetFrameRate during a fullscreen UI, since you should not need to update at 60 fps.
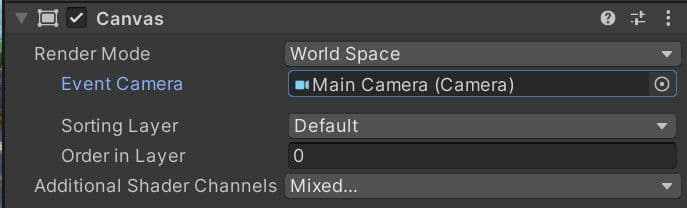
Leaving the Event or Render Camera field blank forces Unity to fill in Camera.main, which is unnecessarily expensive.
Consider using Screen Space – Overlay for your Canvas RenderMode if possible, as that does not require a camera.
Though audio is not normally a performance bottleneck, you can still optimize to save memory.
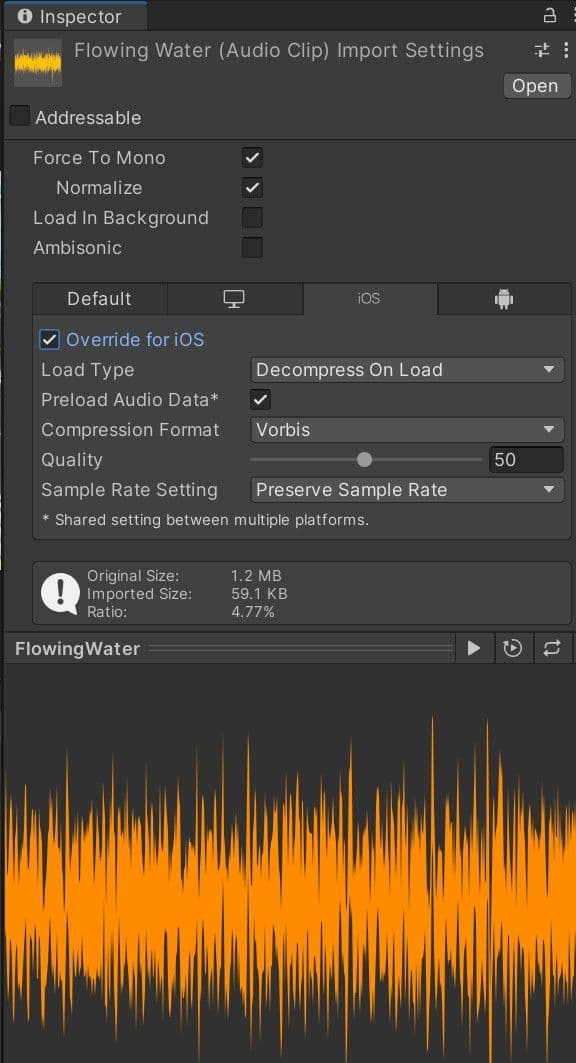
If you use any compressed format (such as MP3 or Vorbis), Unity will decompress it, then recompress it during build time. This results in two lossy passes, degrading the final quality.
Reduce the size of your clips and memory usage with compression:
- Use Vorbis for most sounds (or MP3 for sounds not intended to loop).
- Use ADPCM for short, frequently used sounds (e.g., footsteps, gunshots). This shrinks the files compared to uncompressed PCM, but is quick to decode during playback.
Sound effects on mobile devices should be 22,050 Hz at most. Using lower settings usually has minimal impact on the final quality; use your own ears to judge.
The setting varies by clip size.
- Small clips (< 200 kb) should Decompress on Load. This incurs CPU cost and memory by decompressing a sound into raw 16-bit PCM audio data, so it’s only desirable for short sounds.
- Medium clips (>= 200 kb) should remain Compressed in Memory.
- Large files (background music) should be set to Streaming, or else the entire asset will be loaded into memory at once.
When implementing a mute button, don’t simply set the volume to 0. You can Destroy the AudioSource component to unload it from memory, provided the player does not need to toggle this on and off very often.
In the next blog post, we’ll dive right into graphics and assets. But if you want access to the full list of tips and tricks from the team today, our full-length e-book is available here.

If you’re interested in learning more about Integrated Support services and want to give your team direct access to engineers, expert advice, and best practice guidance for your projects, then check out Unity’s success plans here.
We want to help you make your Unity applications as performant as they can be, so if there are any optimization topics that you’d like to know more about, please keep us posted in the comments.