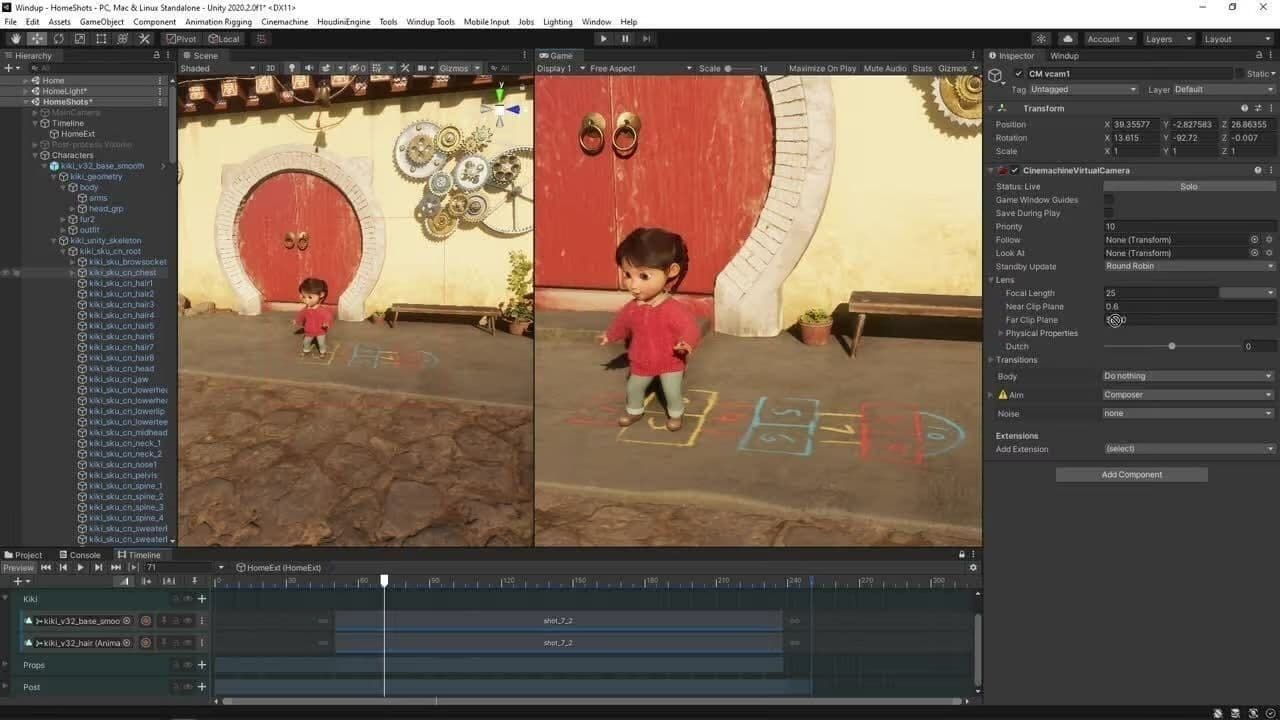
In this video, YouTuber Brackeys explains the principles of animation rigging and how you can apply them in a wide variety of scenarios. It also provides a step-by-step tutorial of how animation rigging is achieved in the Unity Editor.
Rigging in Animation
What is Rigging in Animation?
Character rigging, or skeletal animation, is the first step in animating a digital character. Binding a model to a skeletal hierarchy of bones and controls enables you to pose and animate characters.
How does Animation Rigging work?
Animators use rigging to pose and animate a character or object through a network of movements. Rigs help control the manipulation of that character or object. Instead of acting on the object directly, they create a hierarchical structure that is capable of the desired movement or change. This is a rig, and the object is driven by that rig.
The rig can be anything, but typically, there are one or more “controls” that have been set up to allow different types of movement or changes in the object. Those changes can be as simple as translations or rotations, but may grow to include the automation of complex behaviors and motions.
For characters, animators will use more complex rigging techniques. “Skeletons,” joints,” and other “deformers” may be used to change the way geometry looks. This allows for posing and custom tailored deformation of the model.
When using 3D software like Maya, Blender, or 3ds Max, a rigging artist can create different types of rigs for animation. An animator can then manipulate the controls of the rig, much like moving and posing a digital puppet. They use keyframes to record changes in the position of the controls over time to create the animated movement. These types of rigged models can then be imported into game engines like Unity.

What is Character Rigging?
Character rigging is the process of taking a static 3D (or 2D) model and turning it into a poseable digital puppet. This process has many steps, but will almost always involve creating a skeletal structure made of bones or “joints,” and binding the model or “skin” to those joints. The more rigs a character has, the more complex and subtle movements they’re capable of.
Once the model can move with the skeleton, the rigging artist will create a set of controls that the animator will use to pose the character. The creation, layout, and functionality of this control scheme are at the heart of the rigging artist’s job.
In addition, the look of the model will change when posed, which is called “deformation.” A rigging artist is responsible for making adjustments to the character model when posed, and uses a system to drive those changes. The end result is a digital puppet that is easy for an animator to pose, that looks appealing after deformation, and has automated complex behaviors.
Click the video above and go behind the scenes of WiNDUP to see how animated characters are designed and brought to life. Skip to 3:18 to get a brief introduction on how character rigging is achieved in Unity.
Rigging for 2D and 3D animation
Rigging is the most common technique for animating characters, creatures, or objects in film, TV, and video games. Anything that requires movement can be rigged for animation. Rigging with 3D software can help automate more complex motions, such as ragdoll physics, by applying an accurate physics simulation across all skeletal structures.
To begin rigging, animators first need a 2D or 3D character or object. When creating the rig, animators should think about what they want their rig to do, how it should move, and where the joints or pivots will be. Then they’ll create a hierarchical structure, or skeleton if it’s a character, along with a set of controls.
Next, they’ll connect the object or character to the rig, a process that can be simple or complex, depending on the type of rig required. From there, an animator can manipulate the rig to create animation more easily.
What to consider when Character Rigging?
Independent hierarchical movement
To create a sense of rhythm and balance in animation - and a more believable look - hierarchical movement is the order in which different parts of a character or object move. For example, in a walk cycle, the head and neck will move first, followed by the torso, hips, and legs.
This also creates a sense of weight and gravity, or speed and momentum. Independent hierarchical movement can also refer to the way in which different elements within an animation move relative to each other, such as two characters walking side by side.
To create a sense of rhythm and balance in animation – and a more believable look – hierarchical movement is the order in which different parts of a character or object move. For example, in a walk cycle, the head and neck will move first, followed by the torso, hips, and legs.
This also creates a sense of weight and gravity, or speed and momentum. Independent hierarchical movement can also refer to the way in which different elements within an animation move relative to each other, such as two characters walking side by side.
Accurate weight painting
A rigged character model is attached to a hierarchy of joints or a skeleton. The individual vertices of the model are each weighted between different joints, which is how they move when you move the skeleton.
For a character model to deform correctly when animated, accurate weight painting is needed. This is a process of adding or removing weights of specific vertices on a mesh to corresponding joints in the skeleton. This is usually done by painting onto the mesh using a brush tool in 3D animation software. Clean weight painting can give greater control over a character’s deformation and improve the look of the final result.
Bone movement constraints
To produce a realistic or stylized animation, it’s essential to understand the principles of motion. Understanding how an object moves in relation to other objects is known as movement constraint. There are two kinds: kinematic constraints, and dynamic constraints.
Kinematic constraints define the motion of an object without considering the forces acting upon it. For example, an object can’t move faster than the speed of light.
Dynamic constraints take the forces acting on an object into account, e.g., an object can only accelerate at a certain rate.
Bone movement constraints control their degree of freedom within their transformation to create natural motion.

What are Character Rigging best practices?
Forward kinematics
Forward kinematics is the process of manipulating a joint hierarchy from root to tip, or in a “forward” direction. To position an arm using forward kinematics, start by rotating the upper arm, followed by the elbow, and finally, the wrist. This type of motion results in pleasing arcs when animated, but makes setting the exact position of the end point more difficult, as its position is a combination of the rotations of the rest of the joint chain, and is adjusted manually.
Inverse kinematics
Inverse kinematics is the process of manipulating a joint hierarchy from tip to root, or in an “inverse” direction. To position an arm using inverse kinematics, you only need to move the hand, and the rotations of the elbow and upper arm will be calculated based on the hand’s final position. This type of motion makes it possible to lock a character’s hand to a point in space, or its feet to the floor, without sliding. However, animating natural arcs across the full joint chain can be more difficult.
Driven keys
Also known as a set driven key , driven keys allow you to perform keyframe “condition based” animations, like turning a wheel to open a door, more efficiently. Depending on the animation hierarchy (i.e., what drives the desired outcome), you need to create a dependent link between a pair of objects. For example, your wheel is the “lead driver,” and the door is the “driven.” You then set this as a key. The lead driver will lead the driven, and movement of the driven occurs automatically as you animate the lead driver.
Blend shapes
Changing the shape of an object within your scene requires “deformers.” Blend shapes is a deformer that’s used to create the illusion of one shape changing into another in a natural-looking way – for example, a winking eye.
Constraints
To refine a rig to make it easier to manipulate, you can use constraints to automatically control the position, orientation, or scale. There are various types – aim constraints control an object’s orientation so that it points at another object within the scene, such as eye direction. Point constraints cause one object to follow another, and vector constraints force the direction of an inverse kinematic chain to follow another object, like controlling knee direction.
Control curves
Any animatable property can have an animation curve that allows you to see the changing values of properties as lines on a graph, rather than linear tracks showing only when the keyframes occur. An animation control curve has multiple keys which act as control points that the curve passes through. The curve between each keyframe of an animated motion defines the motion between the two keys.