These tips best serve users who have some prior experience with Unity’s 2D toolset. Another great resource for professional creators developing commercial 2D games with Unity is our e-book, 2D game art, lighting, and animation.
If you’re new to developing 2D games with Unity, start with the 2D guide for new users.
What you will get from this page: Tips to improve the performance of your 2D games and apps with Unity Tilemap. Performance areas covered include Scene size, Serialization, Renderer overhead, and Batching.
These tips are best suited to users who have some prior experience with Unity’s 2D toolset. If you are new to developing 2D games with Unity, we recommend you start with our 2D Guide for new users.
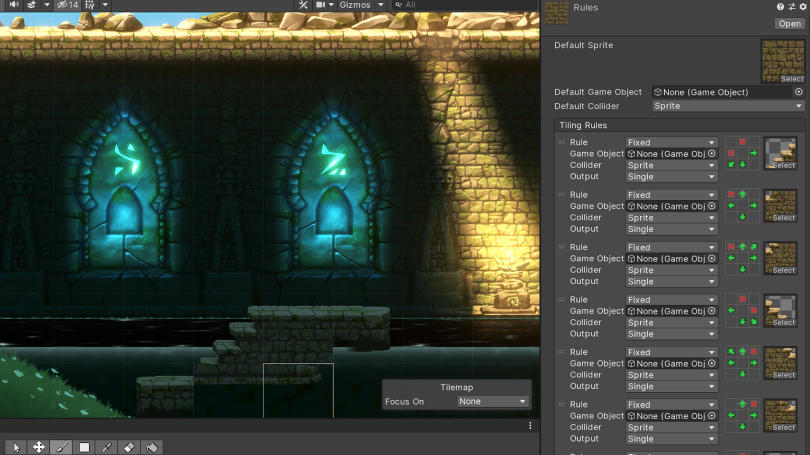
Una imagen del proyecto 2D de Unity, Lost Crypt
General performance tips
Before we look at how Tilemaps improve performance, here are a few general tips to remember.
Think about the performance of your assets (the data) from the beginning. If these elements are non-performant, there is little you can do later on to optimize your code.
Profile on your worst available target device. Use the Unity Profiler throughout your project development along with the free profiling tools available for Xcode.
Don’t use more than ⅓ of the available RAM on your lowest-end target device. This ensures your content will run well on a wide range of mobile devices (inexpensive Android phones continue to be the most popular across markets).
Finally, remember to take into consideration the different app size limits enforced by each app store.
Unity provides a wealth of optimization know-how for mobile developers. You might know of these guides already, but just in case, here are a few:
- Tales from the Optimization trenches
- Optimizing performance on iOS
- The mobile developer checklist from the docs. Includes the practical guide to optimizing mobile applications.
- Understanding optimization in Unity: this is a cross-platform guide with many tips for mobile developers.

A quick introduction to Tilemap
The 2D Tilemap feature in Unity allows you to quickly create 2D levels using tiles and a grid overlay. It is comprised of a number of systems working together:
- Tile
- Assets
- Grid GameObjects
- The Tilemap Palette
- Custom Brushes
You can layout and create 2D levels using a combination of Sprites and GameObjects, and control properties such as Layer Ordering, Tilemap Colliders, Animated Tiles, and more. You can paint Square, Hexagonal and Isometric sprites with Tilemap.
The Tilemap workflow is efficient due to how quickly you can paint levels, as well as the Tilemap Collider 2D Component, which when applied to a Tilemap GameObject, will auto-generate a Collider around the Tiles (based on the Tile’s Collider Type Setting).
The following sections cover performance improvements with Tilemap compared to Scenes built with Sprites.
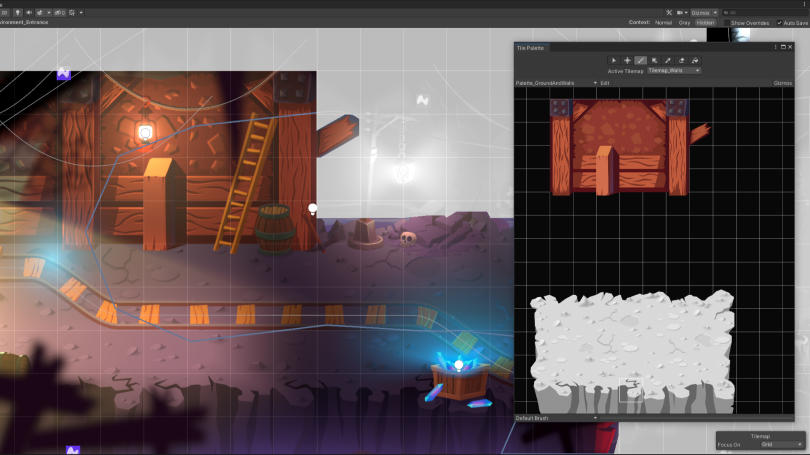
Tilemap in the Unity 2D demo Dragon Crashers
Fewer GameObjects
This reduces load times, memory usage, and CPU usage.
If you’ve developed 2D games and apps before, then you know that you can end up with a high number of Sprites in your game, all of them separate GameObjects. There is a Component on each of those Sprite GameObjects, including a Transform and a Renderer, and all of these take up memory. Other Components, such as Colliders, come with CPU overhead.
In comparison, a Tilemap uses one Renderer for the whole map and all of its tiles. This results in less overhead because it handles its own data structures only, compared to having multiple data structures across memory.
Fewer GameObjects results in a cleaner Hierarchy because you won’t have to scroll through a complex list trying to find things.

Smaller Scene size
Scene sizes are reduced because fewer GameObjects and Components results in fewer objects to load from disk, deserialize, and keep in memory at runtime.
Loading Scenes in Unity is a two-part process: first, the data is read from the disk (this is the process that often takes up the most time in your game, especially on Android devices). Then, it’s deserialized.
Deserialization is the process of transforming data from one format to another–essentially, it restores data and objects from a saved state. Unity does the serialization internally: whenever it loads a Scene file in the editor and at runtime it takes those saved files and turns them into Unity objects. See the next section for a comparison of two serialized Scene files.
In the above image, you can see a comparison between two serialized Scene files, one that uses Tilemaps (thanks to Pixel Reign for this Scene from their game Robbie Swifthand) and the other recreated using Sprites.
On the right is a section from a serialized Tilemap, made up of four tiles. The rules for all of the tiles, including the type of tiles to be used, are set at the top of the TileMap. Then, each of the proceeding tiles simply state properties like the tile used and the position.
On the left is one Sprite GameObject, with a Transform and Sprite Renderer Component.
It’s clear from this comparison how much work the Sprite serialization has to do: the Scene using Sprites had 370,000 lines in its file, while the Scene with Tilemaps had 30,000 lines. Overall the project and repo size are smaller, resulting in faster iteration times and nicer workflows.
As a side tip, if you want to view your own Scenes as a text file you can go into your Editor settings, turn on the Asset Serialization mode, click on Force Text, and then open the .unity scene file in a text editor.

Fewer Colliders
You can combine the Tilemap Collider with the Composite Collider. Not only will that reduce your number of Colliders and Sprites, but it also brings more efficiency to your production because there’s no need to rebuild complex Collision shapes every time you make a change–the Composite Collider takes care of that.
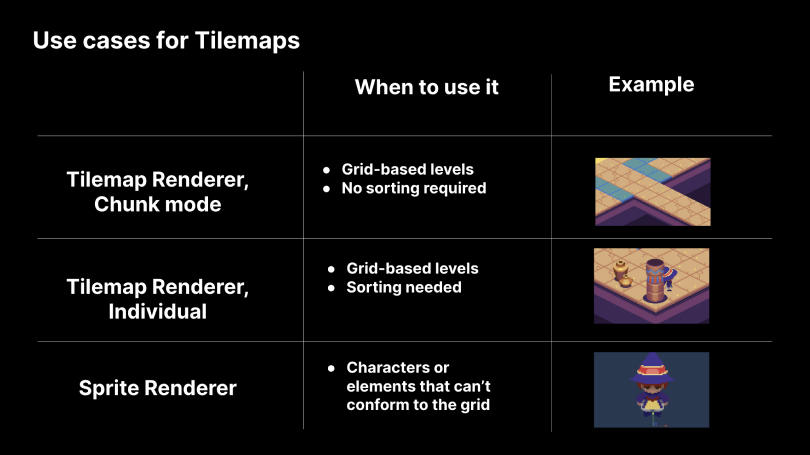
Un caso de uso que compara un elemento individual de GameObjects con su Sprite Renderer y un Tilemap
Reduced rendering overhead
As mentioned earlier, each Sprite has a SpriteRenderer Component, and having more renderers means more work required from the CPU, including time for culling preparation and cleanup for rendering. By using Tilemaps you’ll have fewer Renderer Components, thereby saving CPUs some work.
Reduced culling cost
More than one camera in your Scene means more renderers, which increases the culling cost. In the view of the camera, there is a per-renderer, per-camera cost to culling; every camera has to perform culling checks on every renderer in the Scene, so if you have a multi-camera setup for your game, using Tilemaps will help you reduce that cost.

Fewer batch calls
Batching is gathering all of the geometry that can be drawn without doing another SetPass call. The TilemapRenderer batches the geometry of the sprites based on position. The result is that the Tilemap Renderer sends fewer meshes with more geometry to the render pipeline, compared to the SpriteRenderer, which sends more meshes with less geometry. As the table below shows, the Tilemap-based Scene had much fewer batches.
You can check the batching by looking at the stats panel in your Game View. You can also use the Frame Debugger to pinpoint why items aren’t batching.
A faster framerate
To reach 60 FPS, each frame can take a maximum of 16 milliseconds to render. When the sample Scene was profiled on an iPhone 7 the Sprite-based version had 244 ms per frame. The Tilemap version had 13 ms per frame.
Finally, RAM usage was at 1.1 gigabytes with the Sprite-based Scene; this is too much for low-end Android phones, for example. The Tilemap-based Scene used only 21 MB of RAM, making it suitable to run on a wider range of mobile devices.
This comparison shows the clear difference in performance between the two Scenes:
| Unity Scene using Sprites | Unity Scene using Tilemaps |
|
370,000 lines in the Scene file |
30,000 lines in the Scene file |
| 10 MB Scene size | 831 KB Scene size |
| 1930 batches | 157 batches |
| 244 ms per frame | 13 ms per frame |
| RAM usage: 1.1 GB | Ram usage: 21 MB |
Using Sprite Atlas in Dragon Crashers
Pack Sprites with Sprite Atlas
Sprite Atlas is the Editor tool that allows you to pack your Sprites in textures to optimize memory usage and draw calls. Create a Sprite Atlas Asset that includes all of the sprites used in your Tilemap so they can be batched by the Tilemap Renderer in just one draw call (so long as all the Sprites fit into a single texture).
More for 2D game developers
Behind the Lost Crypt: Art in our 2D sample project: Lost Crypt is a 2D sample project that showcases all of Unity’s 2D tools working together. This side-scrolling demo game was created with Unity 2019.3 Beta and uses the Universal Render Pipeline.
Introduction to 2D Animation: Documentation for learning how to quickly rig and animate a 2D character in Unity with the 2D Animation package and tools.
2D Lights: Enhance 2D visuals with different types of lights that feature easy-to-configure parameters like colors, intensity, fall-off, and blending effects.
Getting started with 2D Inverse Kinematics: The idea behind Inverse Kinematics is to take a chain of bone transforms and use an algorithm to move each transform so that the last bone is as close to a given target position as possible. See the docs for how to set it up.
Choosing the resolution of your 2D art assets: Unity doesn’t express the size of an object in pixels and this can confuse artists who are creating assets for 2D games. “How big do they need to be?” As usual in game development, the answer to this question is “it depends”. This post goes over a few concepts that will make the decision easier.
Cinemachine for 2D: Tips and tricks: This blog post gives you some tips for getting the best out of the Cinemachine camera system, so you can speed up the development of your 2D game significantly. Find out about Cinemachine Virtual Cameras, Confiners and more, specifically for use in 2D games.
2D world-building, animation & graphics features: This session from Unite 2018 in Los Angeles explores organic world-building with Sprite Shape as well as improvements to Tilemap for grid-based layouts. It includes a demo of Unity’s 2D Sprite Rigging tools for 2D animation and enhancements to 2D graphics, including the Pixel Perfect Camera.
Procedural patterns you can use with Tilemaps: Part I & Part II: Many creators have used procedural generation to add some diversity to their game. These posts explain some of the algorithms you can use with Tilemap and RuleTile.
The Scalable Vector Graphics (SVG) Importer: Import SVG files directly into your projects. The SVG Importer allows you to create sprite assets with a very small file size that will retain their quality at any resolution.
Sprite Rigging workflows: A helpful overview of the Sprite Rigging workflows for creating 2D animation in Unity. In this video, Rus Scammell from Unity explores the tools and components that come together to create a tight iteration loop for bringing your 2D characters and worlds to life.